
Element 29 Build Log


Introduction
Modern high powered computing components are jam packed with billions of transistors and can create a lot of heat as a by product. This heat needs to be transferred away from them so they can perform to their full potential. Otherwise these components are programed to reduce their performance to meet the thermal envelope. Project “Element 29” (Periodic table number for Cu, Elemental Copper) came out of necessity as this heat would easily and quickly raise the office temperature to uncomfortable levels upwards of 28°C.
Most of the cooling solutions involve moving heat from component(s) to a heat sink and then exhausting it out of the computer chassis. Problem with this design is that the heat gets dumped in the same room from where it originates. The idea of utilizing an external heat exchanger (radiator) was born and the planning phase started around January 2021.
The Design
Initially the plan was to buy off the shelf components and hook them them up without must additional work. Acrylic tubes would be used and it would be a quick project.
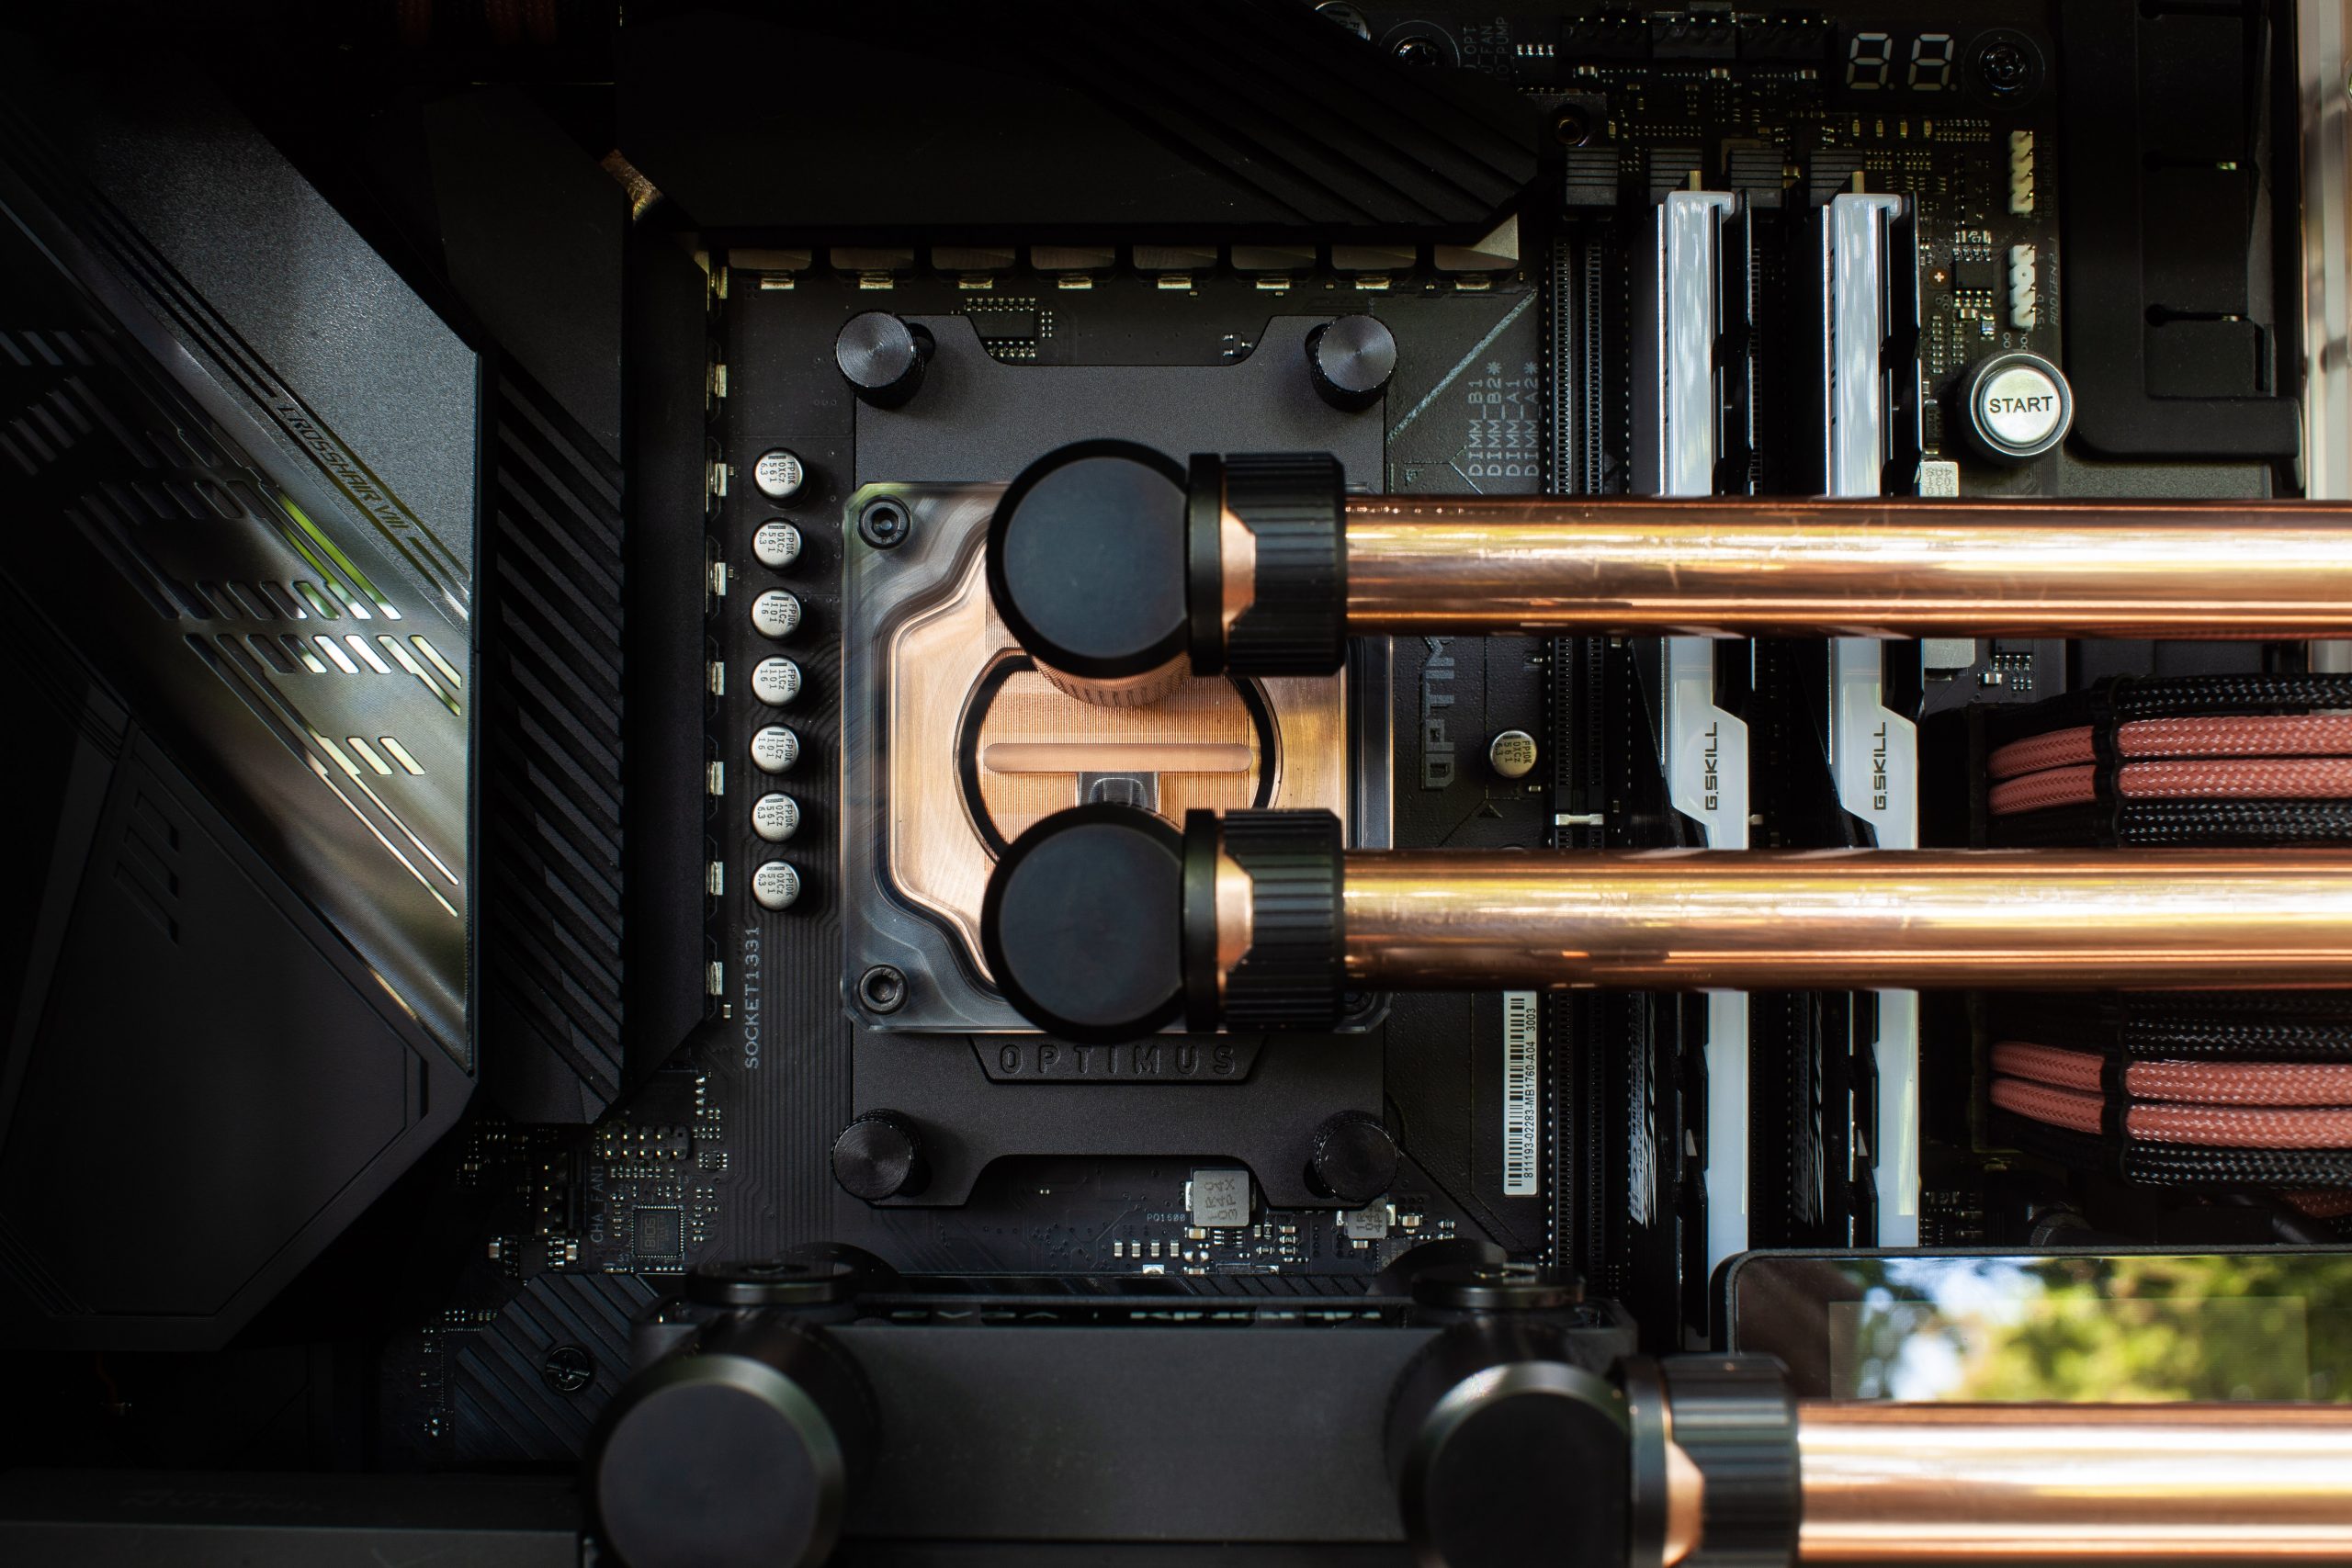
Enter the water block for the video card: EVGA’s Kingpin Hydro Copper. I first lucked out on buying the extremely rare and exclusive Kingpin 3090 Video card. Then fast forward to April 2021 I lucked out once again and scored the ultra exclusive pure copper water block for it. When I first laid my eyes on this beautiful piece of 8mm thick copper and heavy acrylic water block I decided to build something very special. I had to incorporate copper in the build. Copper is a gorgeous metal and there had to be a build idea to showcase that brilliance.
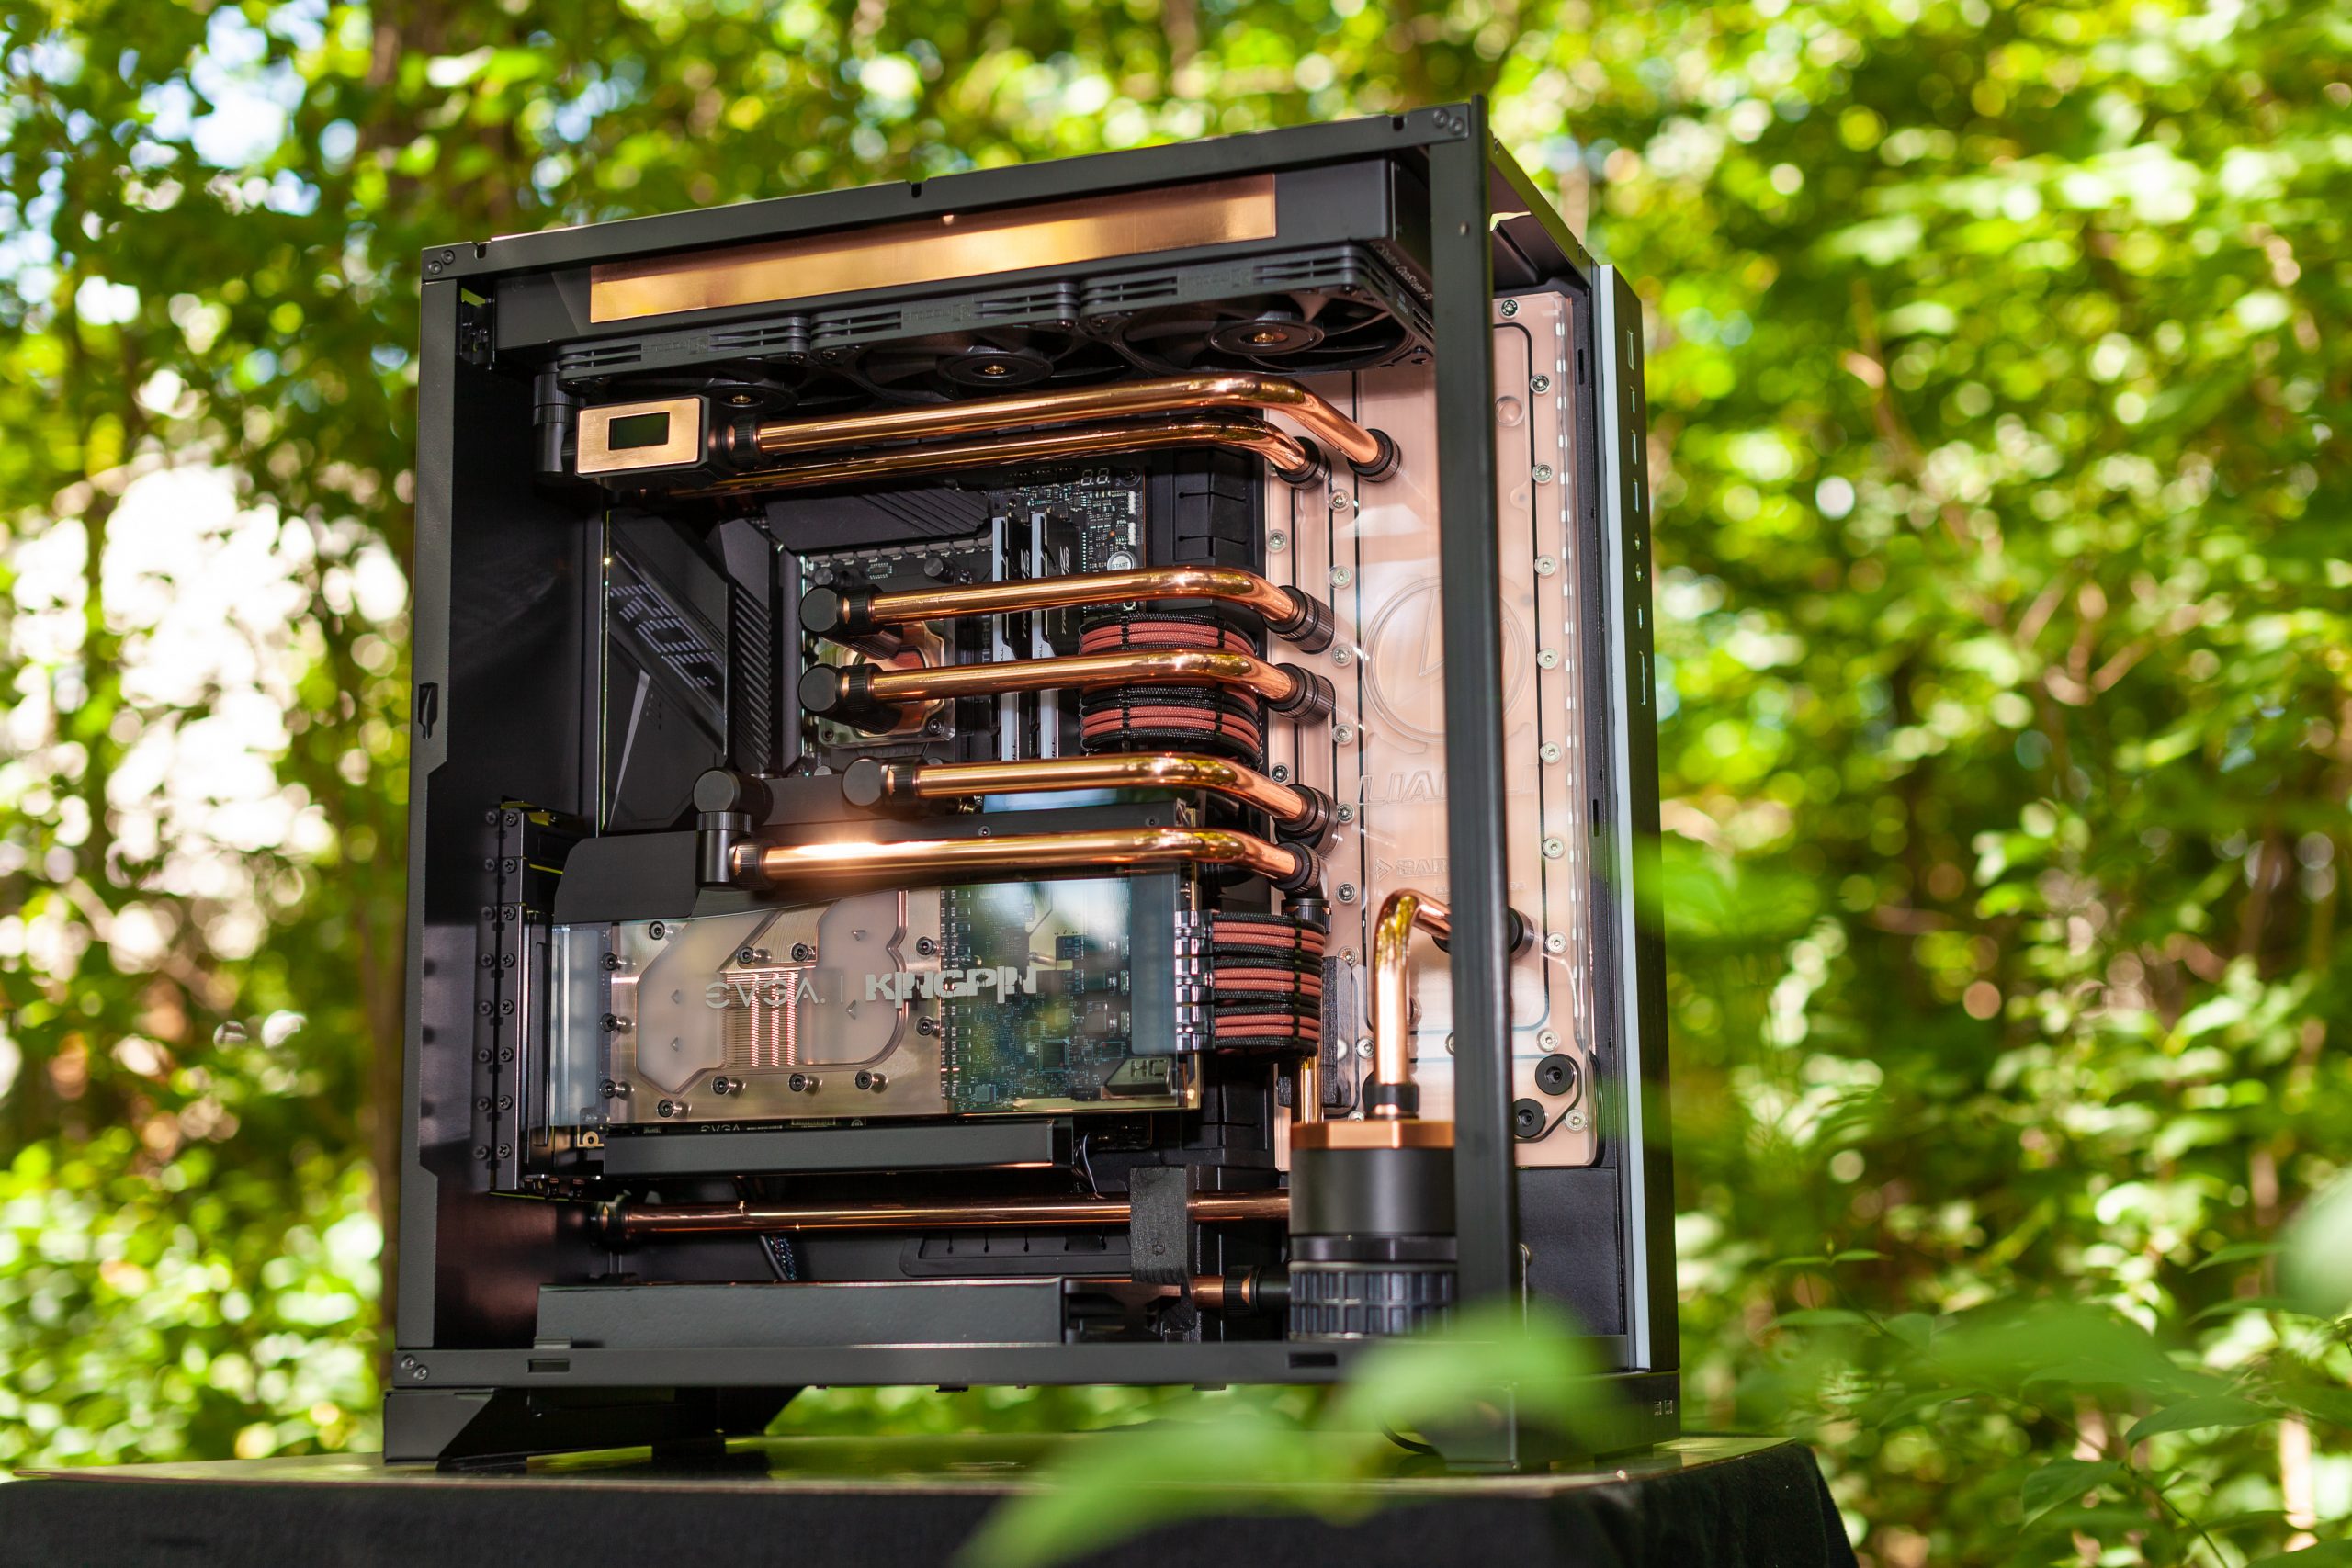
Computer Specifications
Case Lian Li O11 XL
CPU AMD Ryzen 9 5900x 12 Core 24 Thread 4.8GHz
Motherboard Asus Crosshair VIII X570 Dark Hero
Video Card EVGA Kingpin Nvidia RTX 3090 Hybrid
Fans Exhaust 3x Noctua NF-A12x15 PWM chromax.Black.swap @ 20% Speed Static
Fans Intake 2x Noctua NF-S12A PWM chromax.black.swap @ 20% Speed Static
Cables Custom Sleeved cables from Mainframe Customs
Boot Drive Samsung 980 Pro 1 TB NVME Gen 4
Storage Drive XPG SX8200 Pro 2 TB NVME Gen 3
PSU Be Quiet! Dark Power Pro 12 (1200W 80+ Titanium)
Monitor Alienware AW3418DW 34″ Ultra Wide 3440×1440
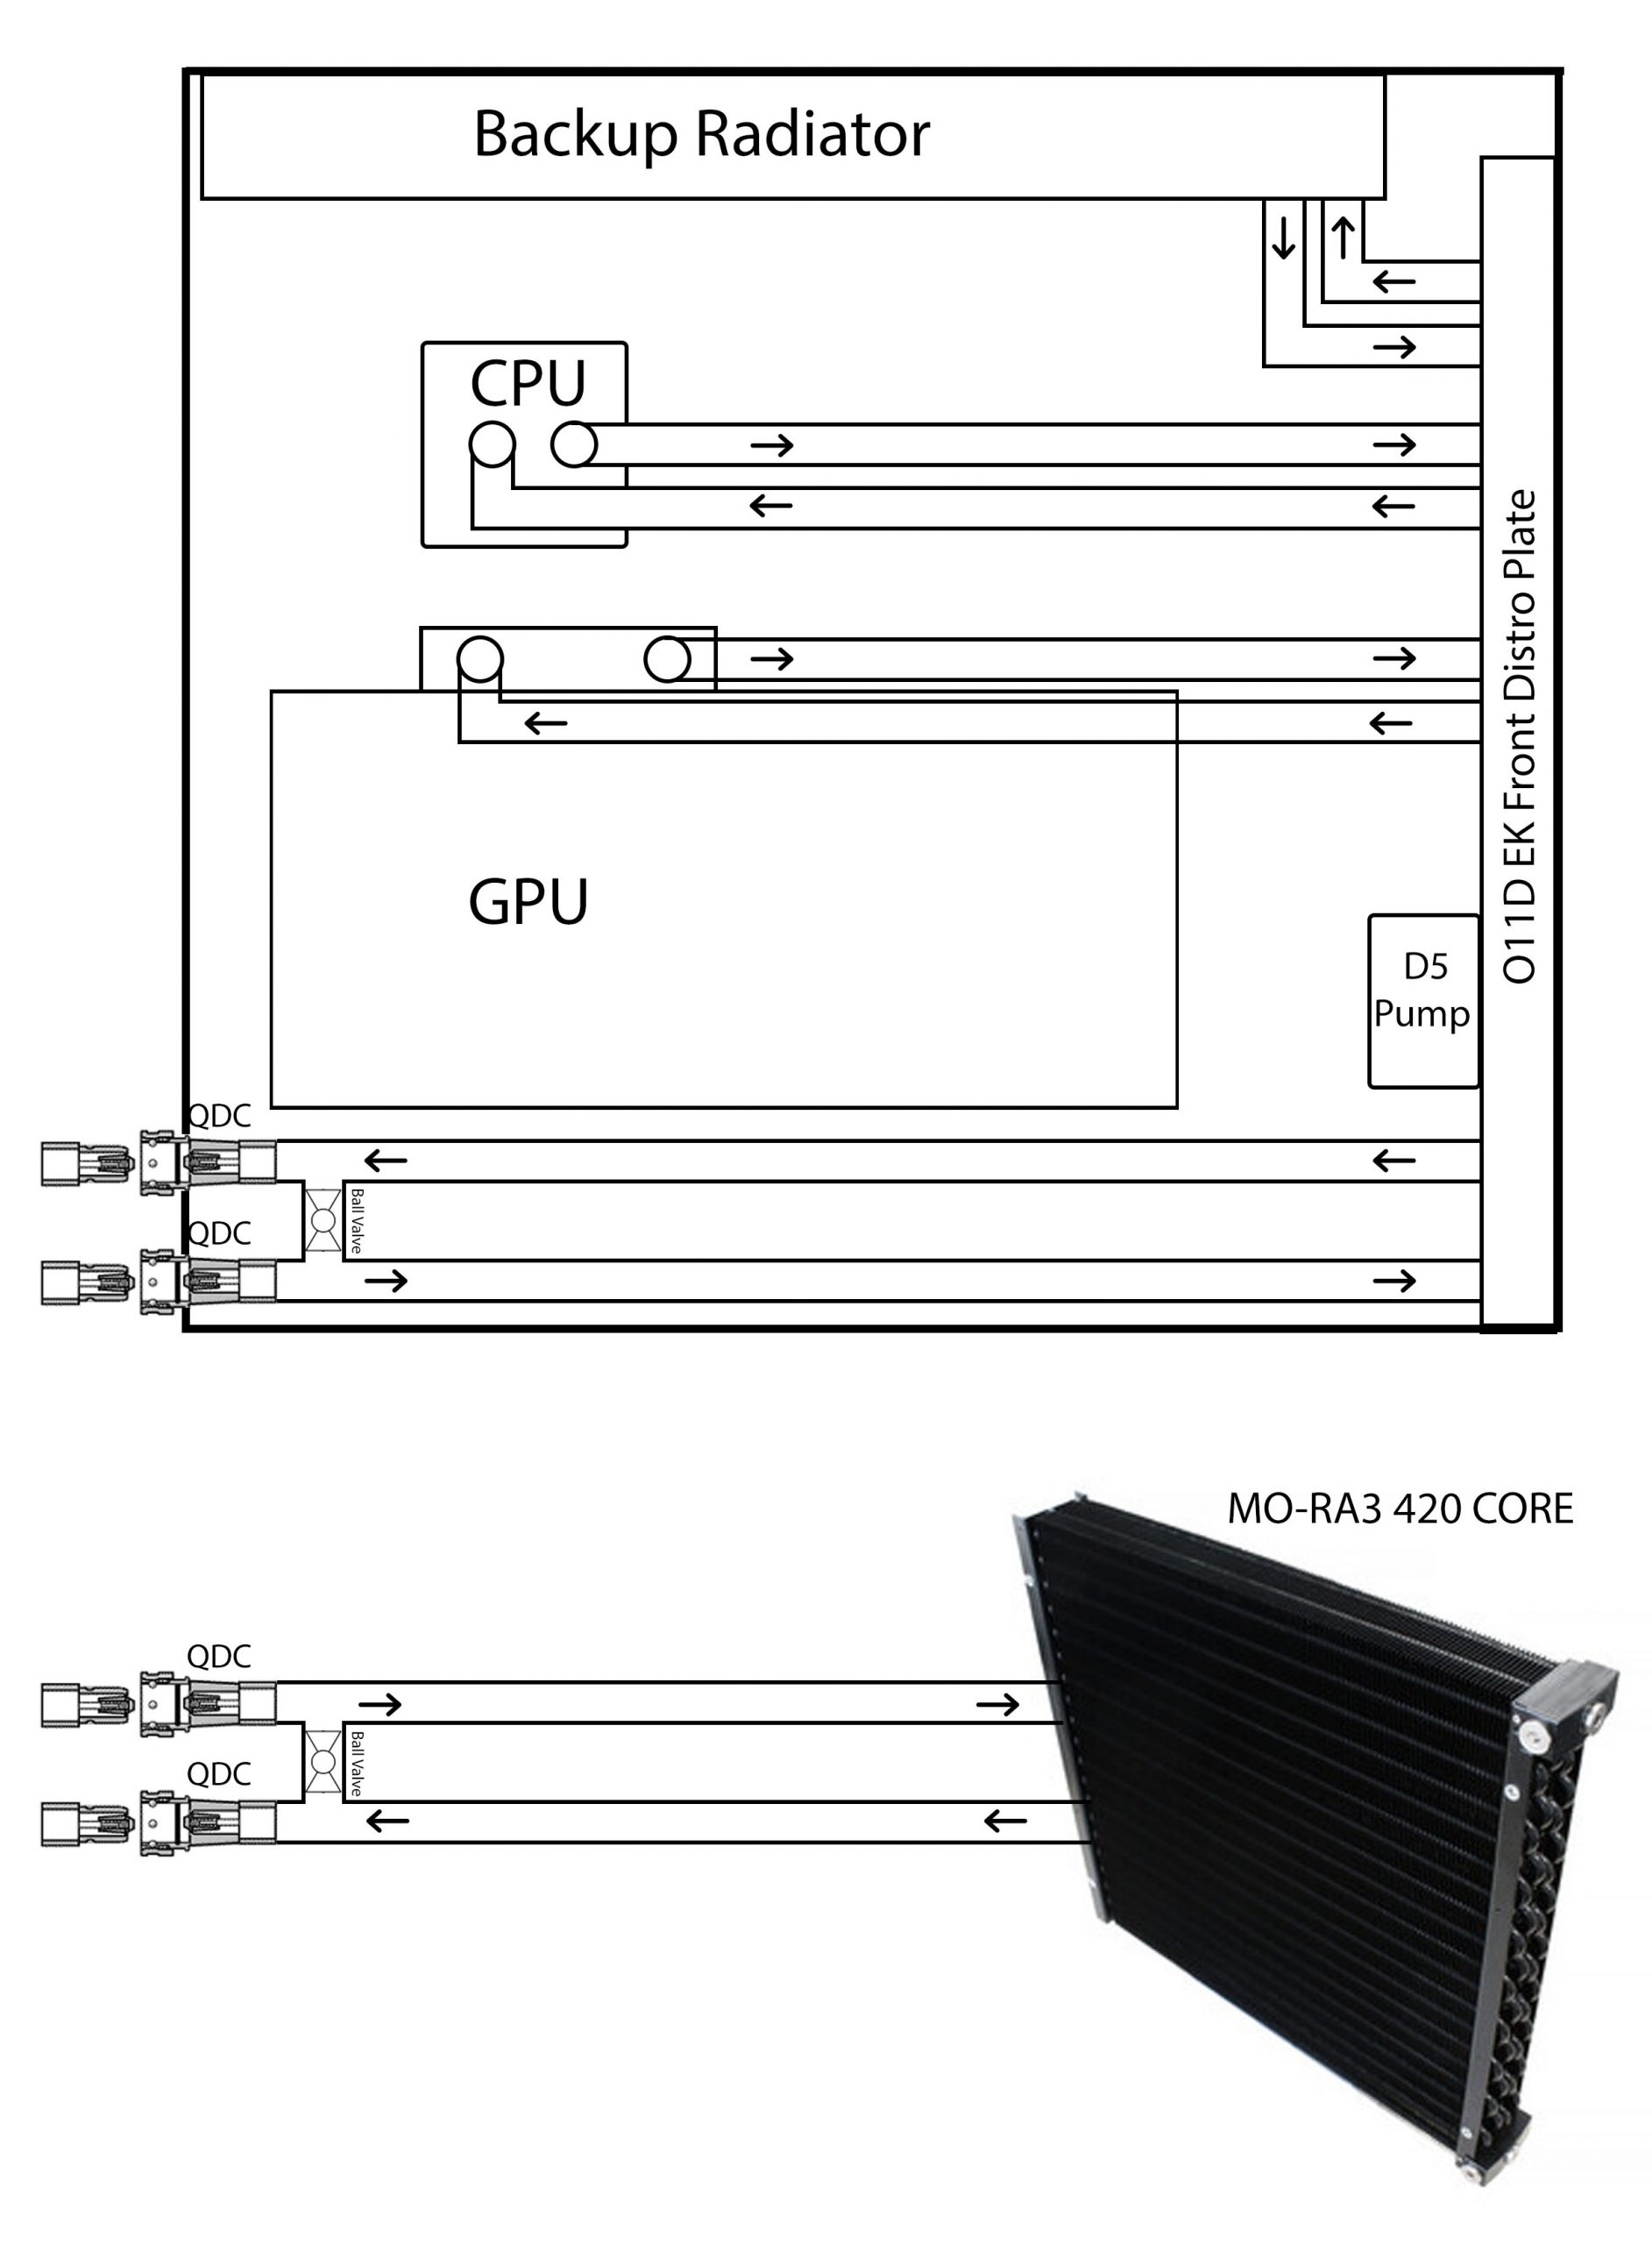
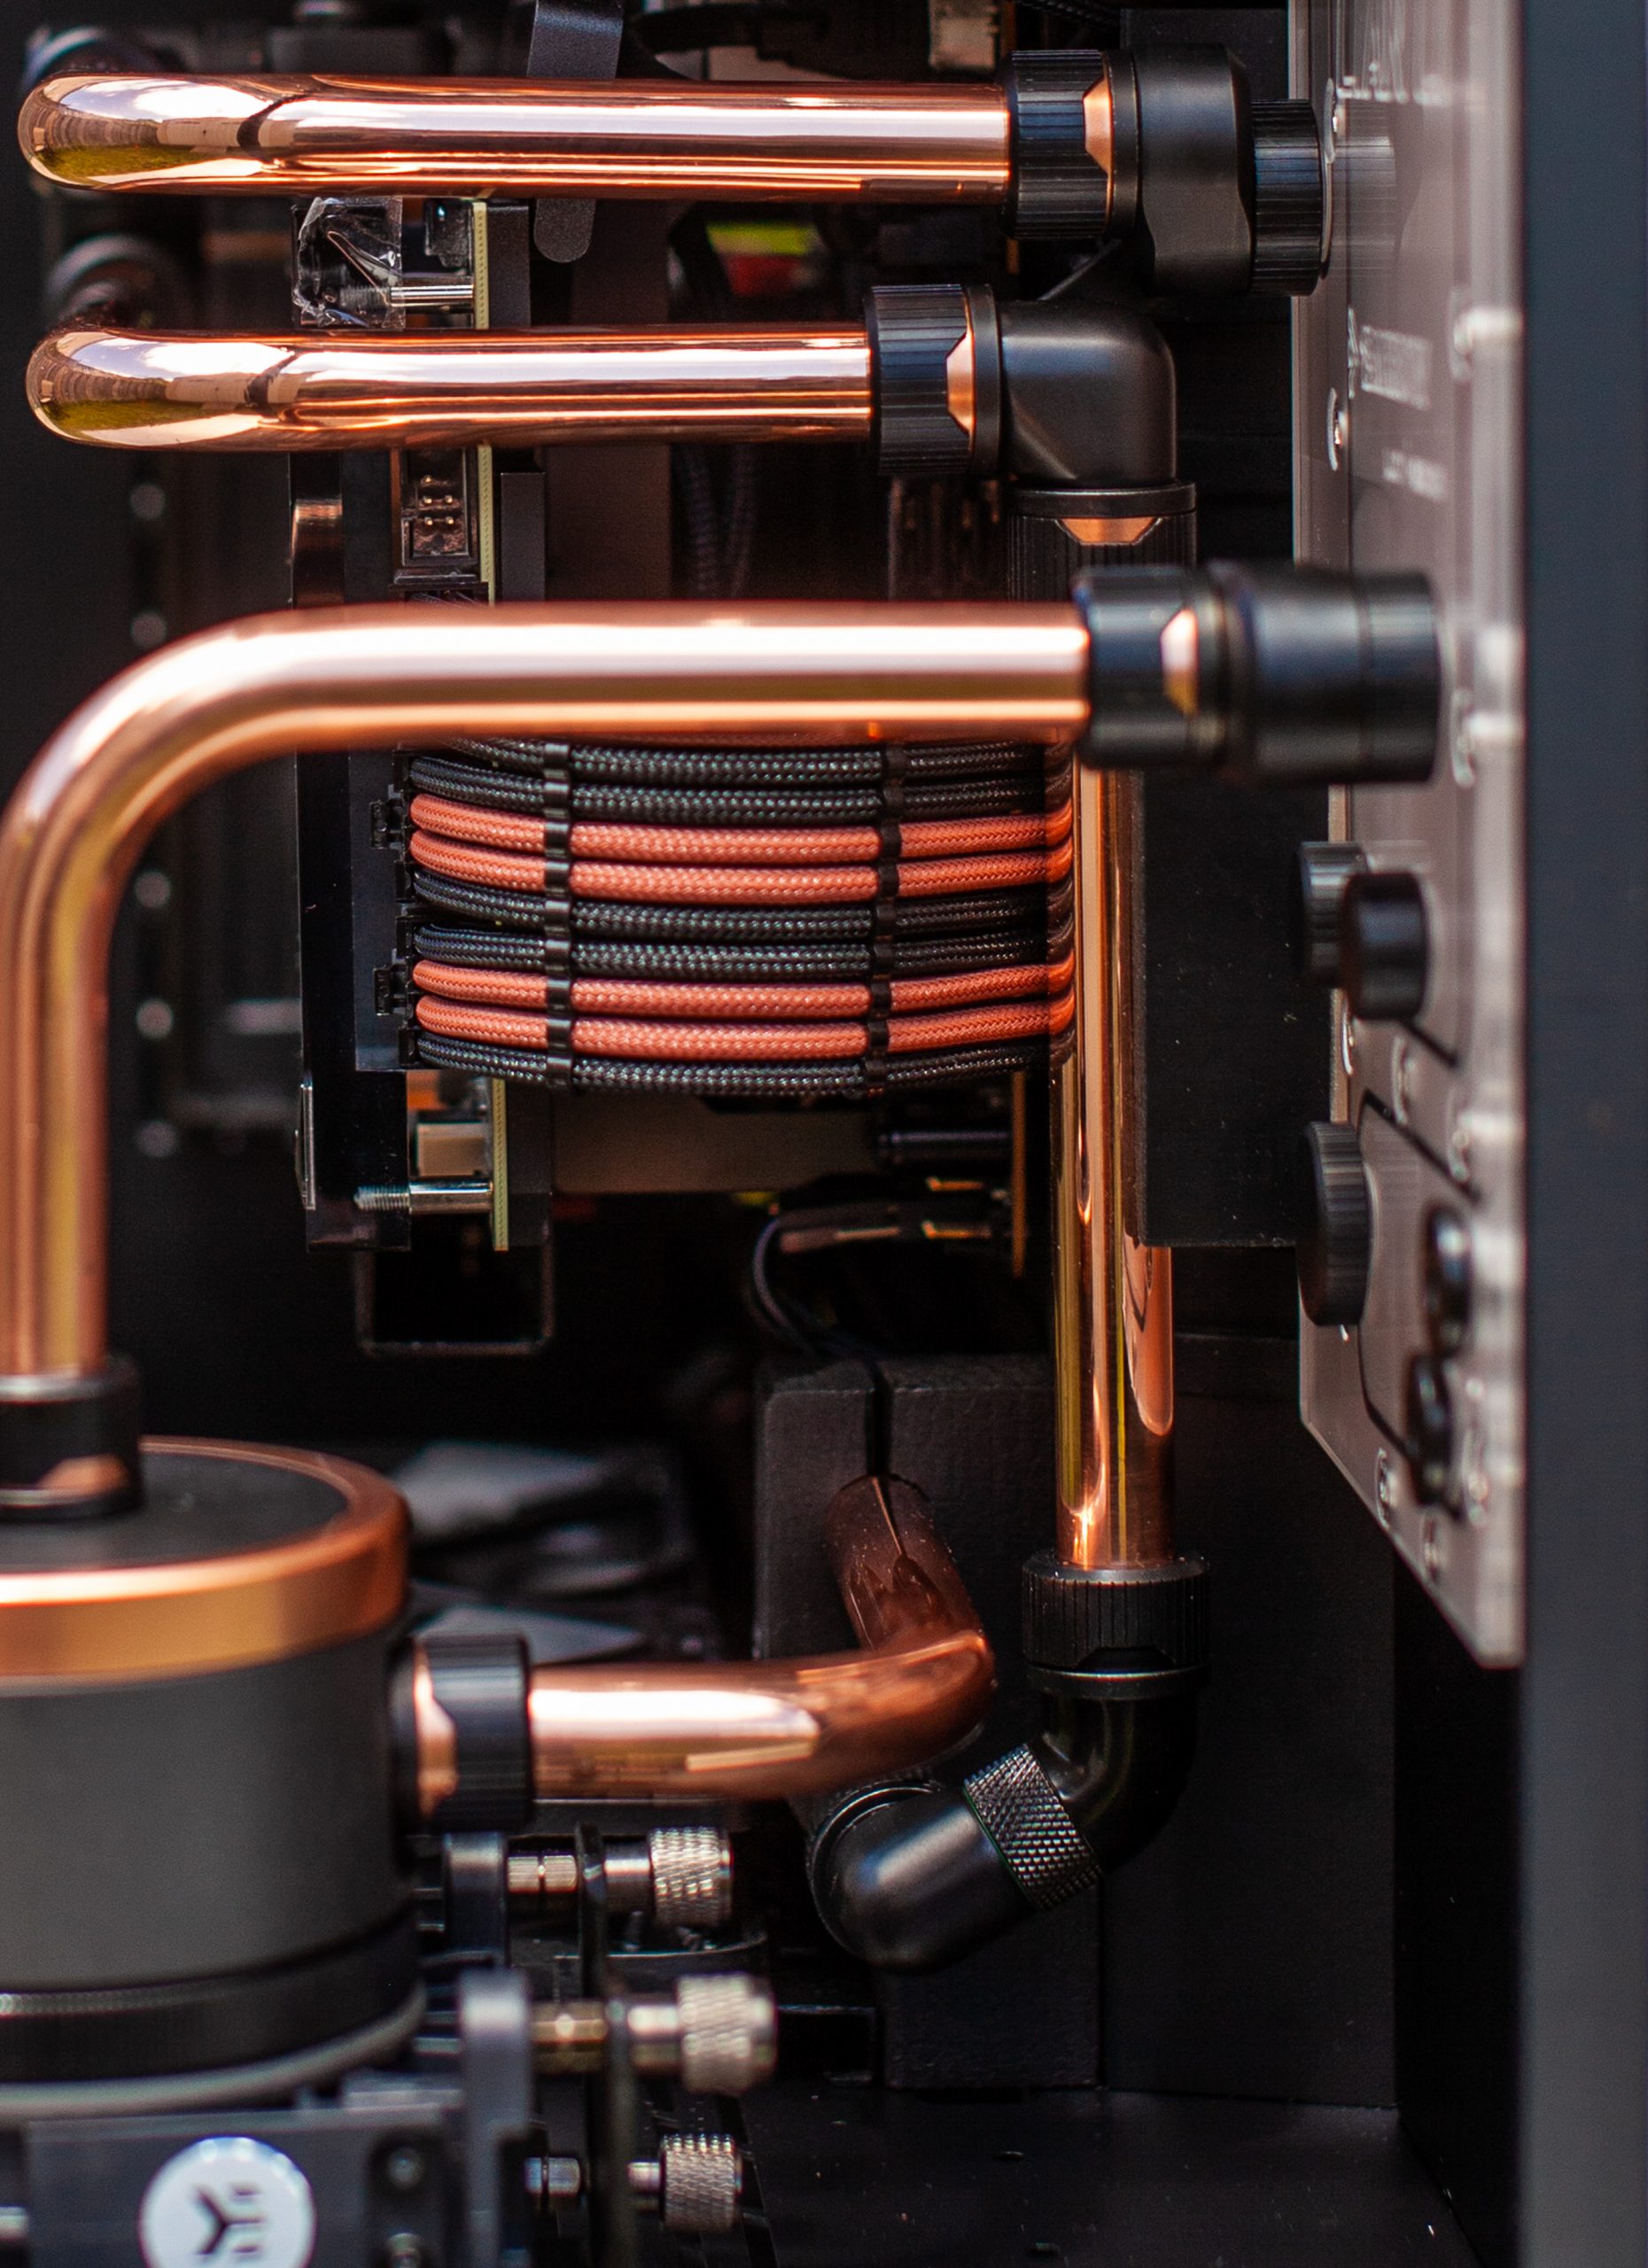
Water Cooling Components
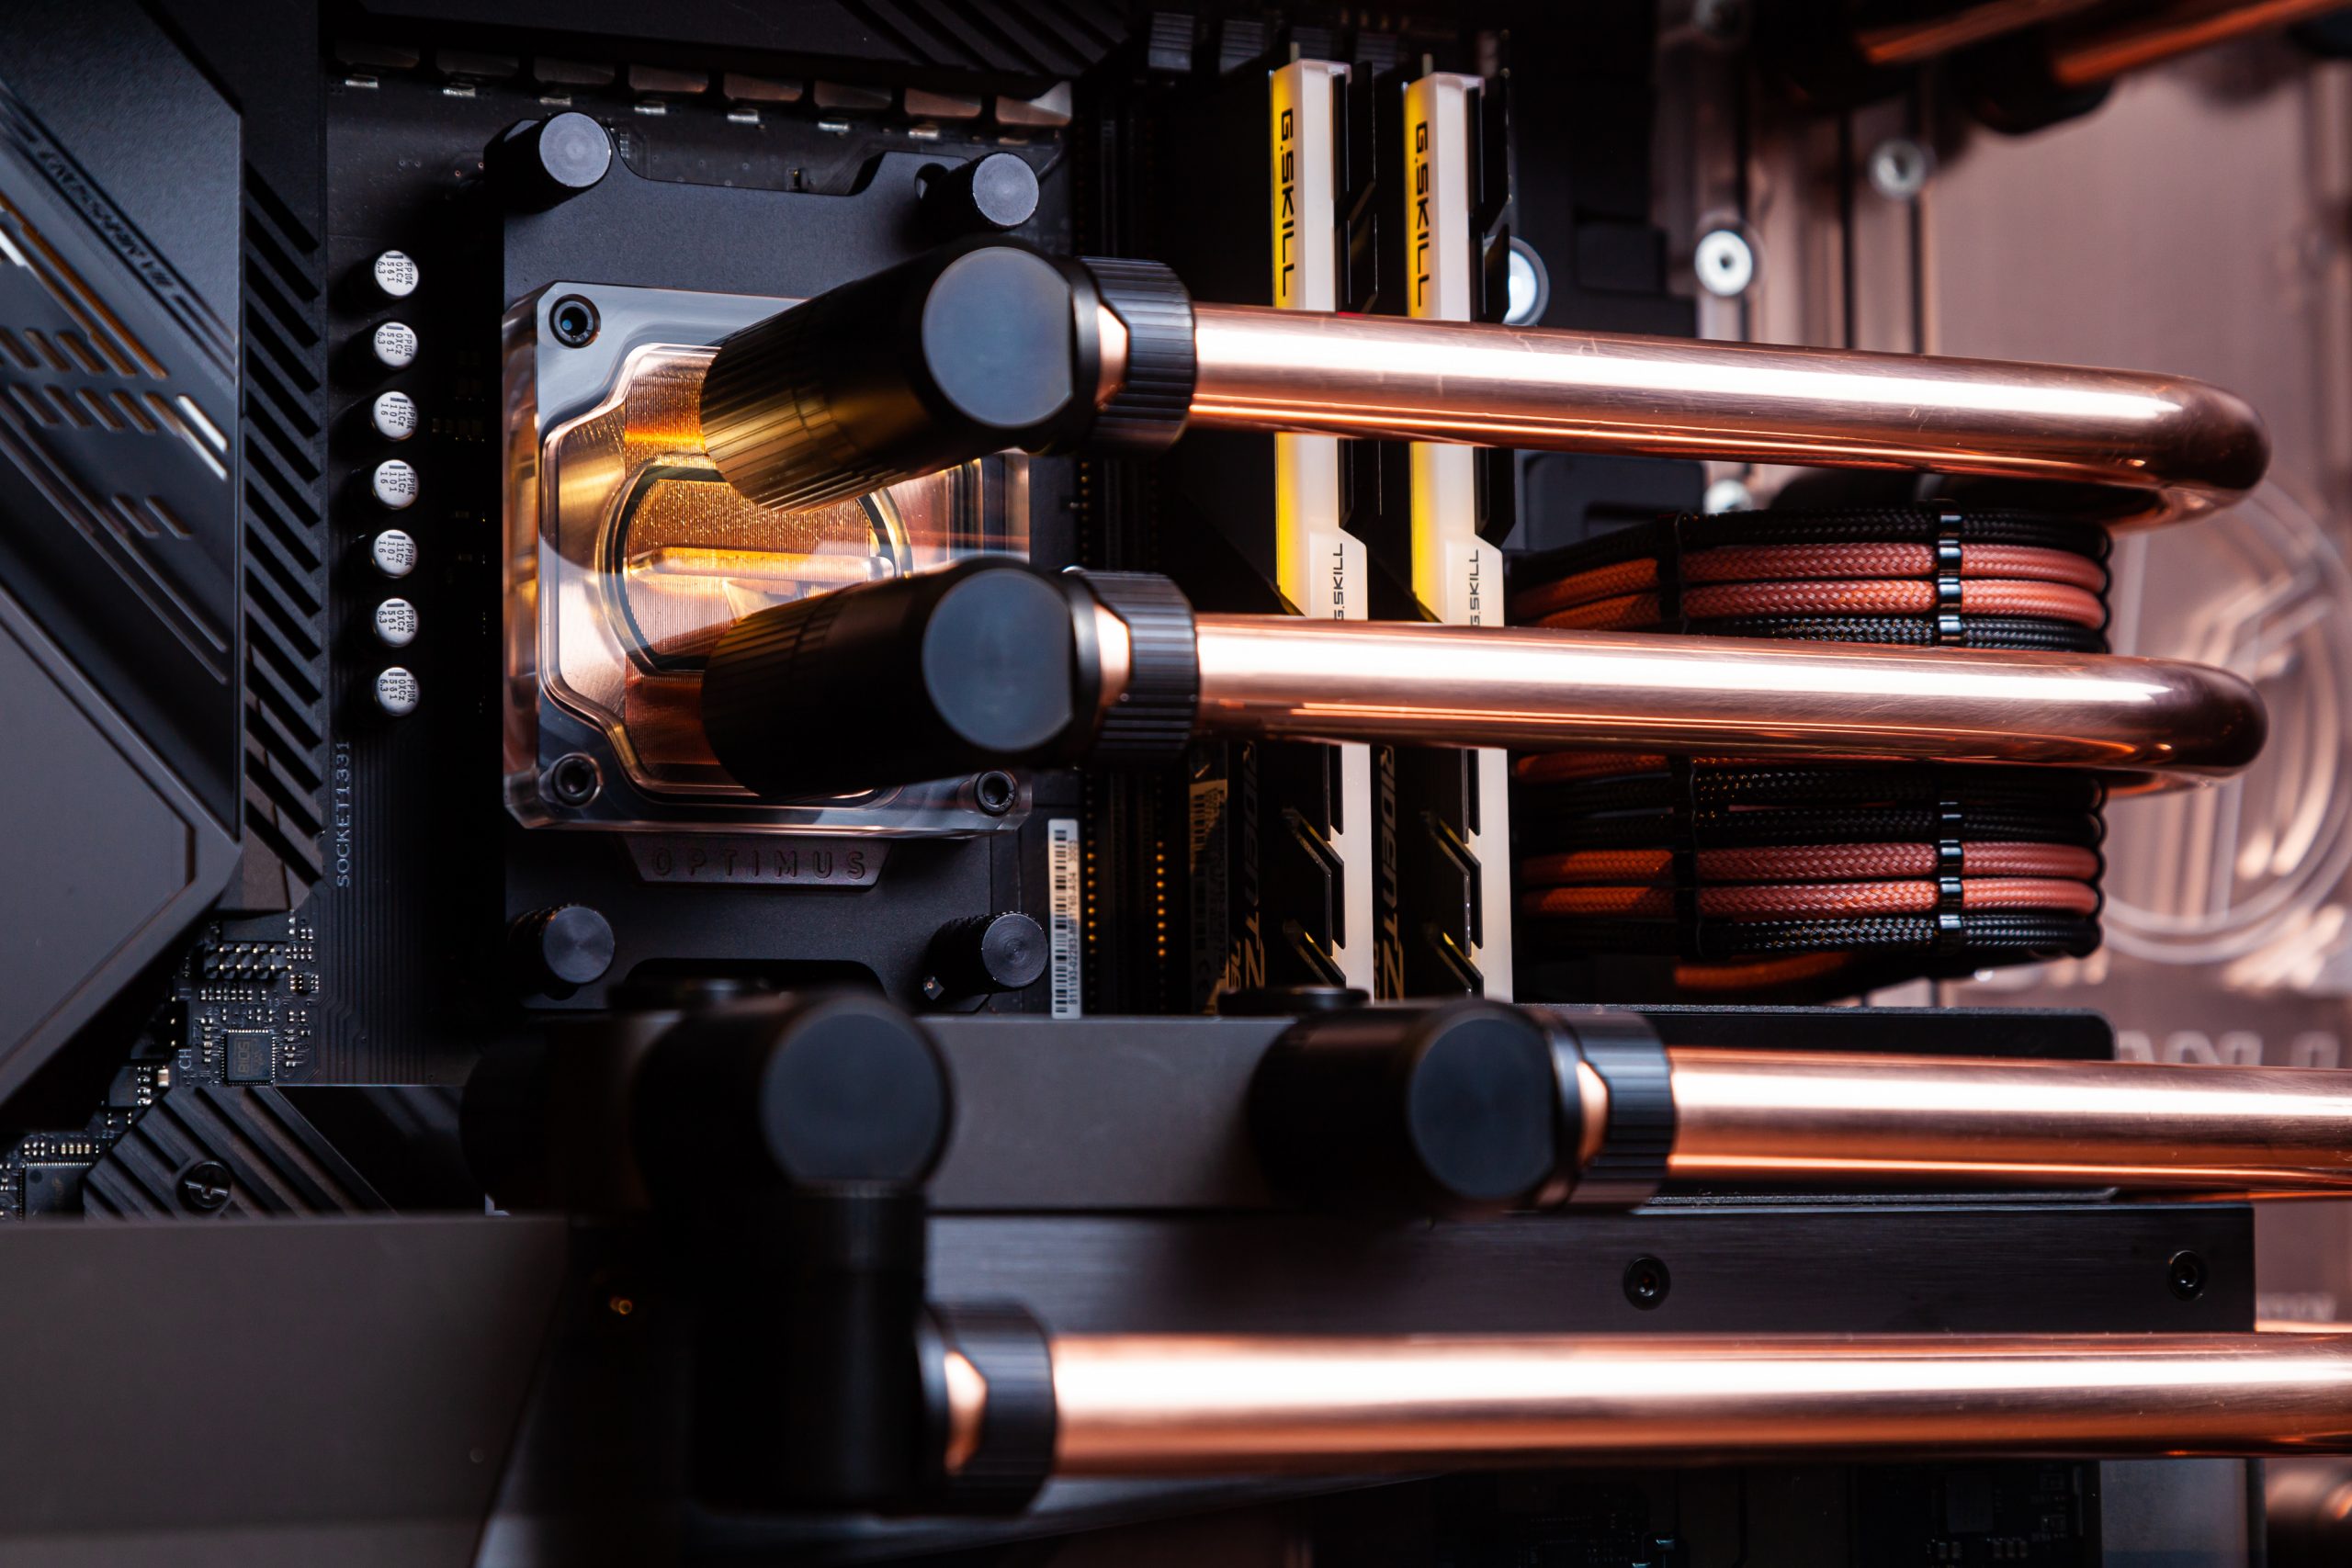
CPU
Optimus Foundation Block Acrylic + Black Aluminum / Raw Copper
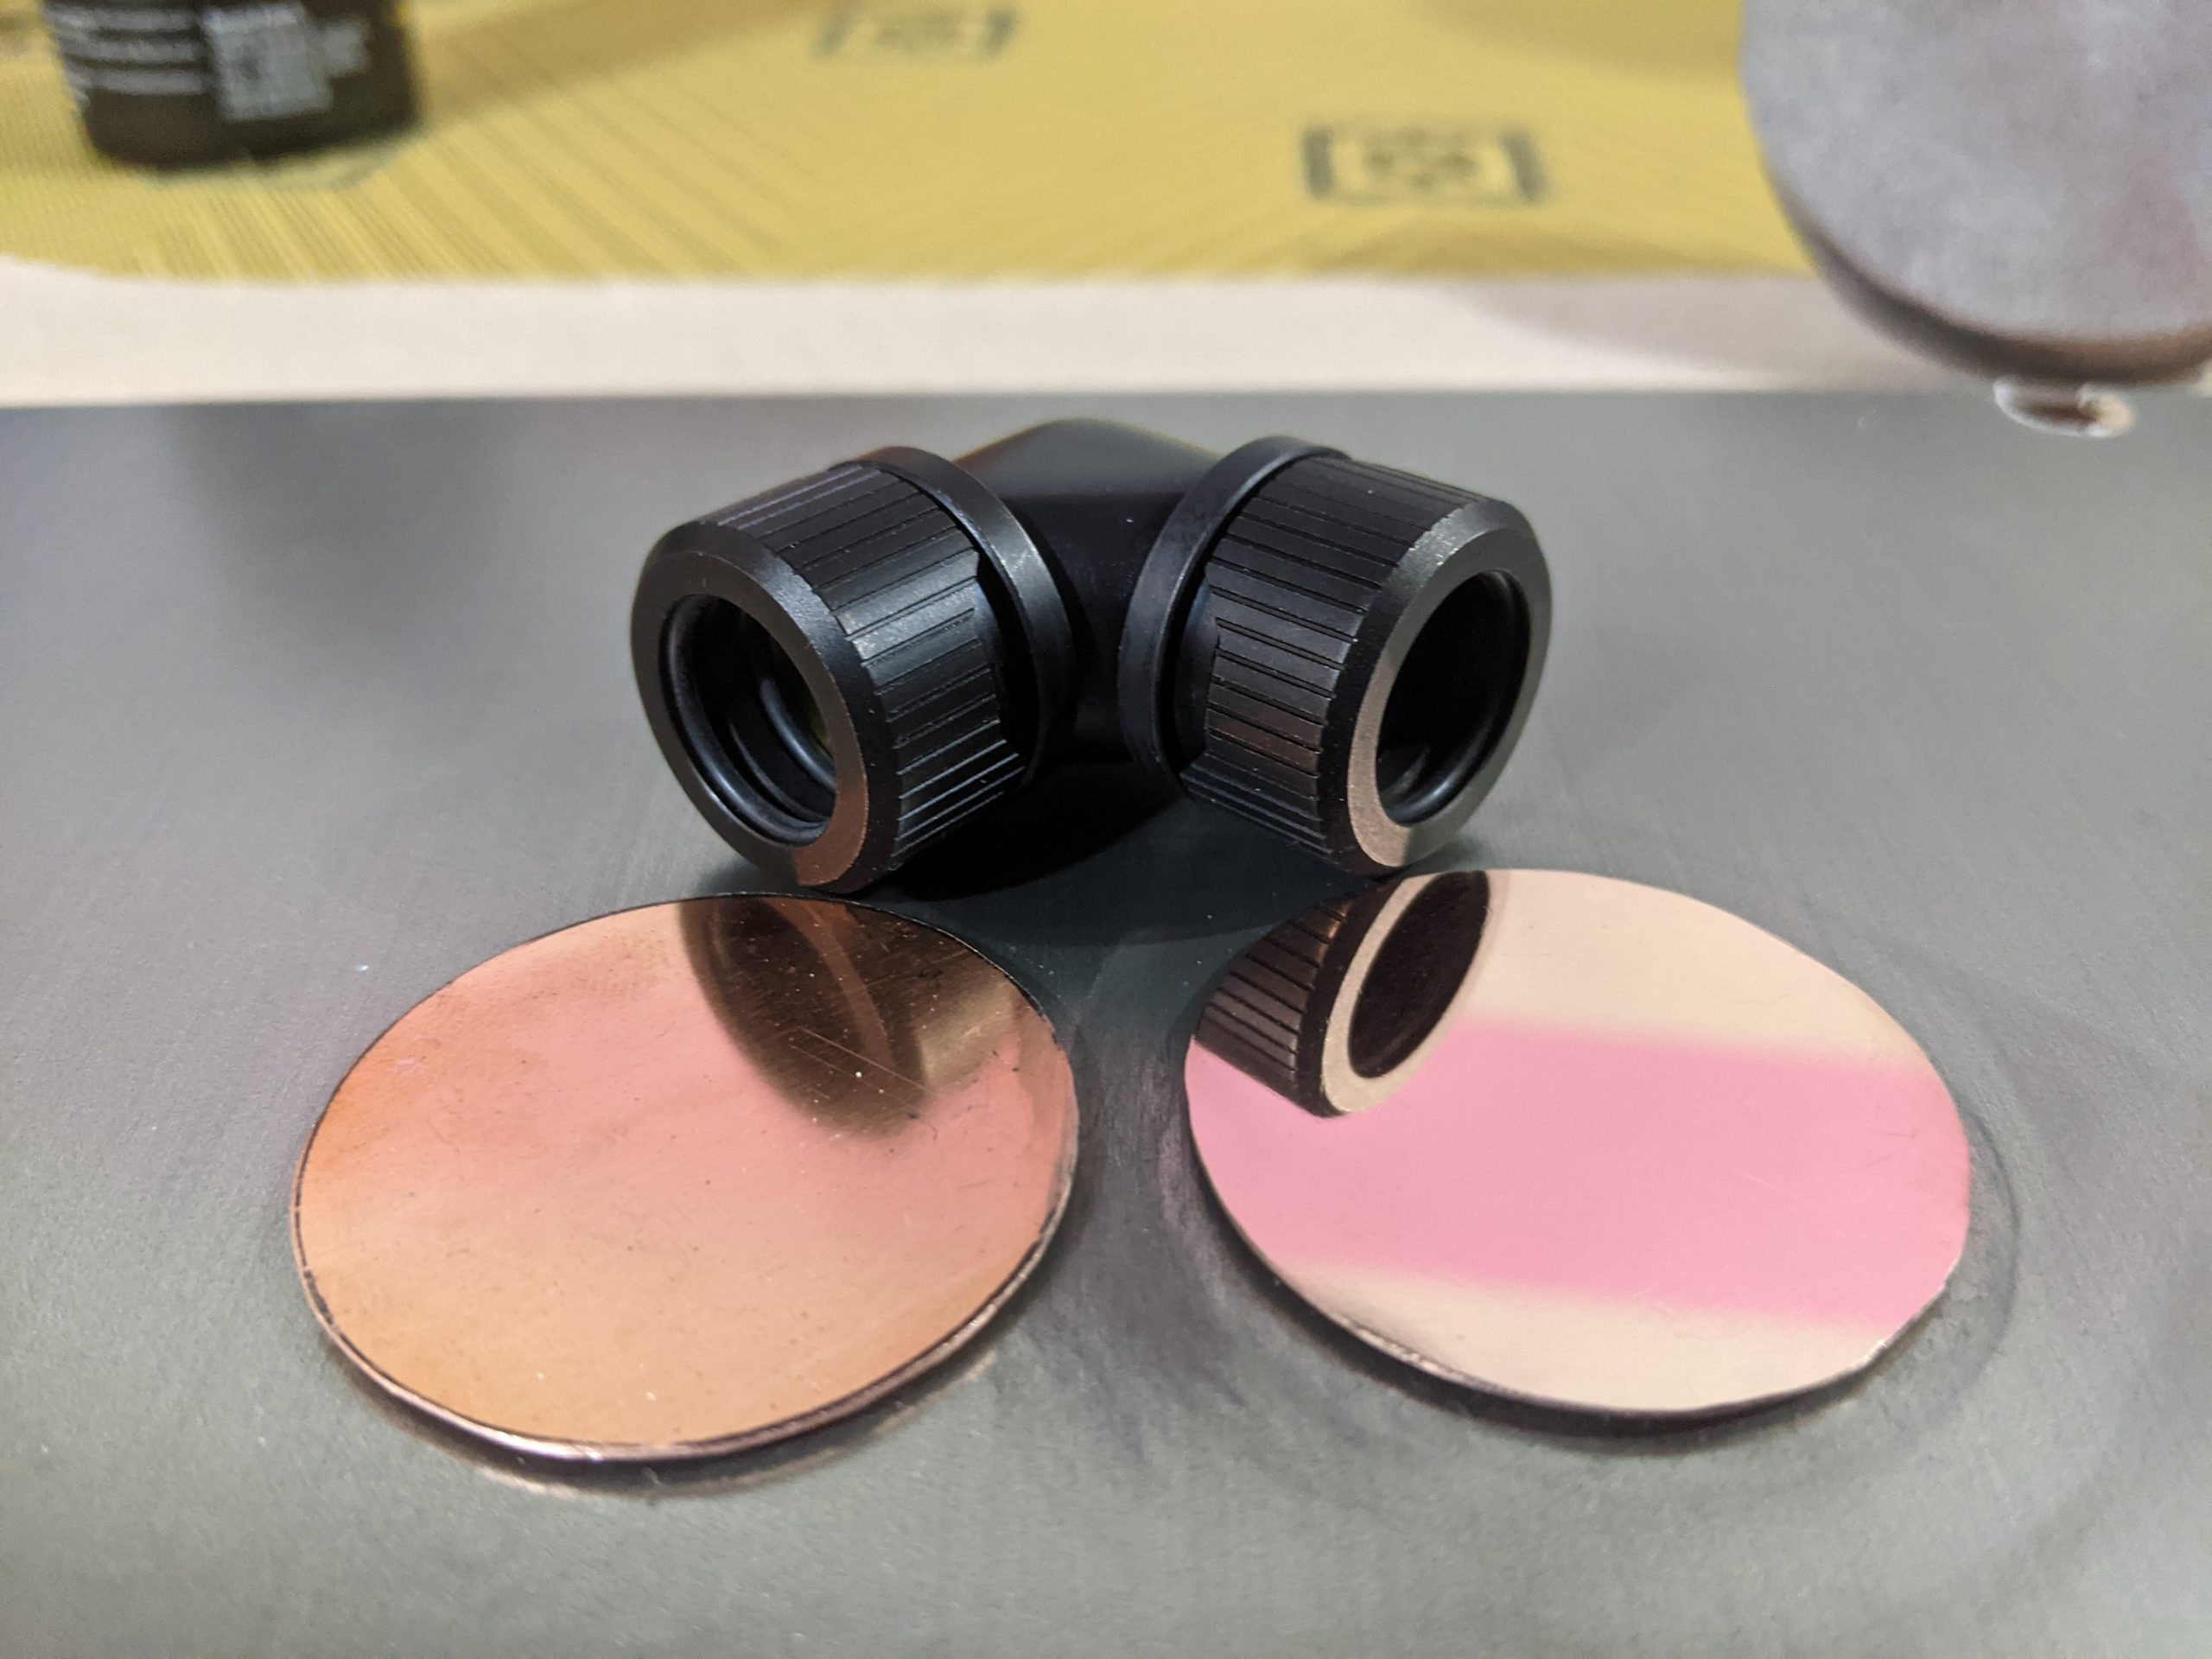
EK Quantum Torque Rotary 90 x2
EK Quantum Torque MF Extender Static MF 28mm
EK-Quantum Torque Rotary Offset 3mm x2
EK Quantum HDC with custom painted accent rings x4
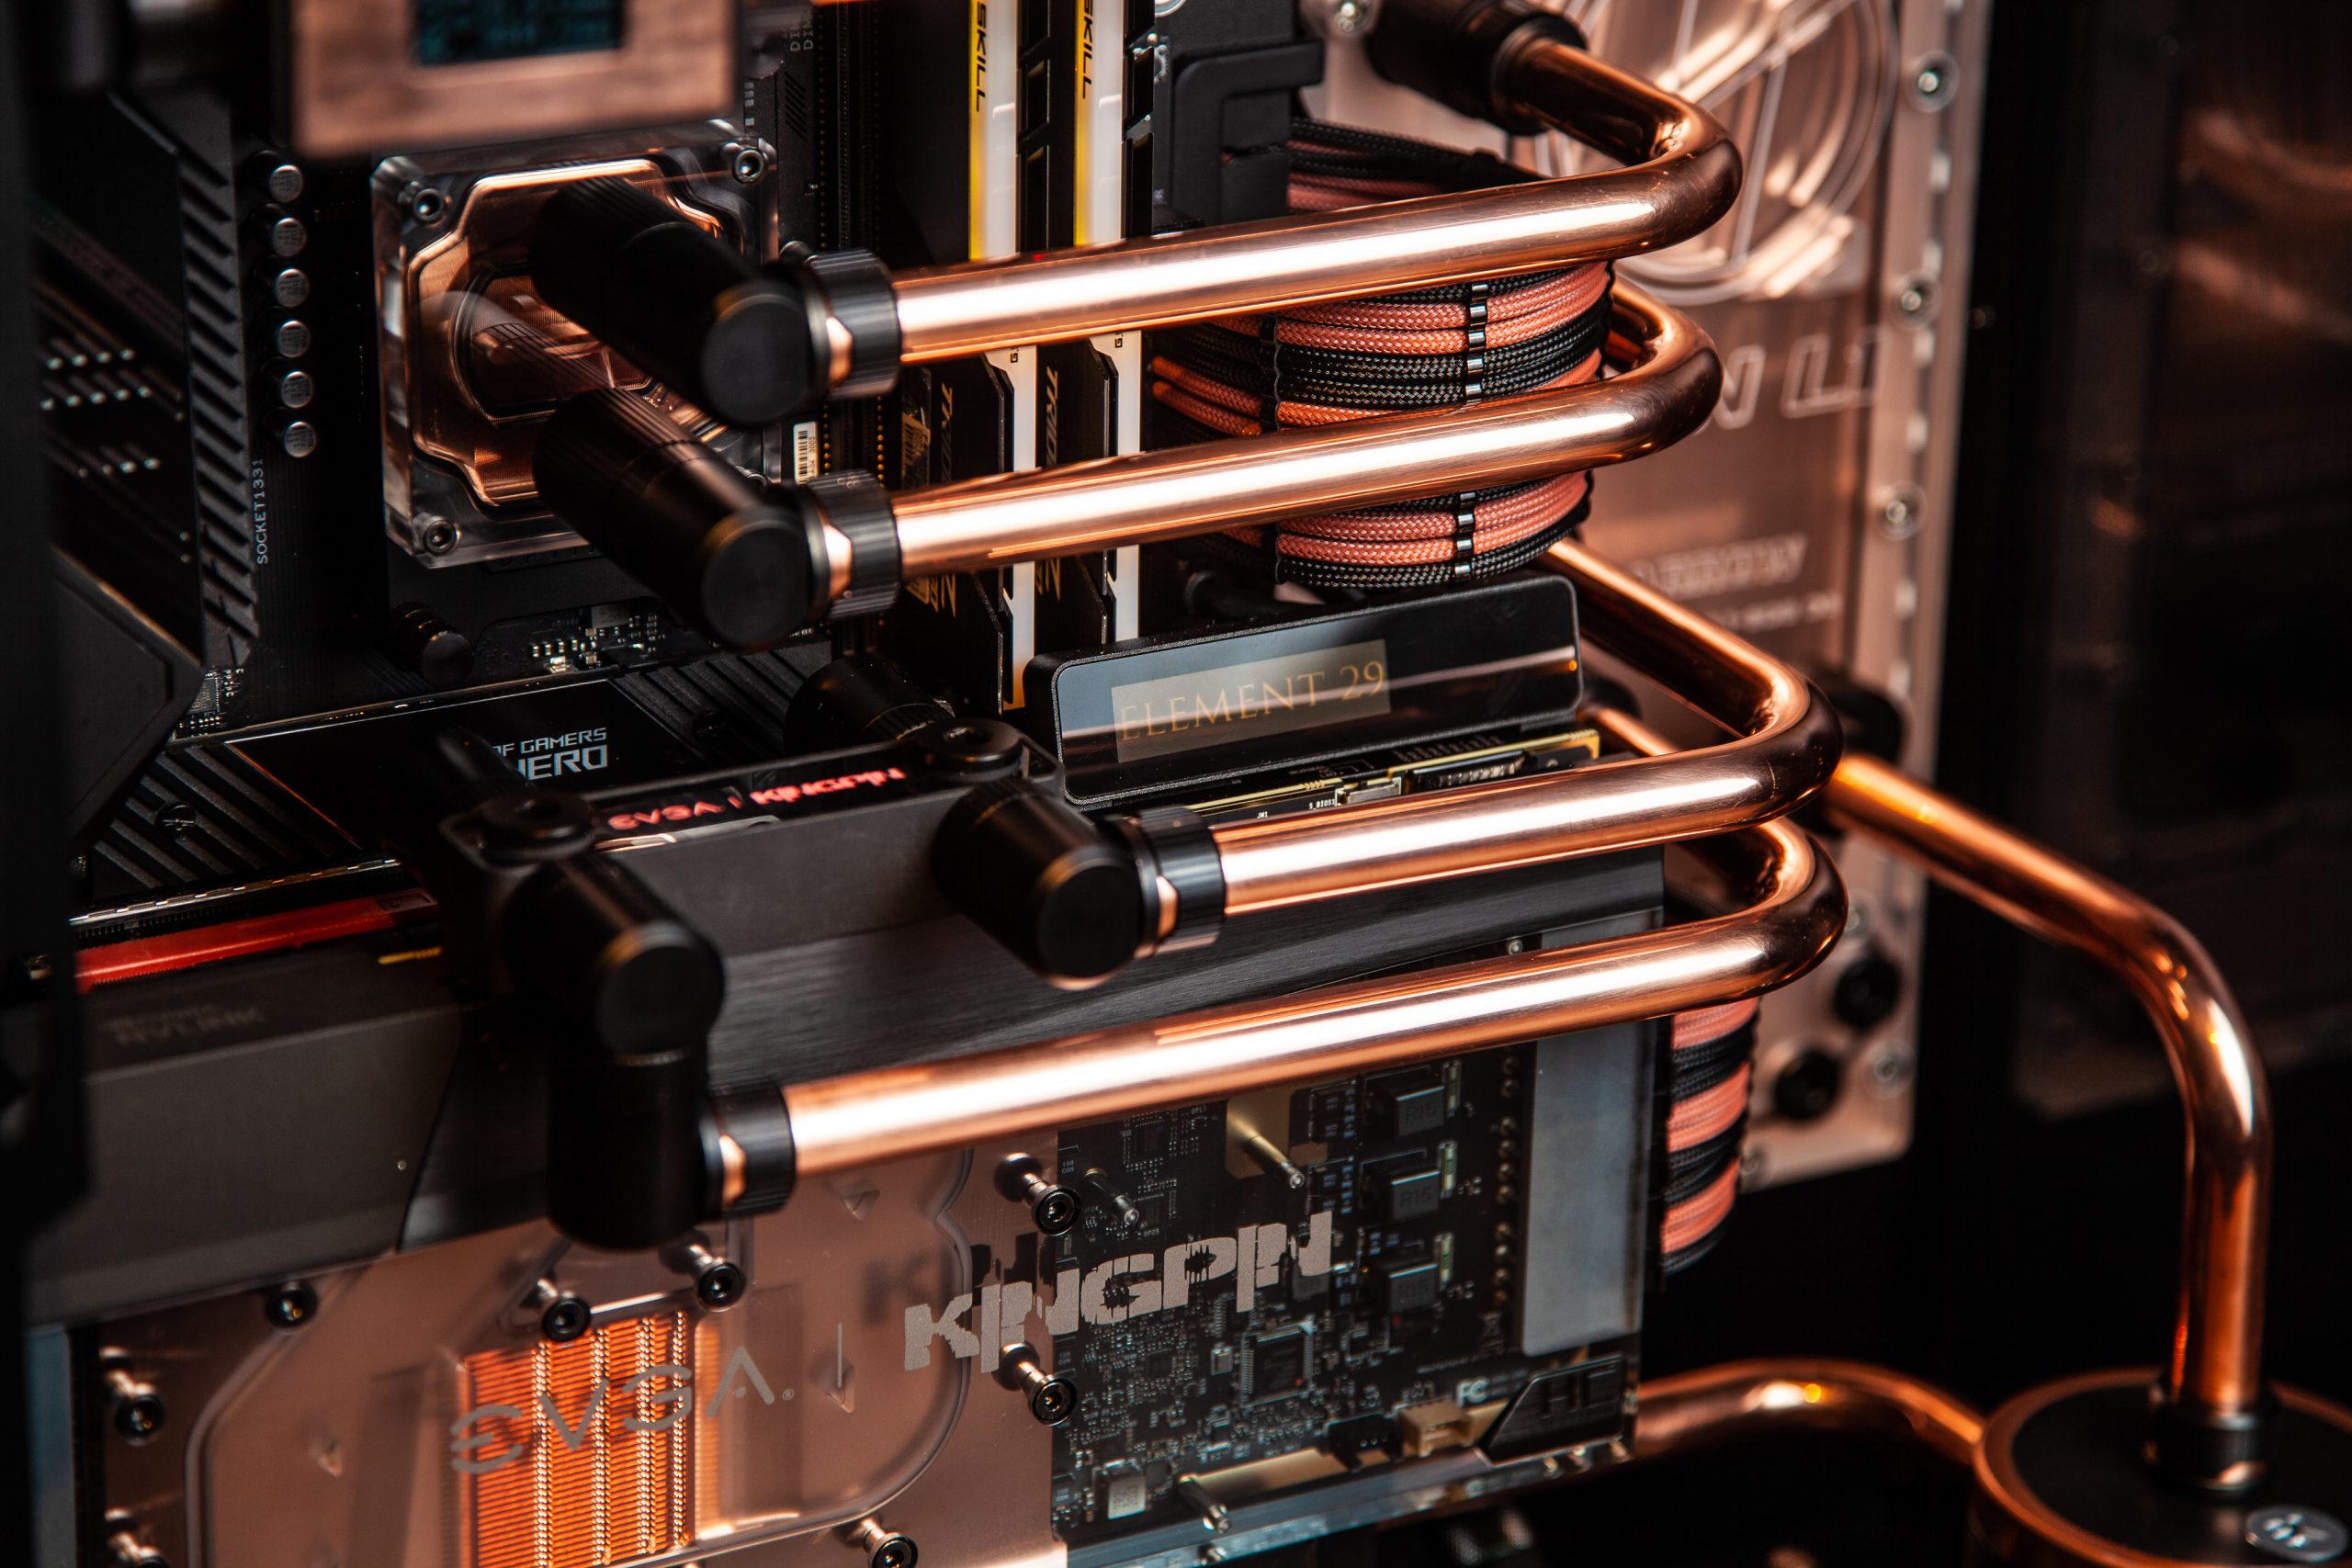
GPU
Kingpin Hydro Copper Block
MP5 Backplate Cooler (For rear VRAM)
EK Quantum Torque Rotary 90 x5
EK Quantum HDC with custom painted accent rings x7
EK Quantum Torque Rotary Offset 7mm
Bitspower 60° Rotary MF
EK Classic 90° FF x2
Internal Radiator
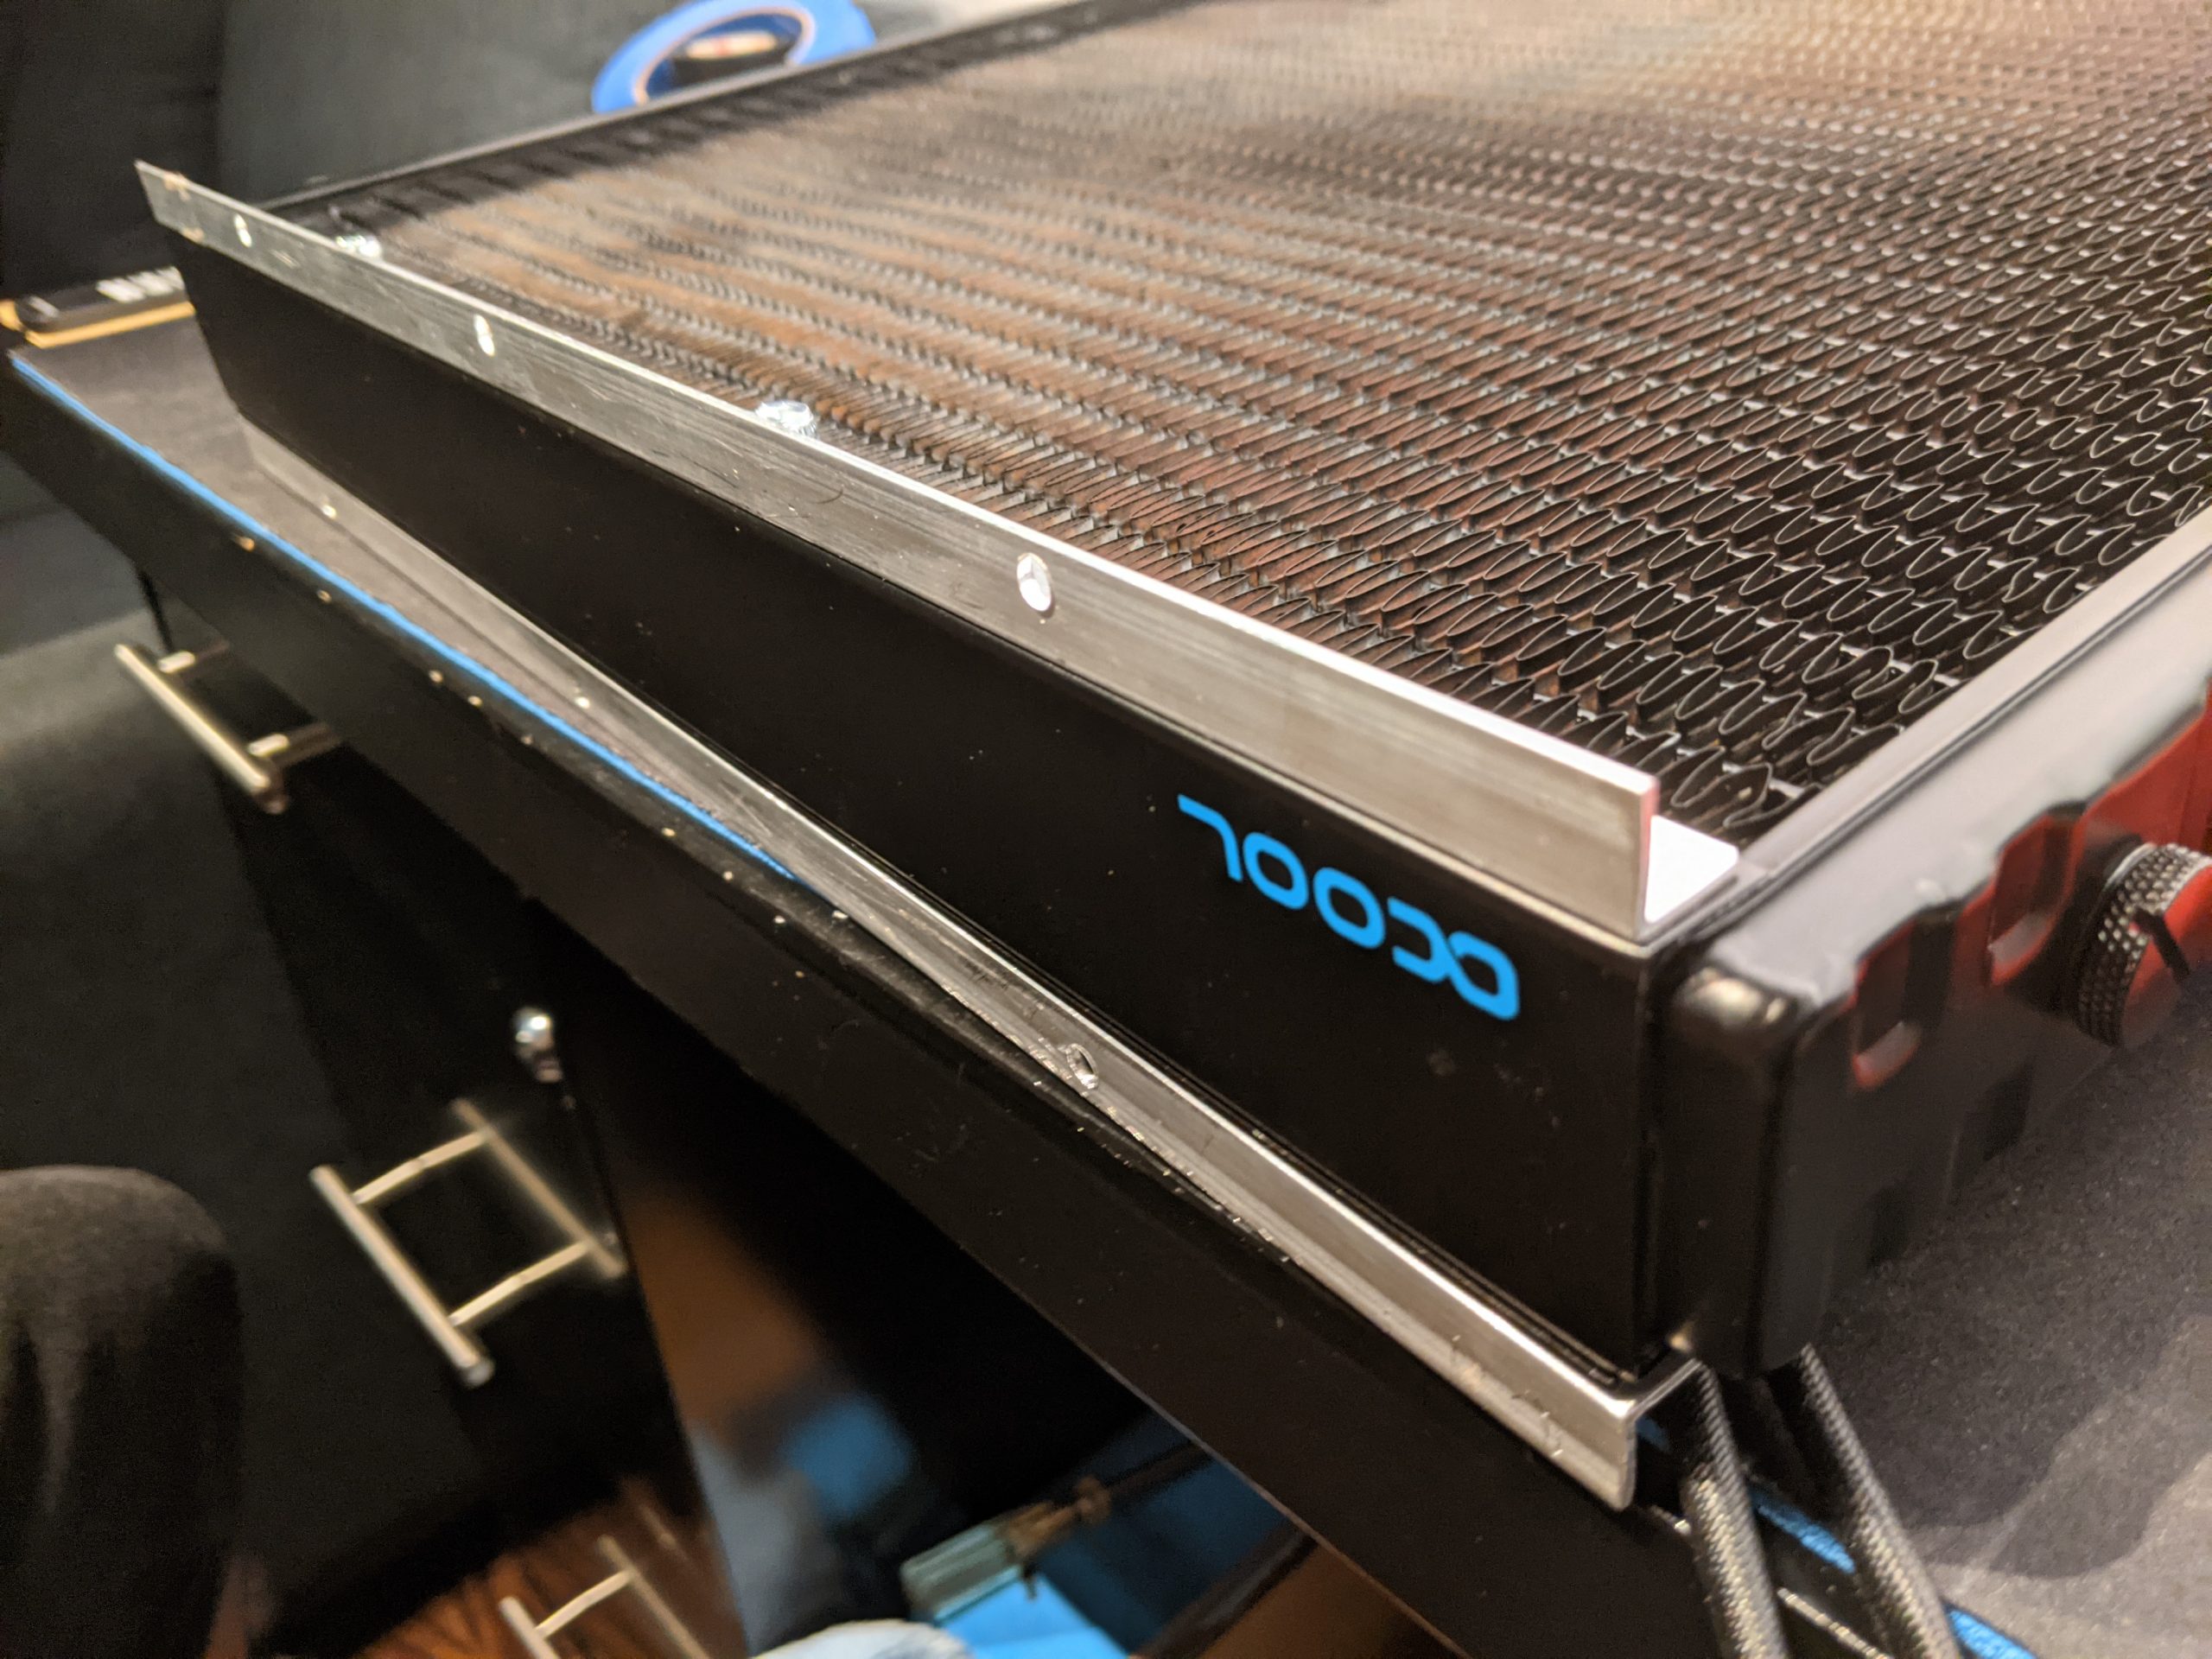
EK Coolstream PE
EK Quantum Torque Extender Static MF 14mm
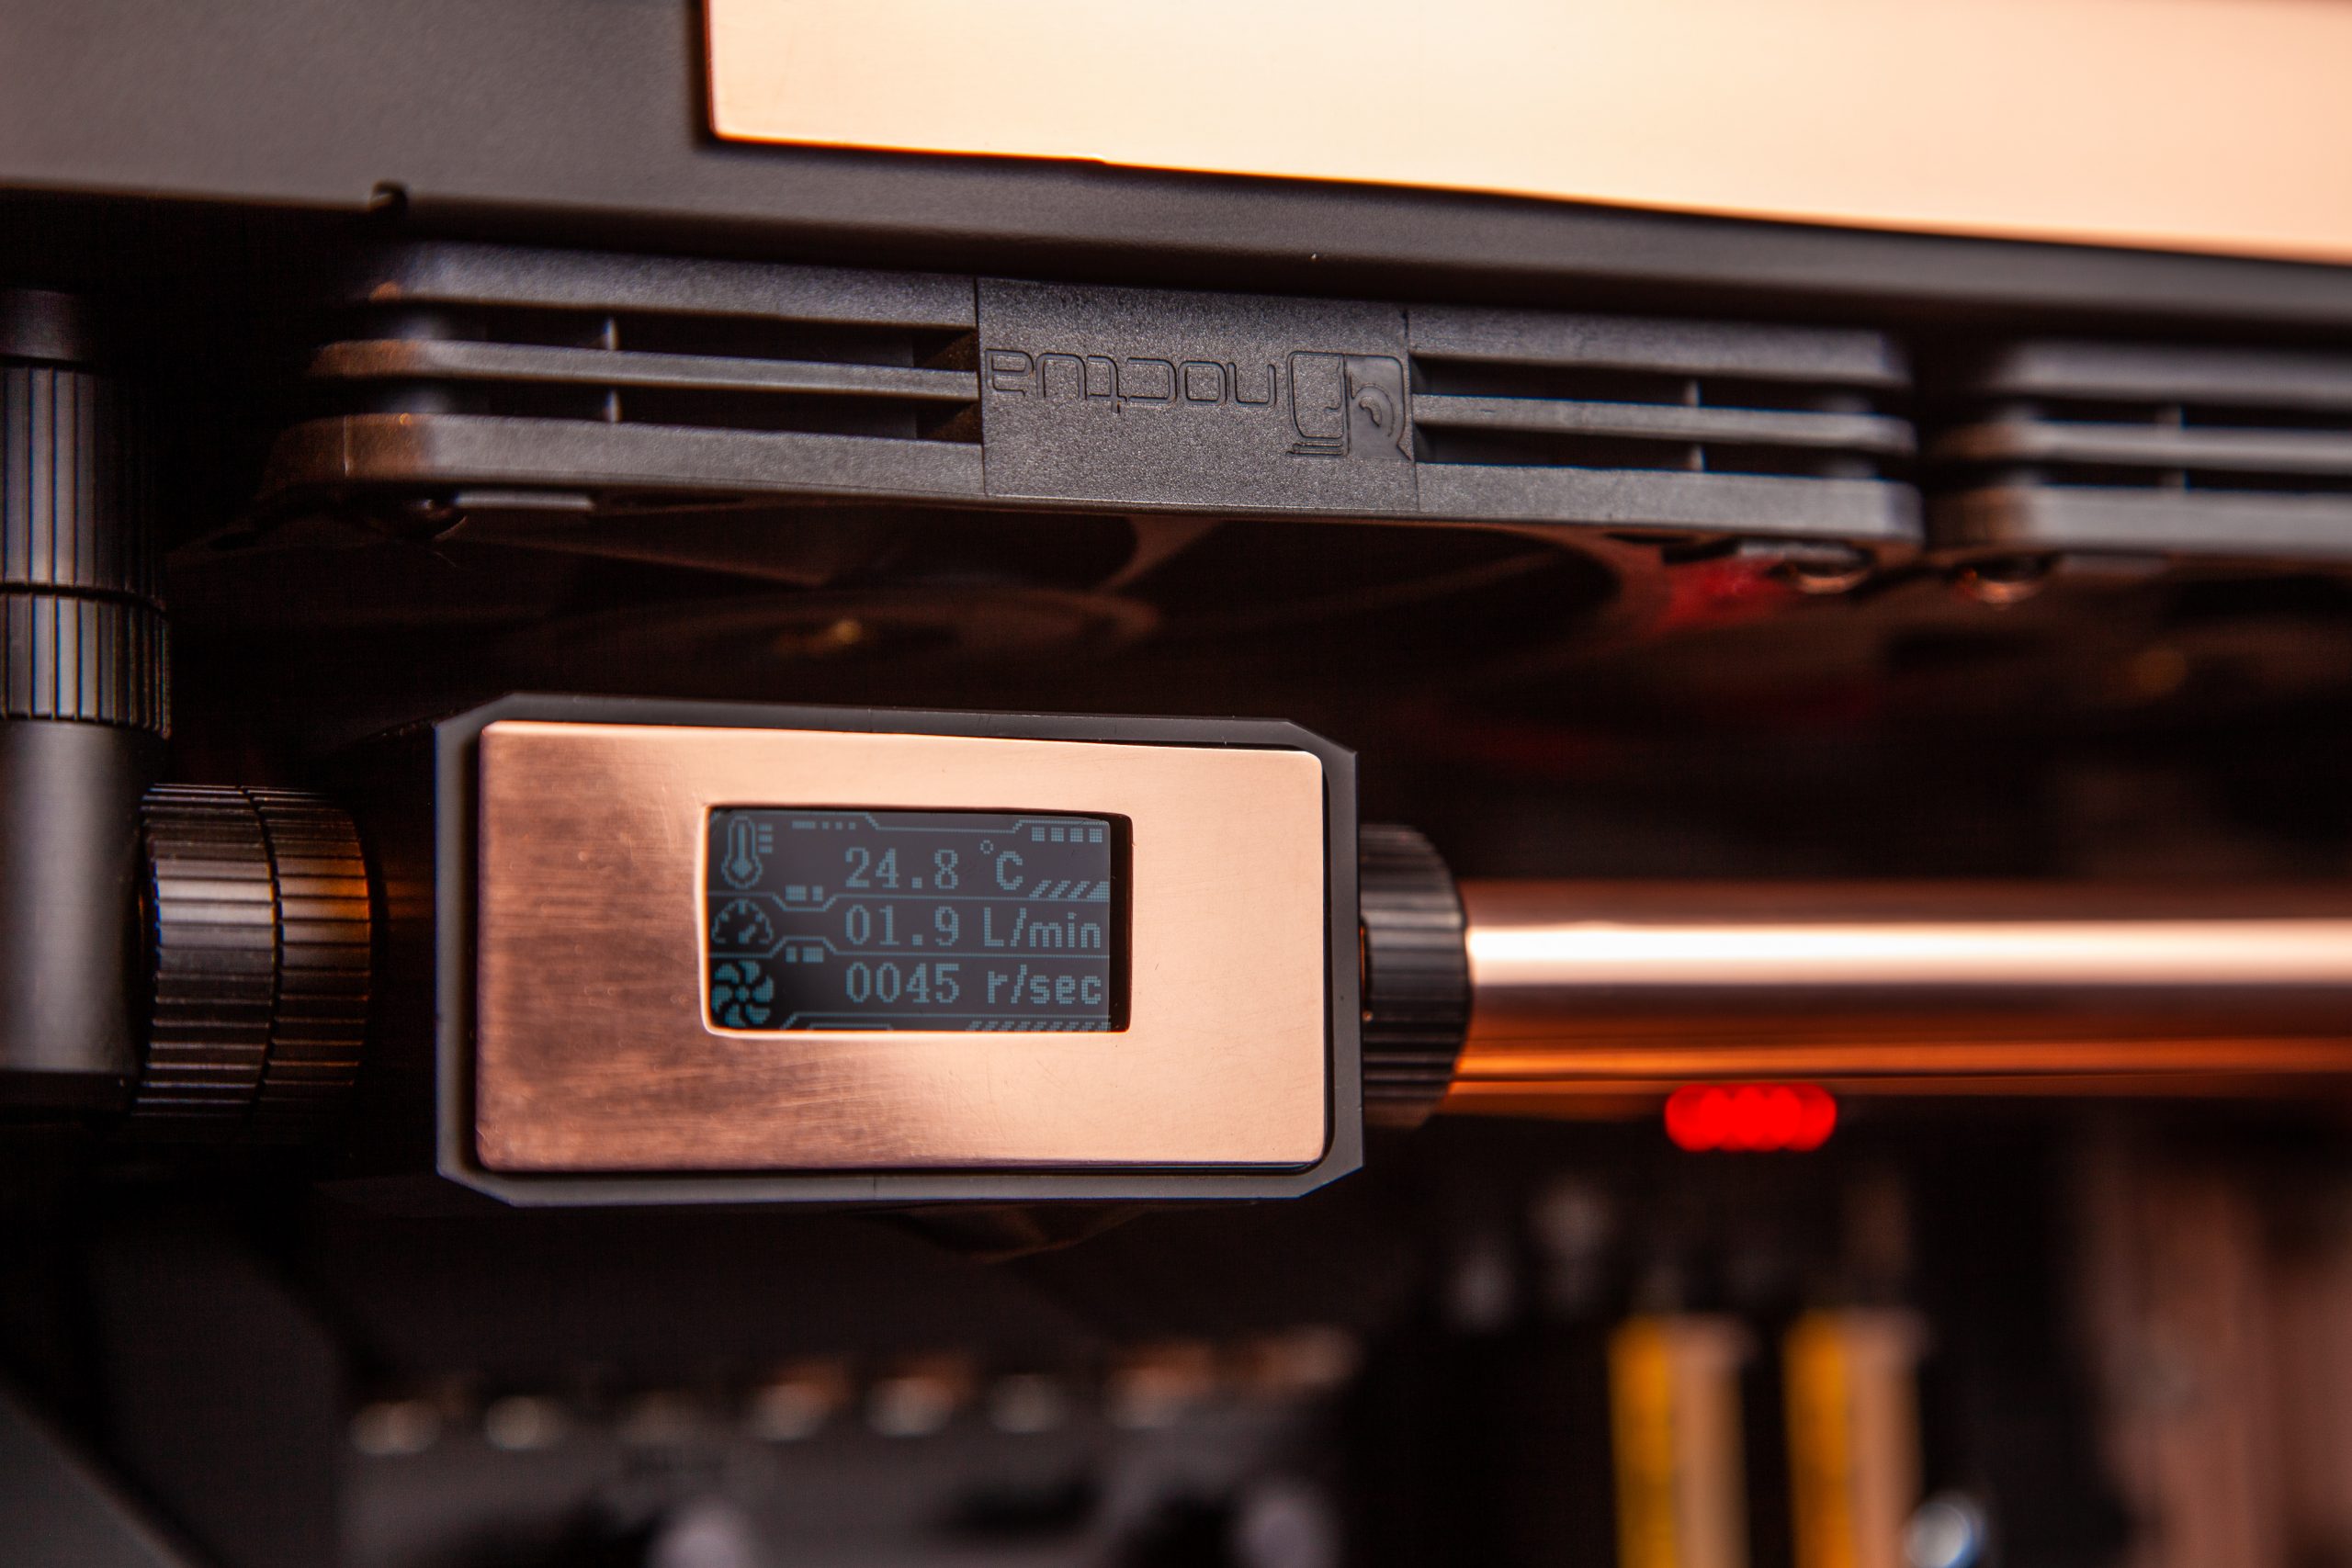
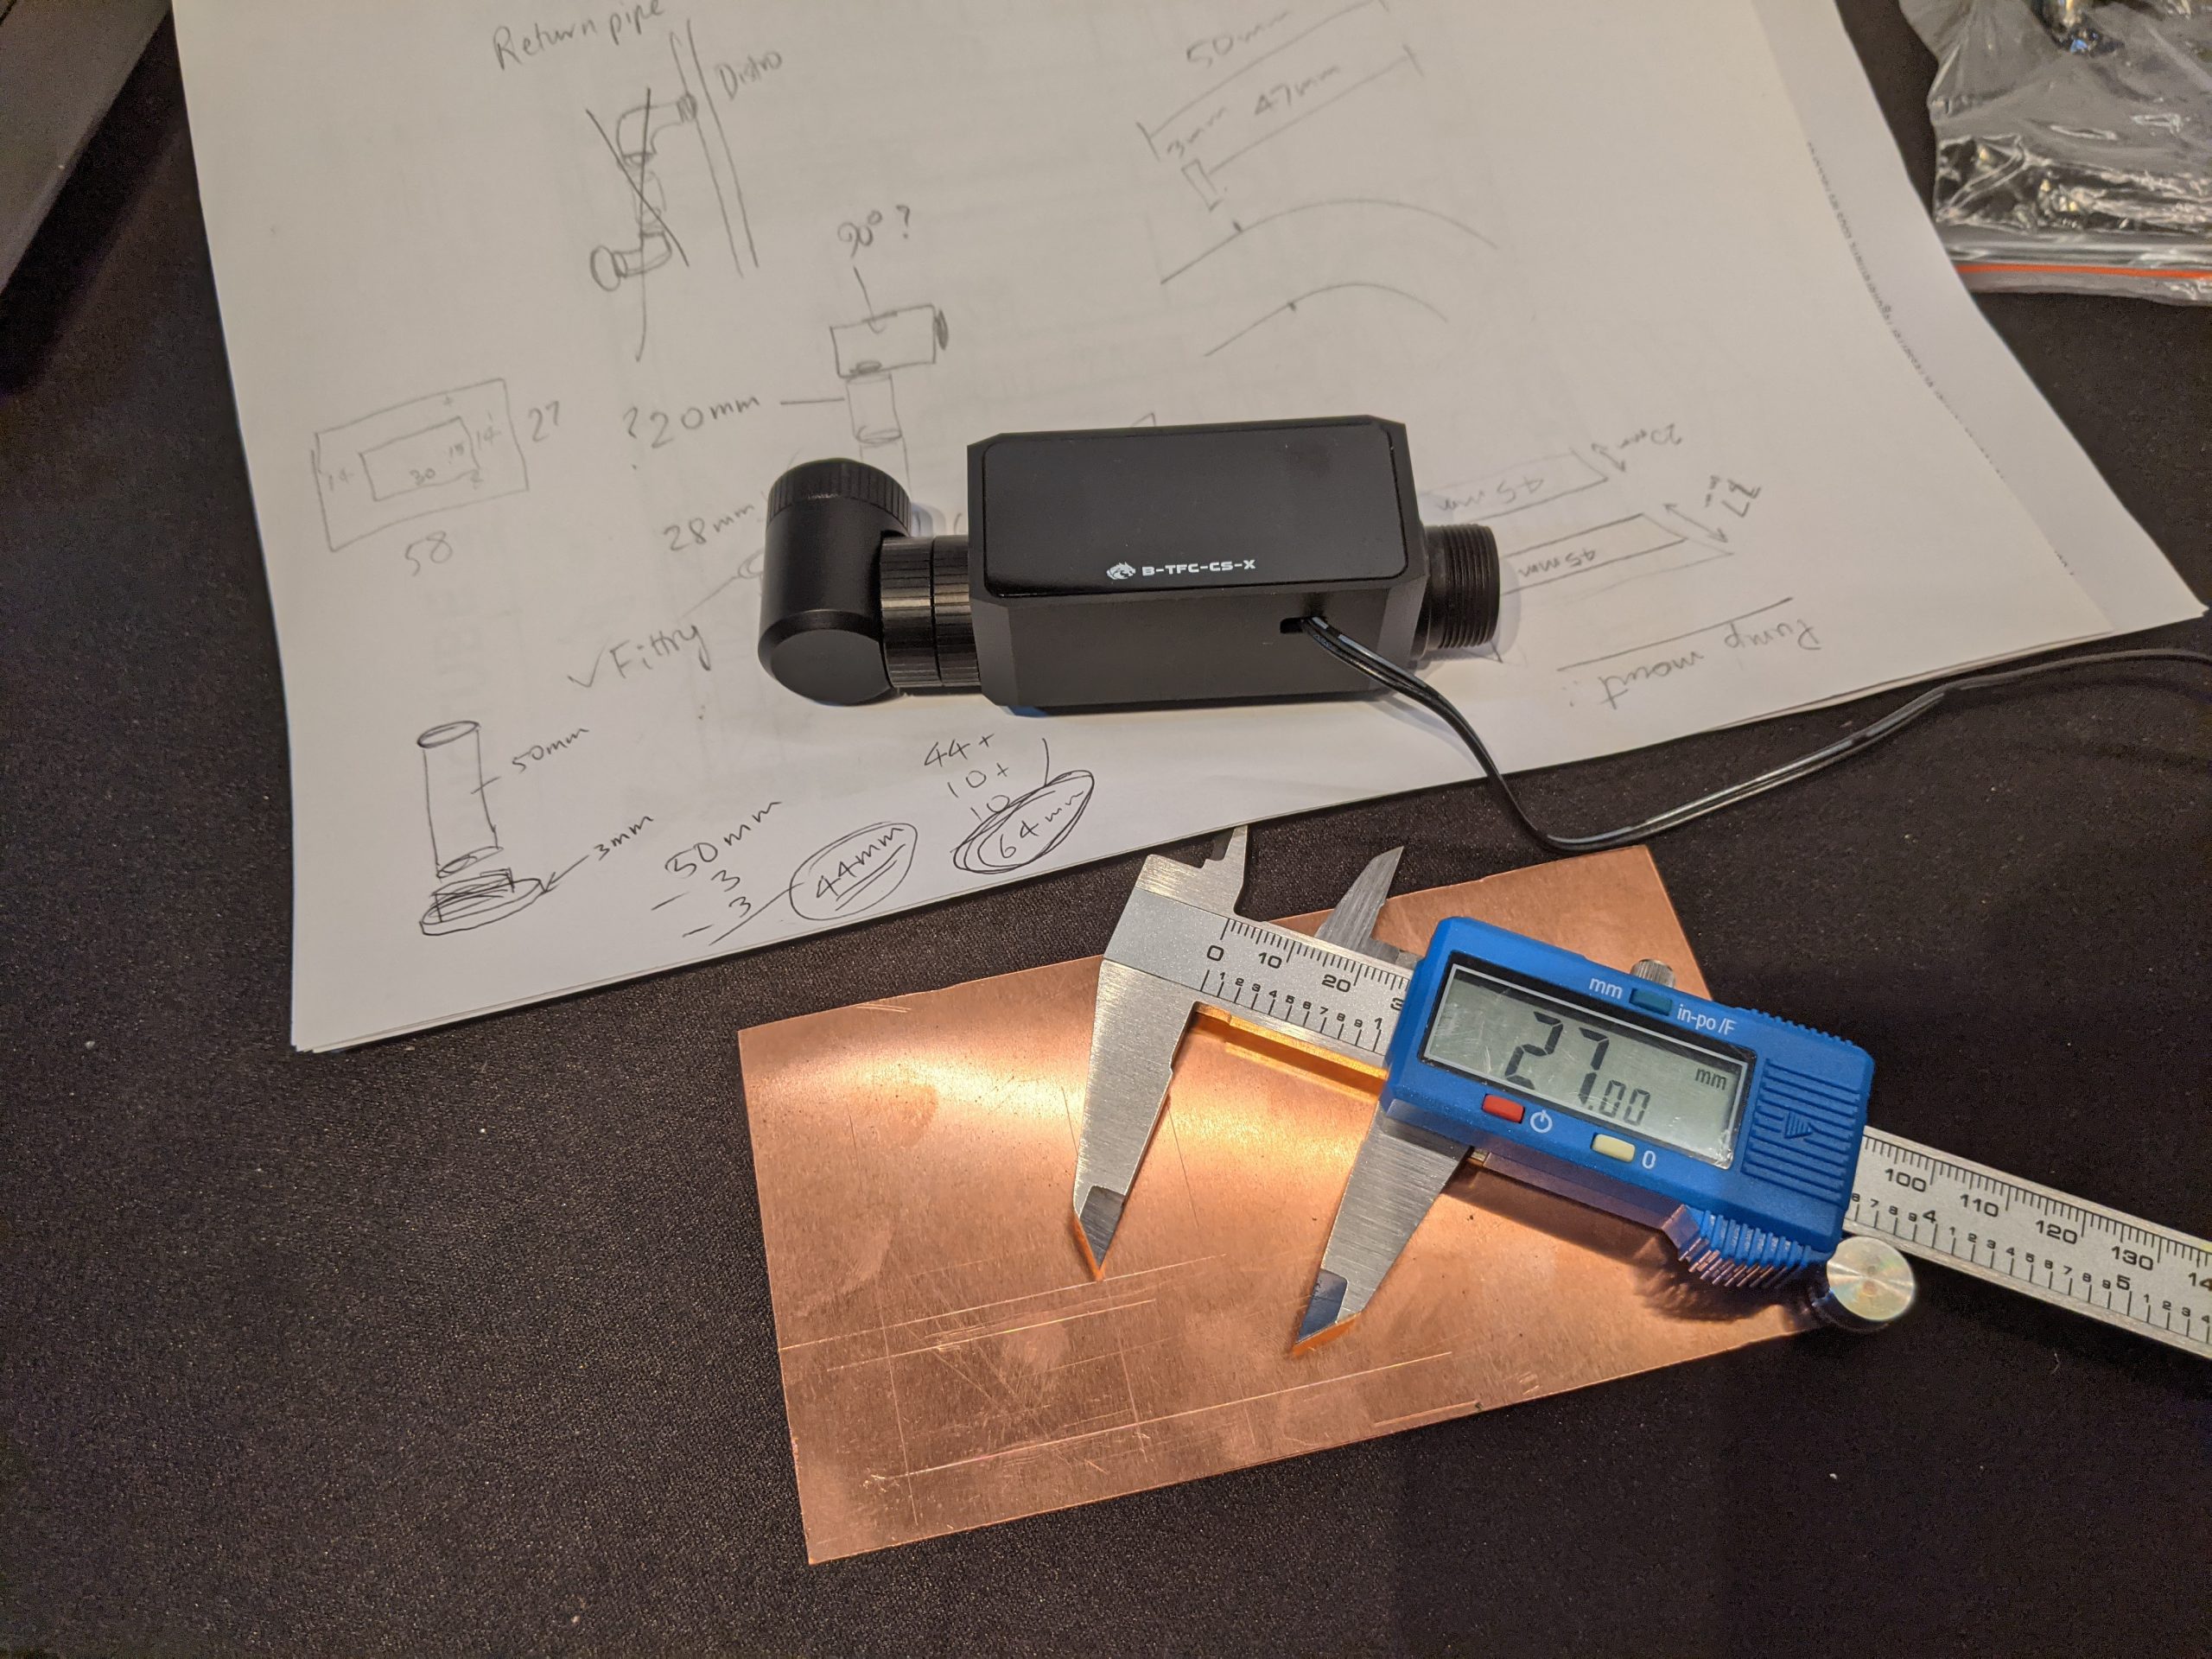
Bykski B-TFC-CS OLED Flowmeter
Internal backup pump
EK D5 PWM G2 Pump
EK Quantum Inertia D5 Body, Digital RGB
EK Quantum Torque Rotary Offset 14mm
EK Quantum HDC with custom painted accent rings x4
Distribution Plate
Barrow LLO11-SDB-D5
Tubing
EK ZMT 12 meters (for external connection)
12x Barrow TGWG-14 14mm Copper pre-bent 90° rigid tube – Chrome, Reverse electroplated, sanded, buffed using jeweler’s red polishing compound
External Radiator
Alphacool NexXxoS XT45 Full Copper 1260mm Super Nova Radiator
4x Thermaltake Technology Pure Series 200mm fan
Barrow SPG40A-X, 18W PWM Combination Pump
Bitspower inline filter
Coolant
EK Cryofuel Clear Concentrate x2 Biocide and Anti-Corrosion additive
Distilled water 2.5L
The Tubing
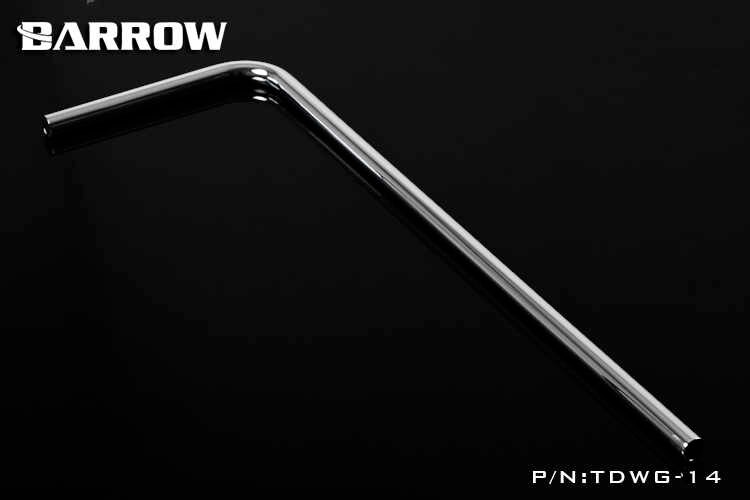
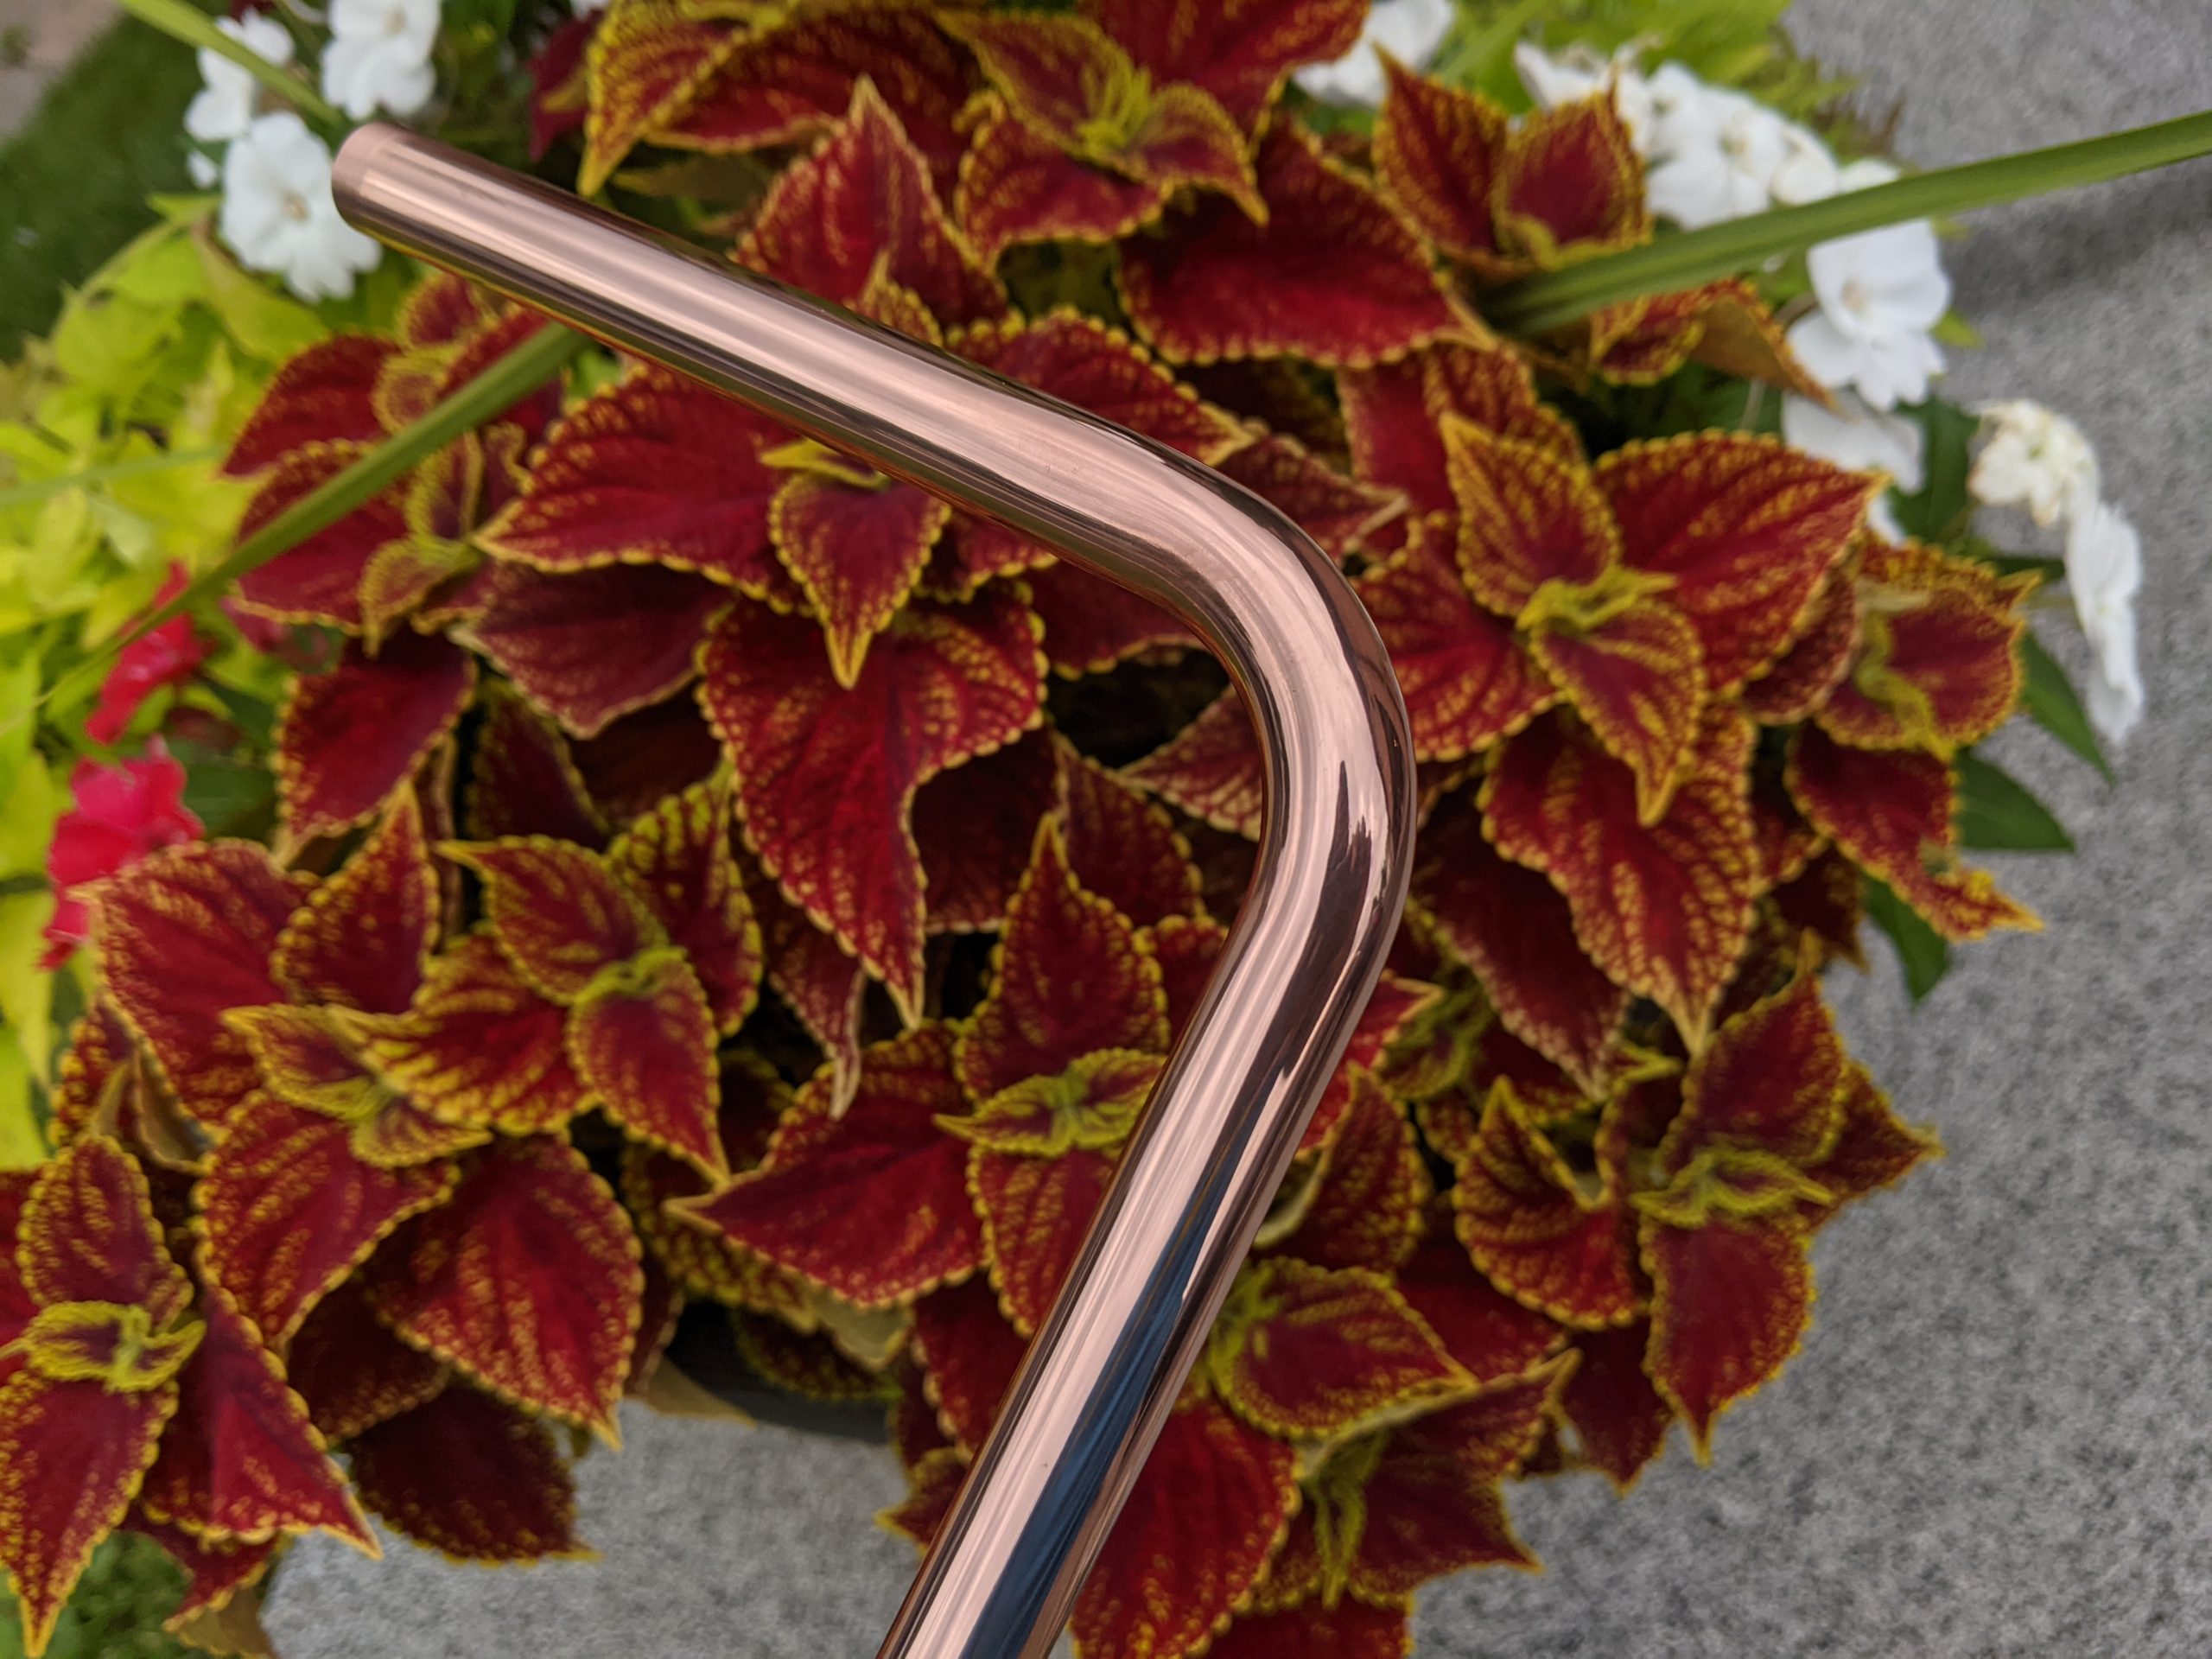
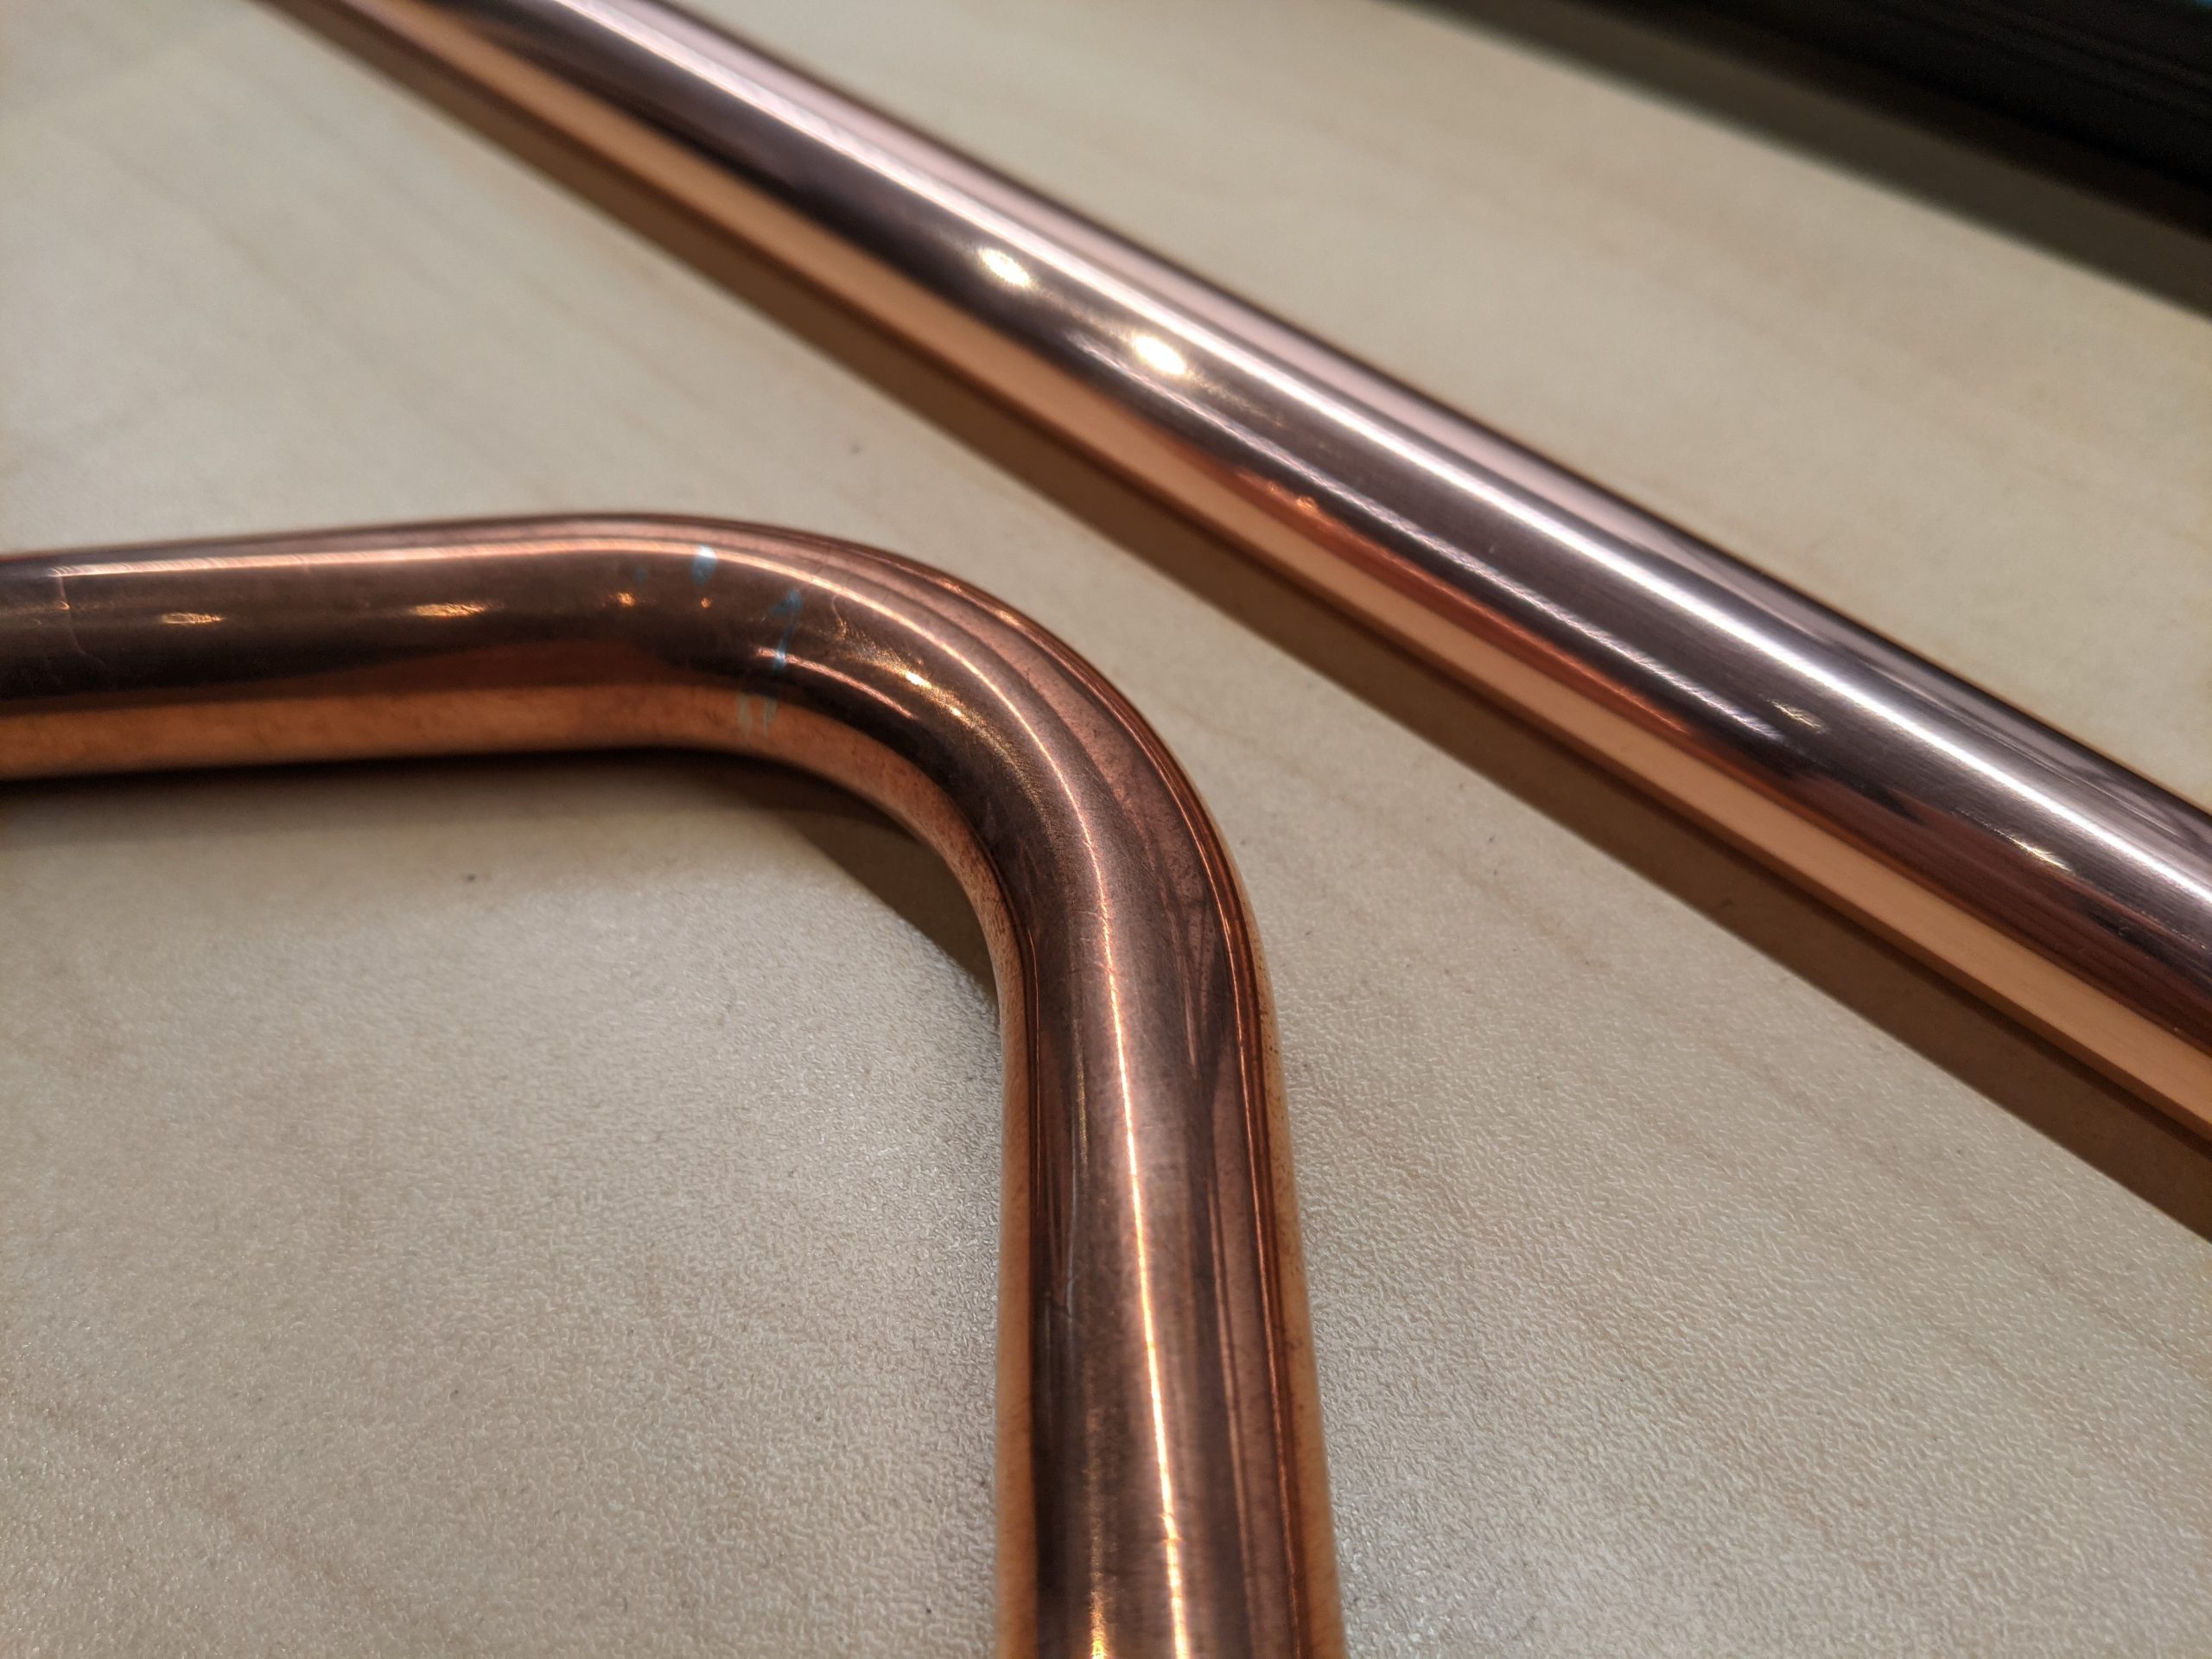
Perhaps the most striking part of this build is the tubing. There was a lot of research and work required to get it in it’s final finish. Barrow TGWG-14 Pre bent 90 degree chrome tubing was used. Copper in it’s raw finish quickly rusts to an undesirable brown color which is the reason why all computer specific tubing will have paint or electroplating on it. Mine came in chrome and looked like below:
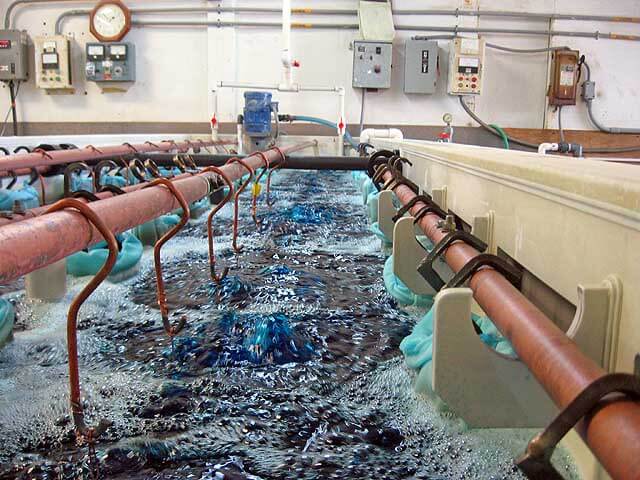
The research began on how to cleanly strip the chrome plating off this otherwise pure copper tubing. The cleanest way would be to get it electrically stripped. I contacted some local electroplating shops and landed on https://www.platinghouse.com/. Upon explaining my project, Mark at the shop was extremely friendly and accommodating. Simply based on the initial interaction I was positive this would be the place to support. He even walked me through the whole process at the shop.
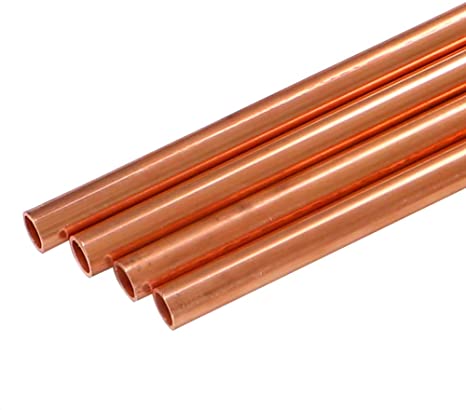
The tubing was wrapped in electric wire and dunked it in a huge bath of electrolyte and after a couple of minutes I was greeted with a beautiful (but rough) pure copper tube. The shop did not allow photographs so here is close to what it looked like
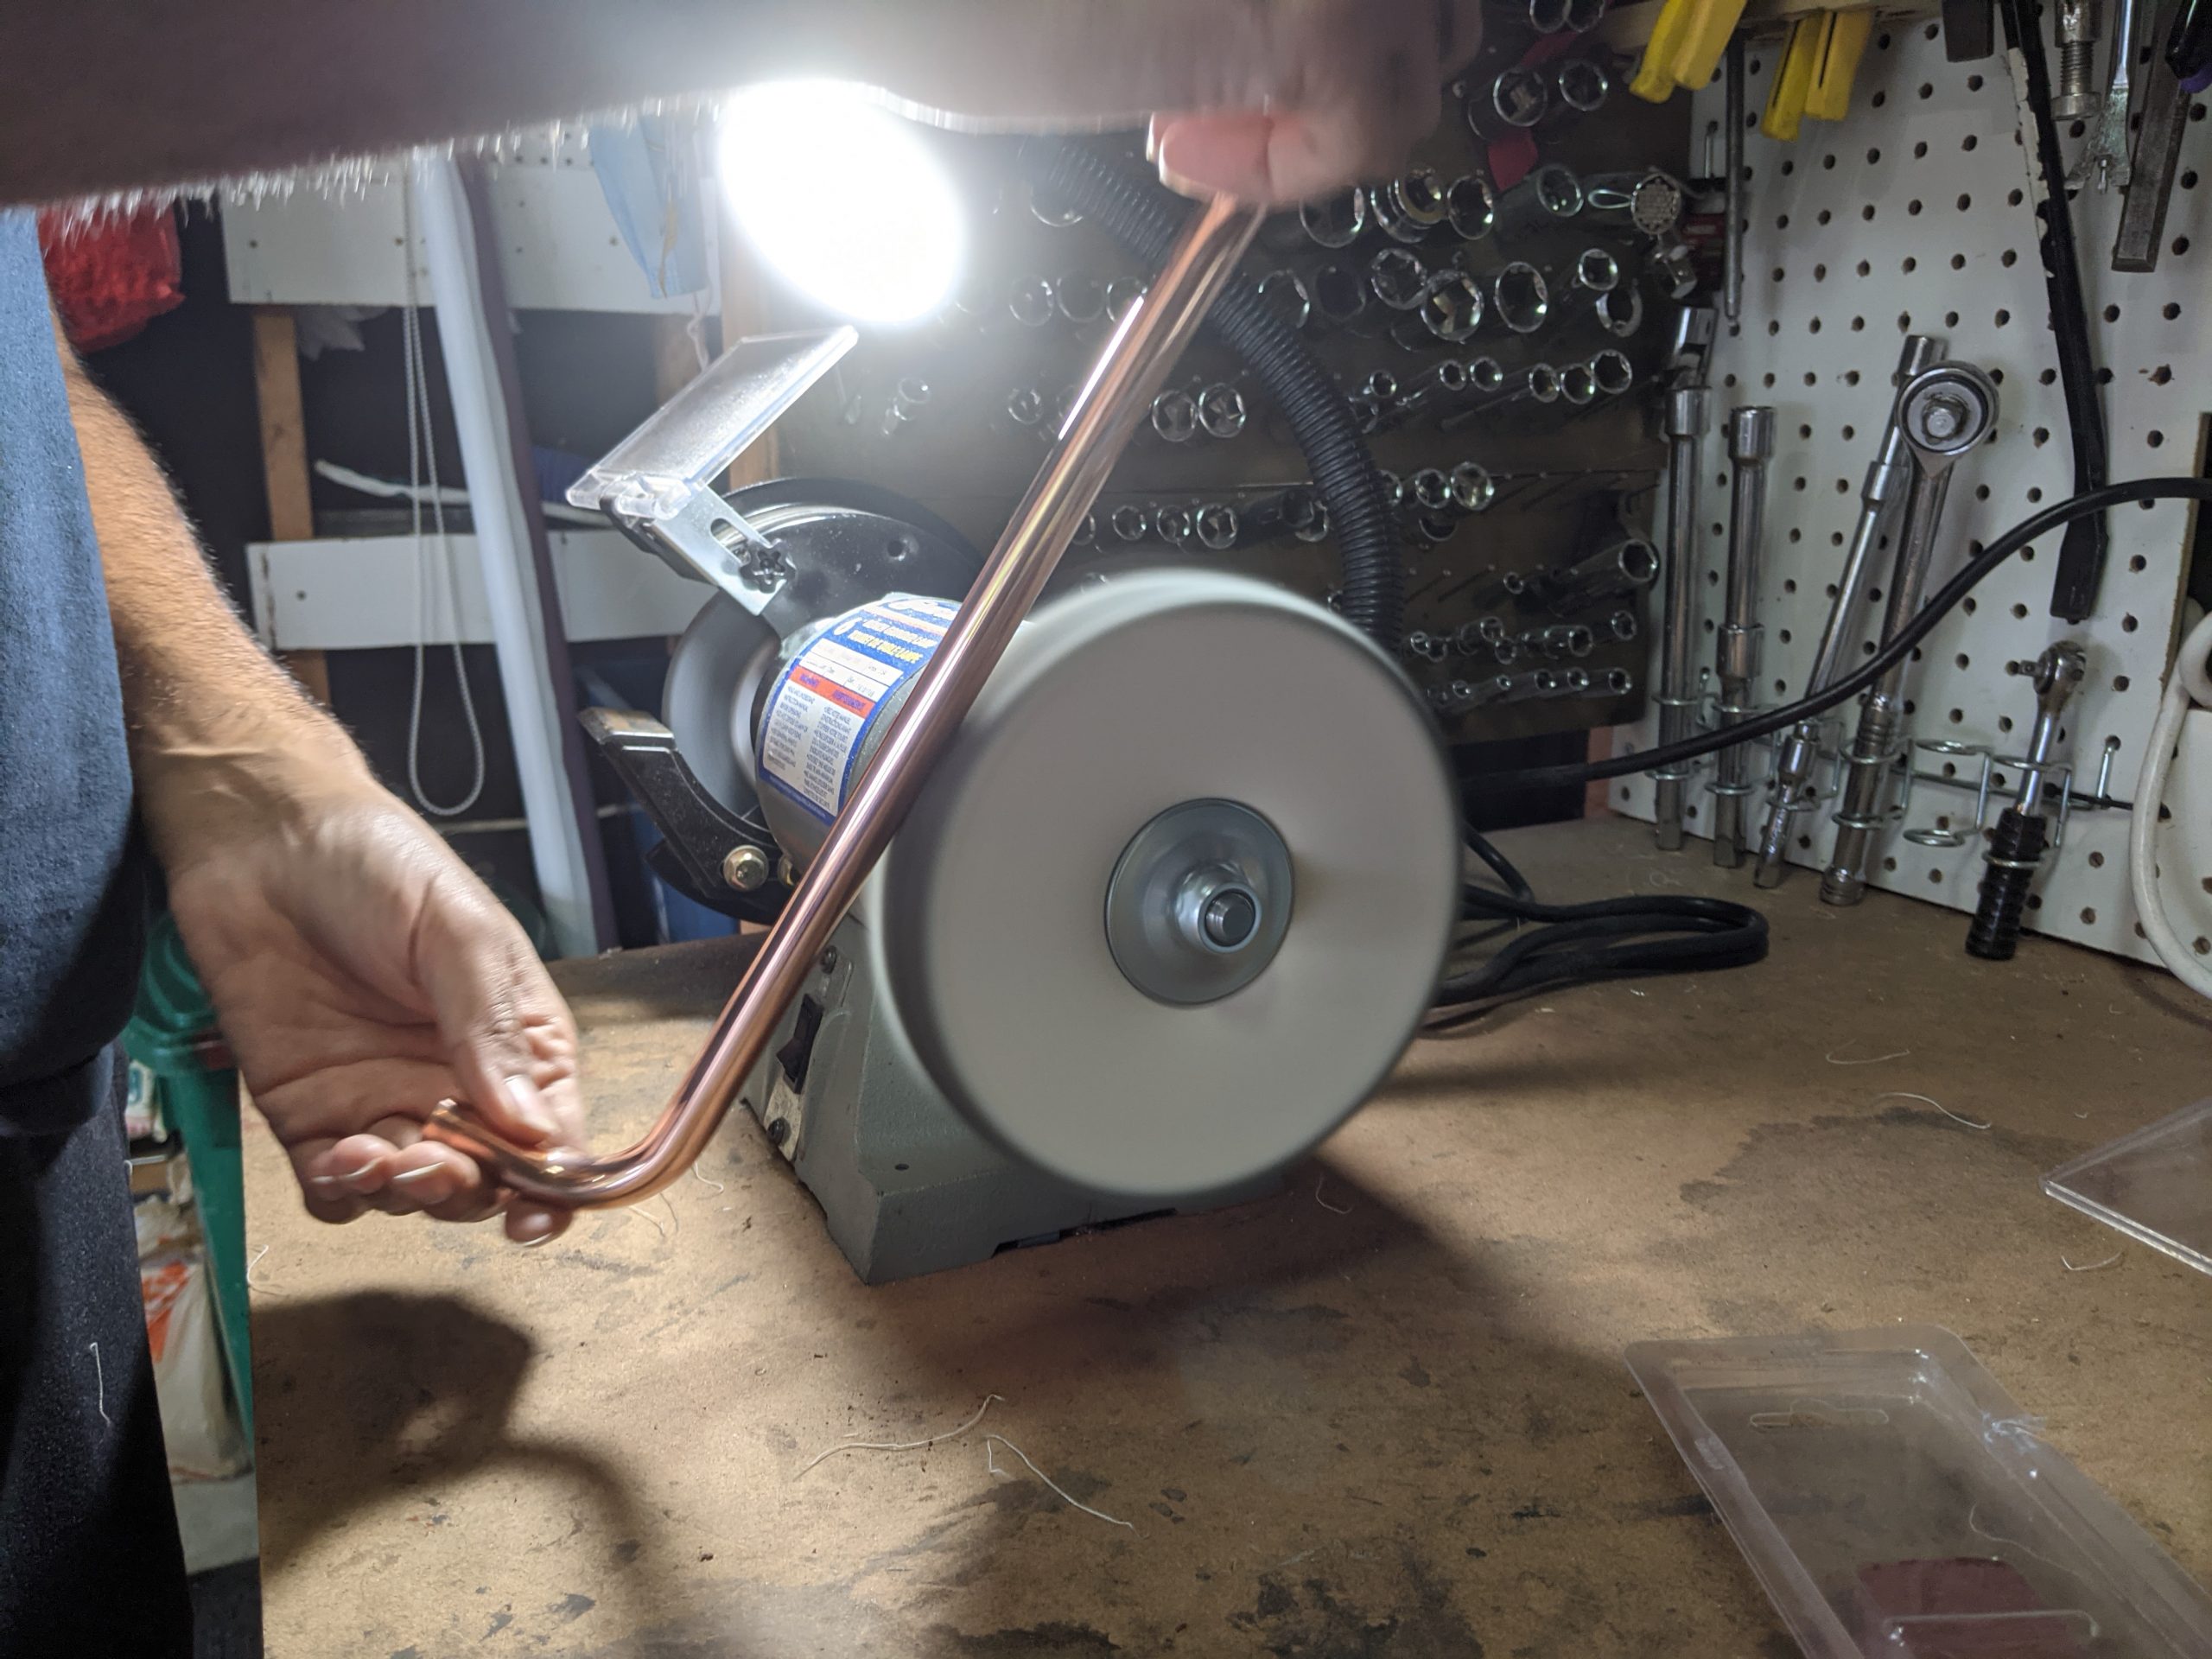
After reverse electroplating, the finish was very rough and had marks from the process. Mark and his team was kind enough to do an initial buffing using a heavy cut polishing compound and show me the process from start to end.
The final mirror shine polish was up to me so I bought a 80 ply unstitched buffing pad for my bench grinder along with red jeweler’s polish. Note that all tubes were measured and cut before this process. Video below shows how I did the final polish.
Here is a closer shot of buffing. It is a time consuming but pretty fun process
Finished product
Next step is to seal the tubes using two coats of Everbrite’s ProtectaClear solution. The ends were masked 10mm as it would be inserted into the water cooling fittings.

This is what happens to a unprotected copper tube after about one week Right: Polished and sealed Left: Polished and left unsealed.
Installing them
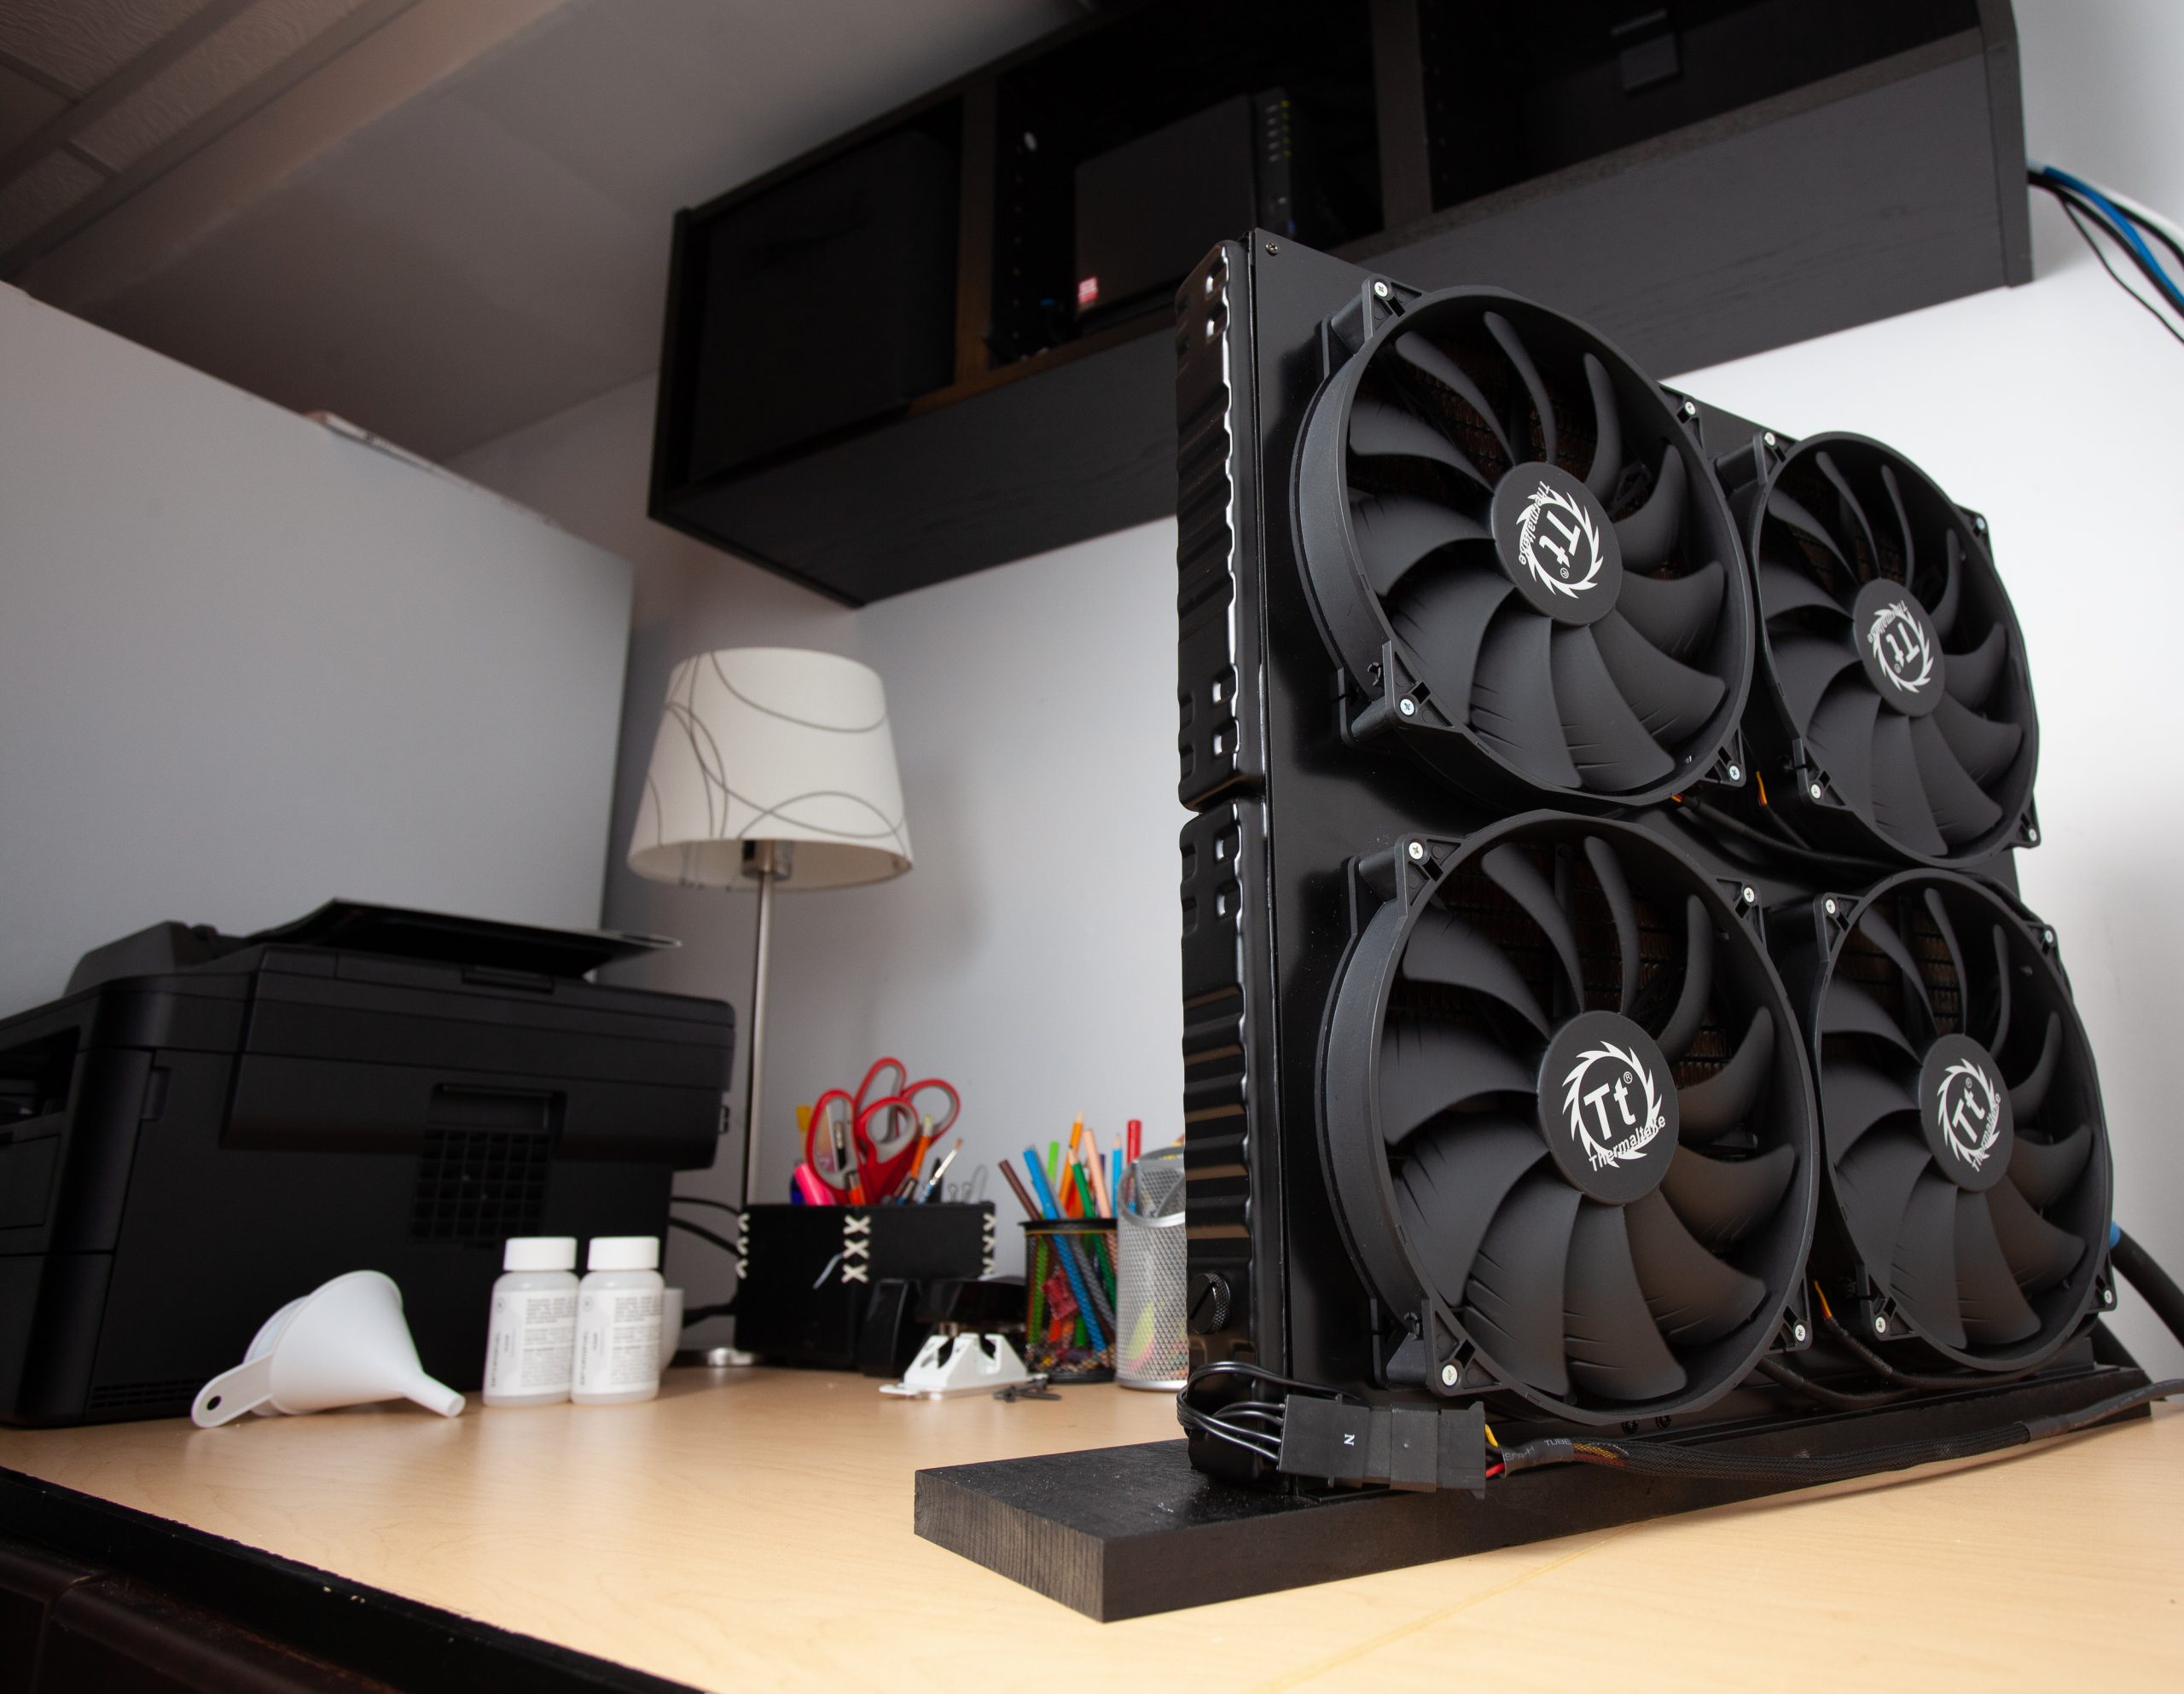
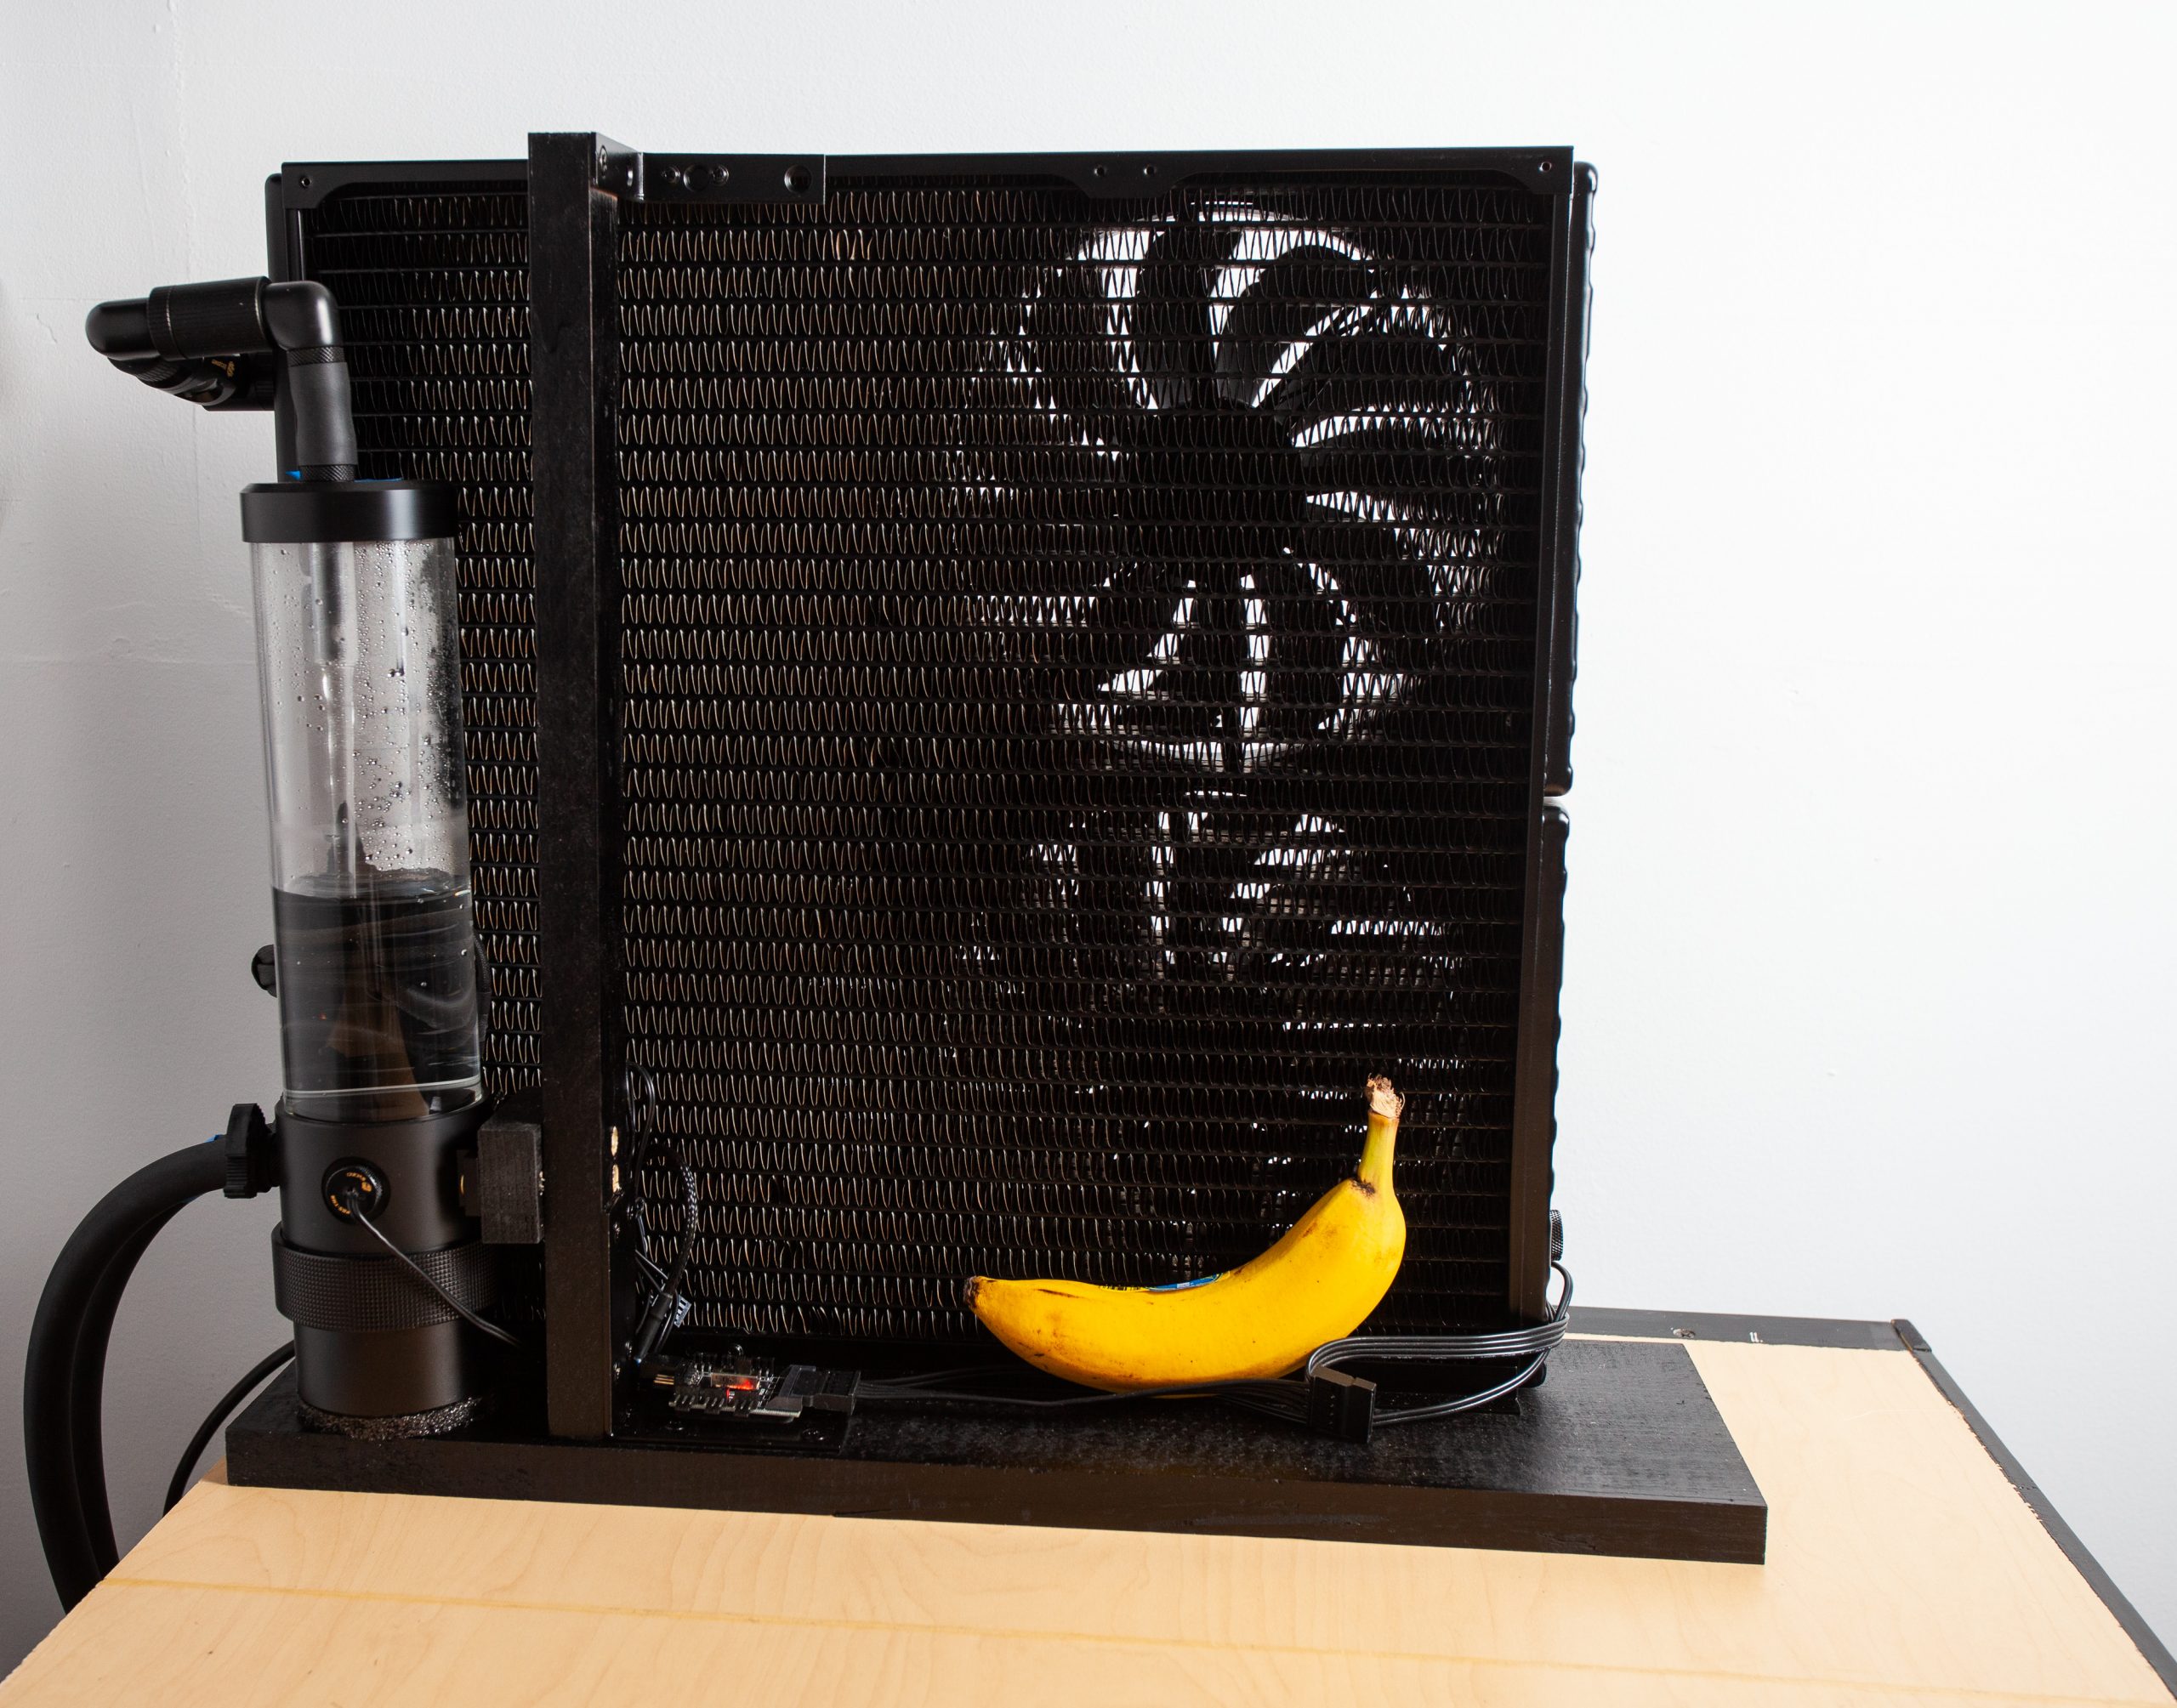
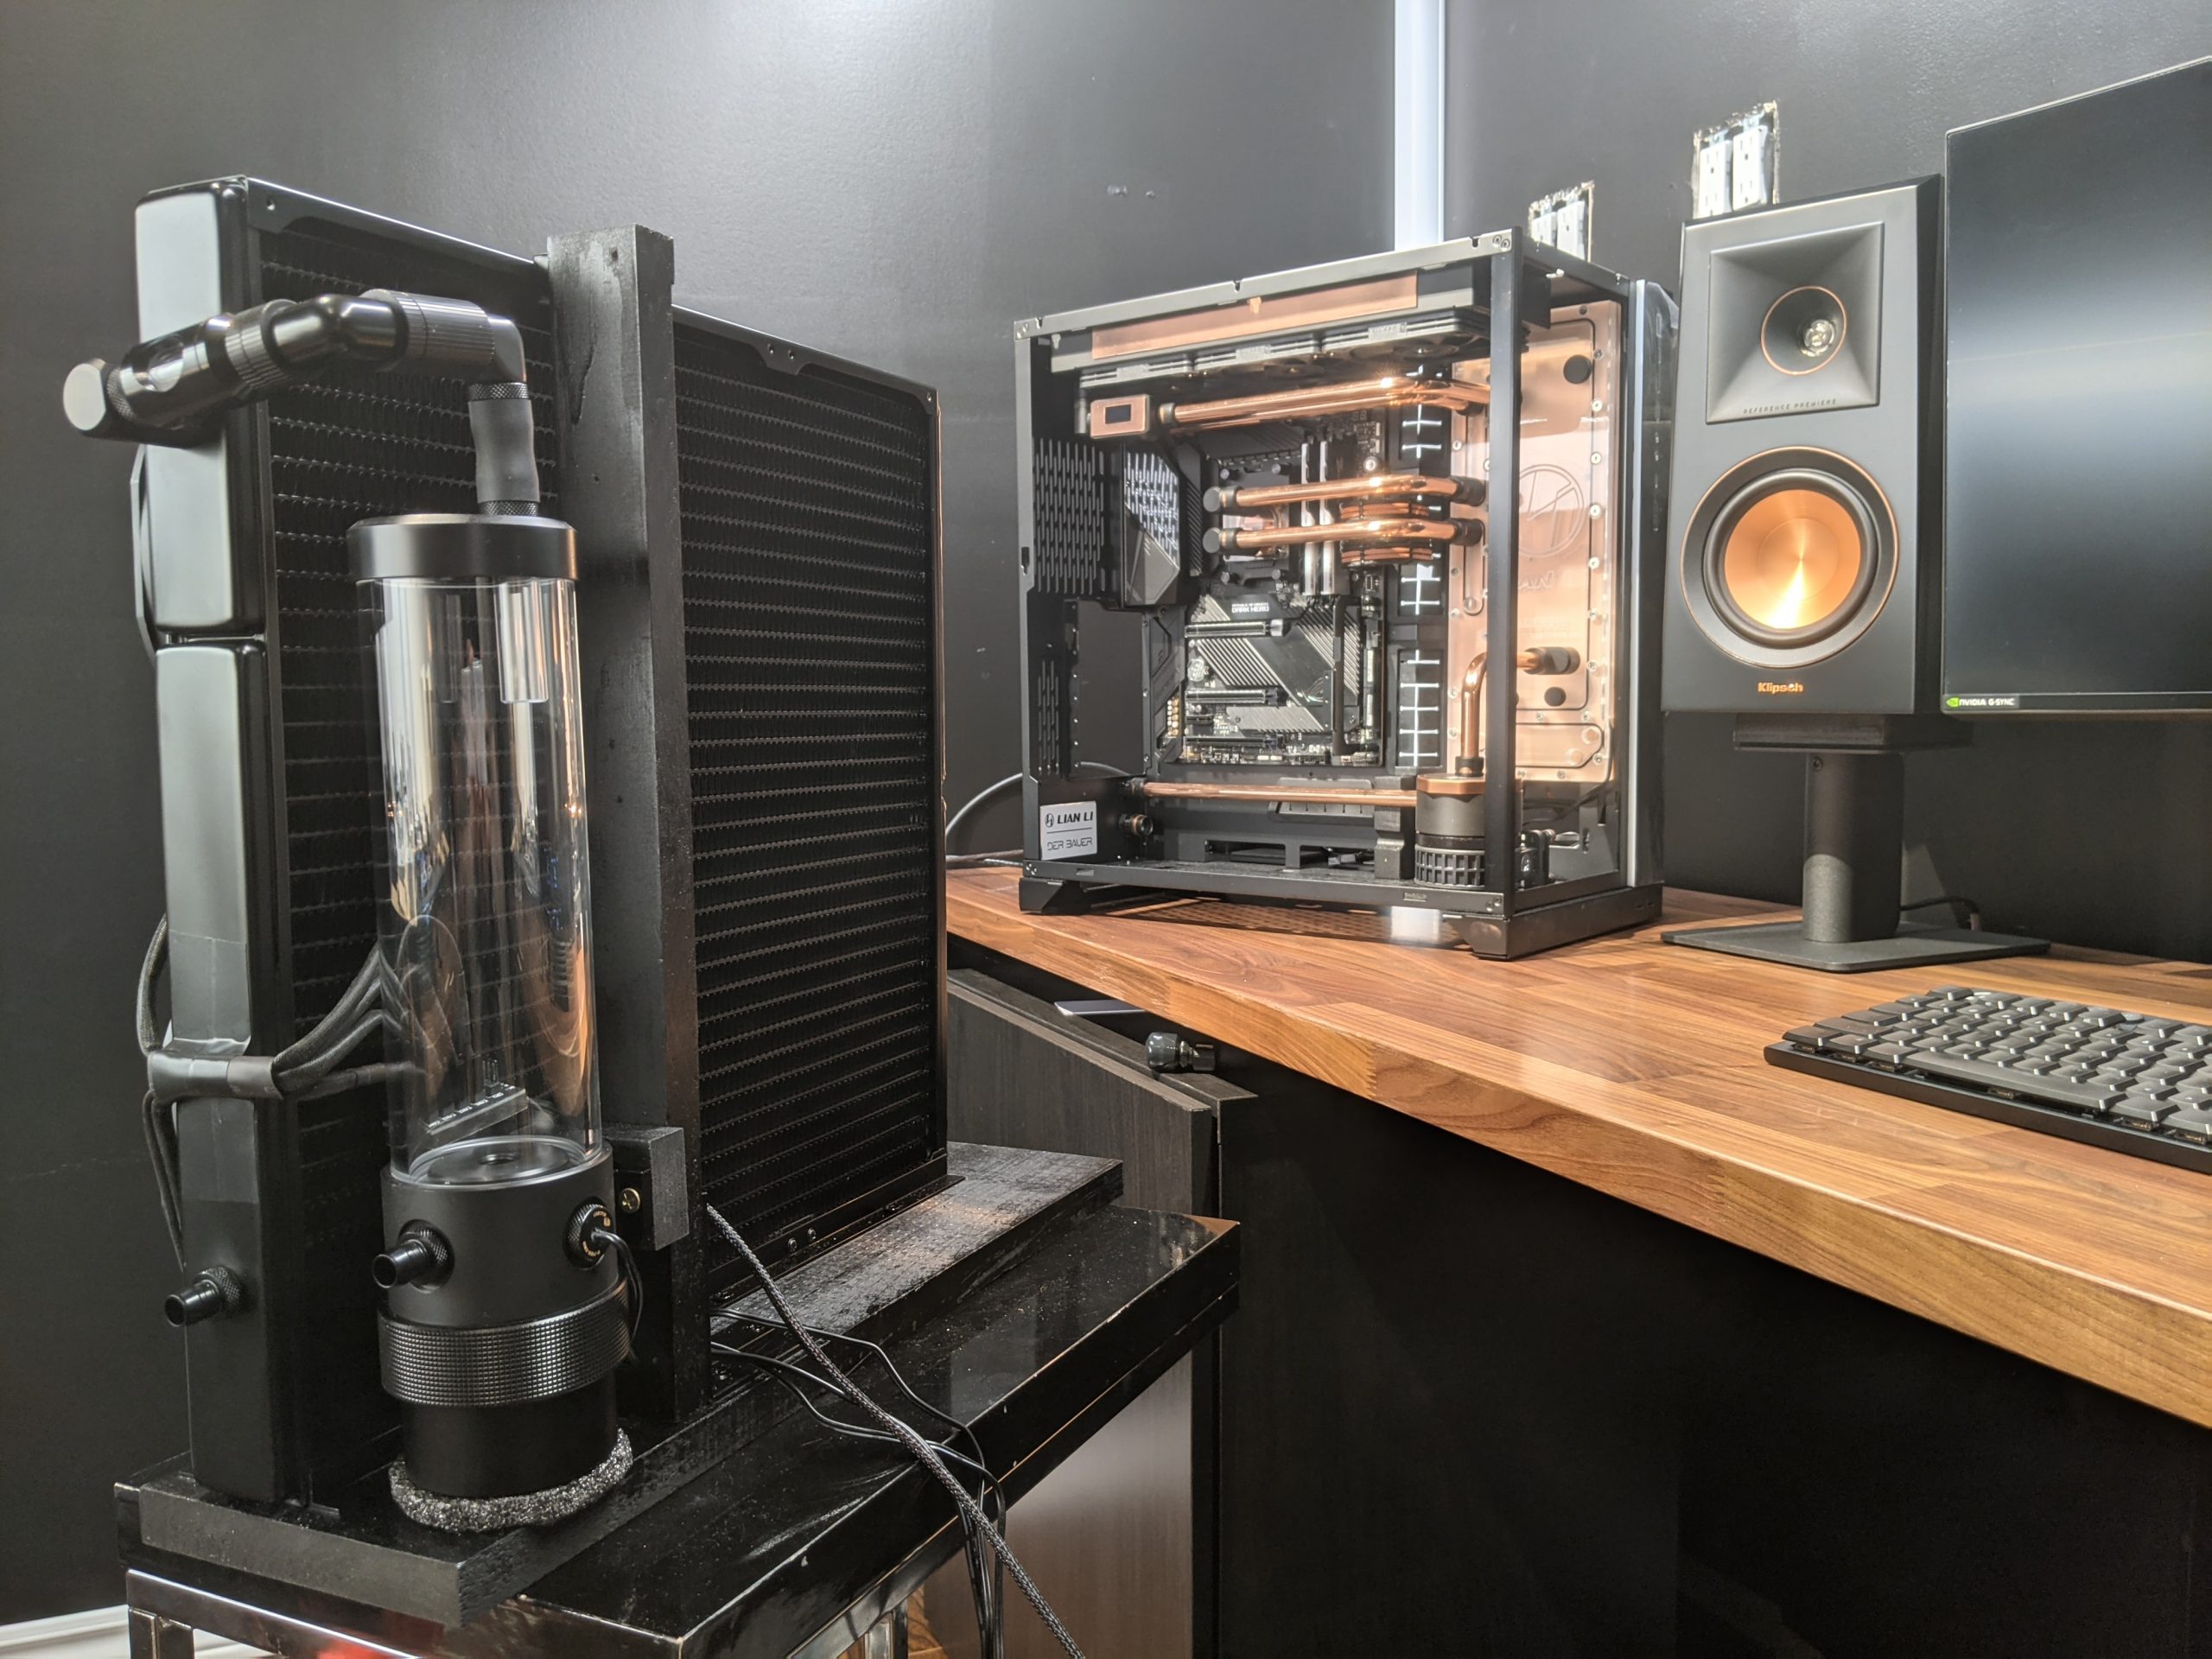
External Unit
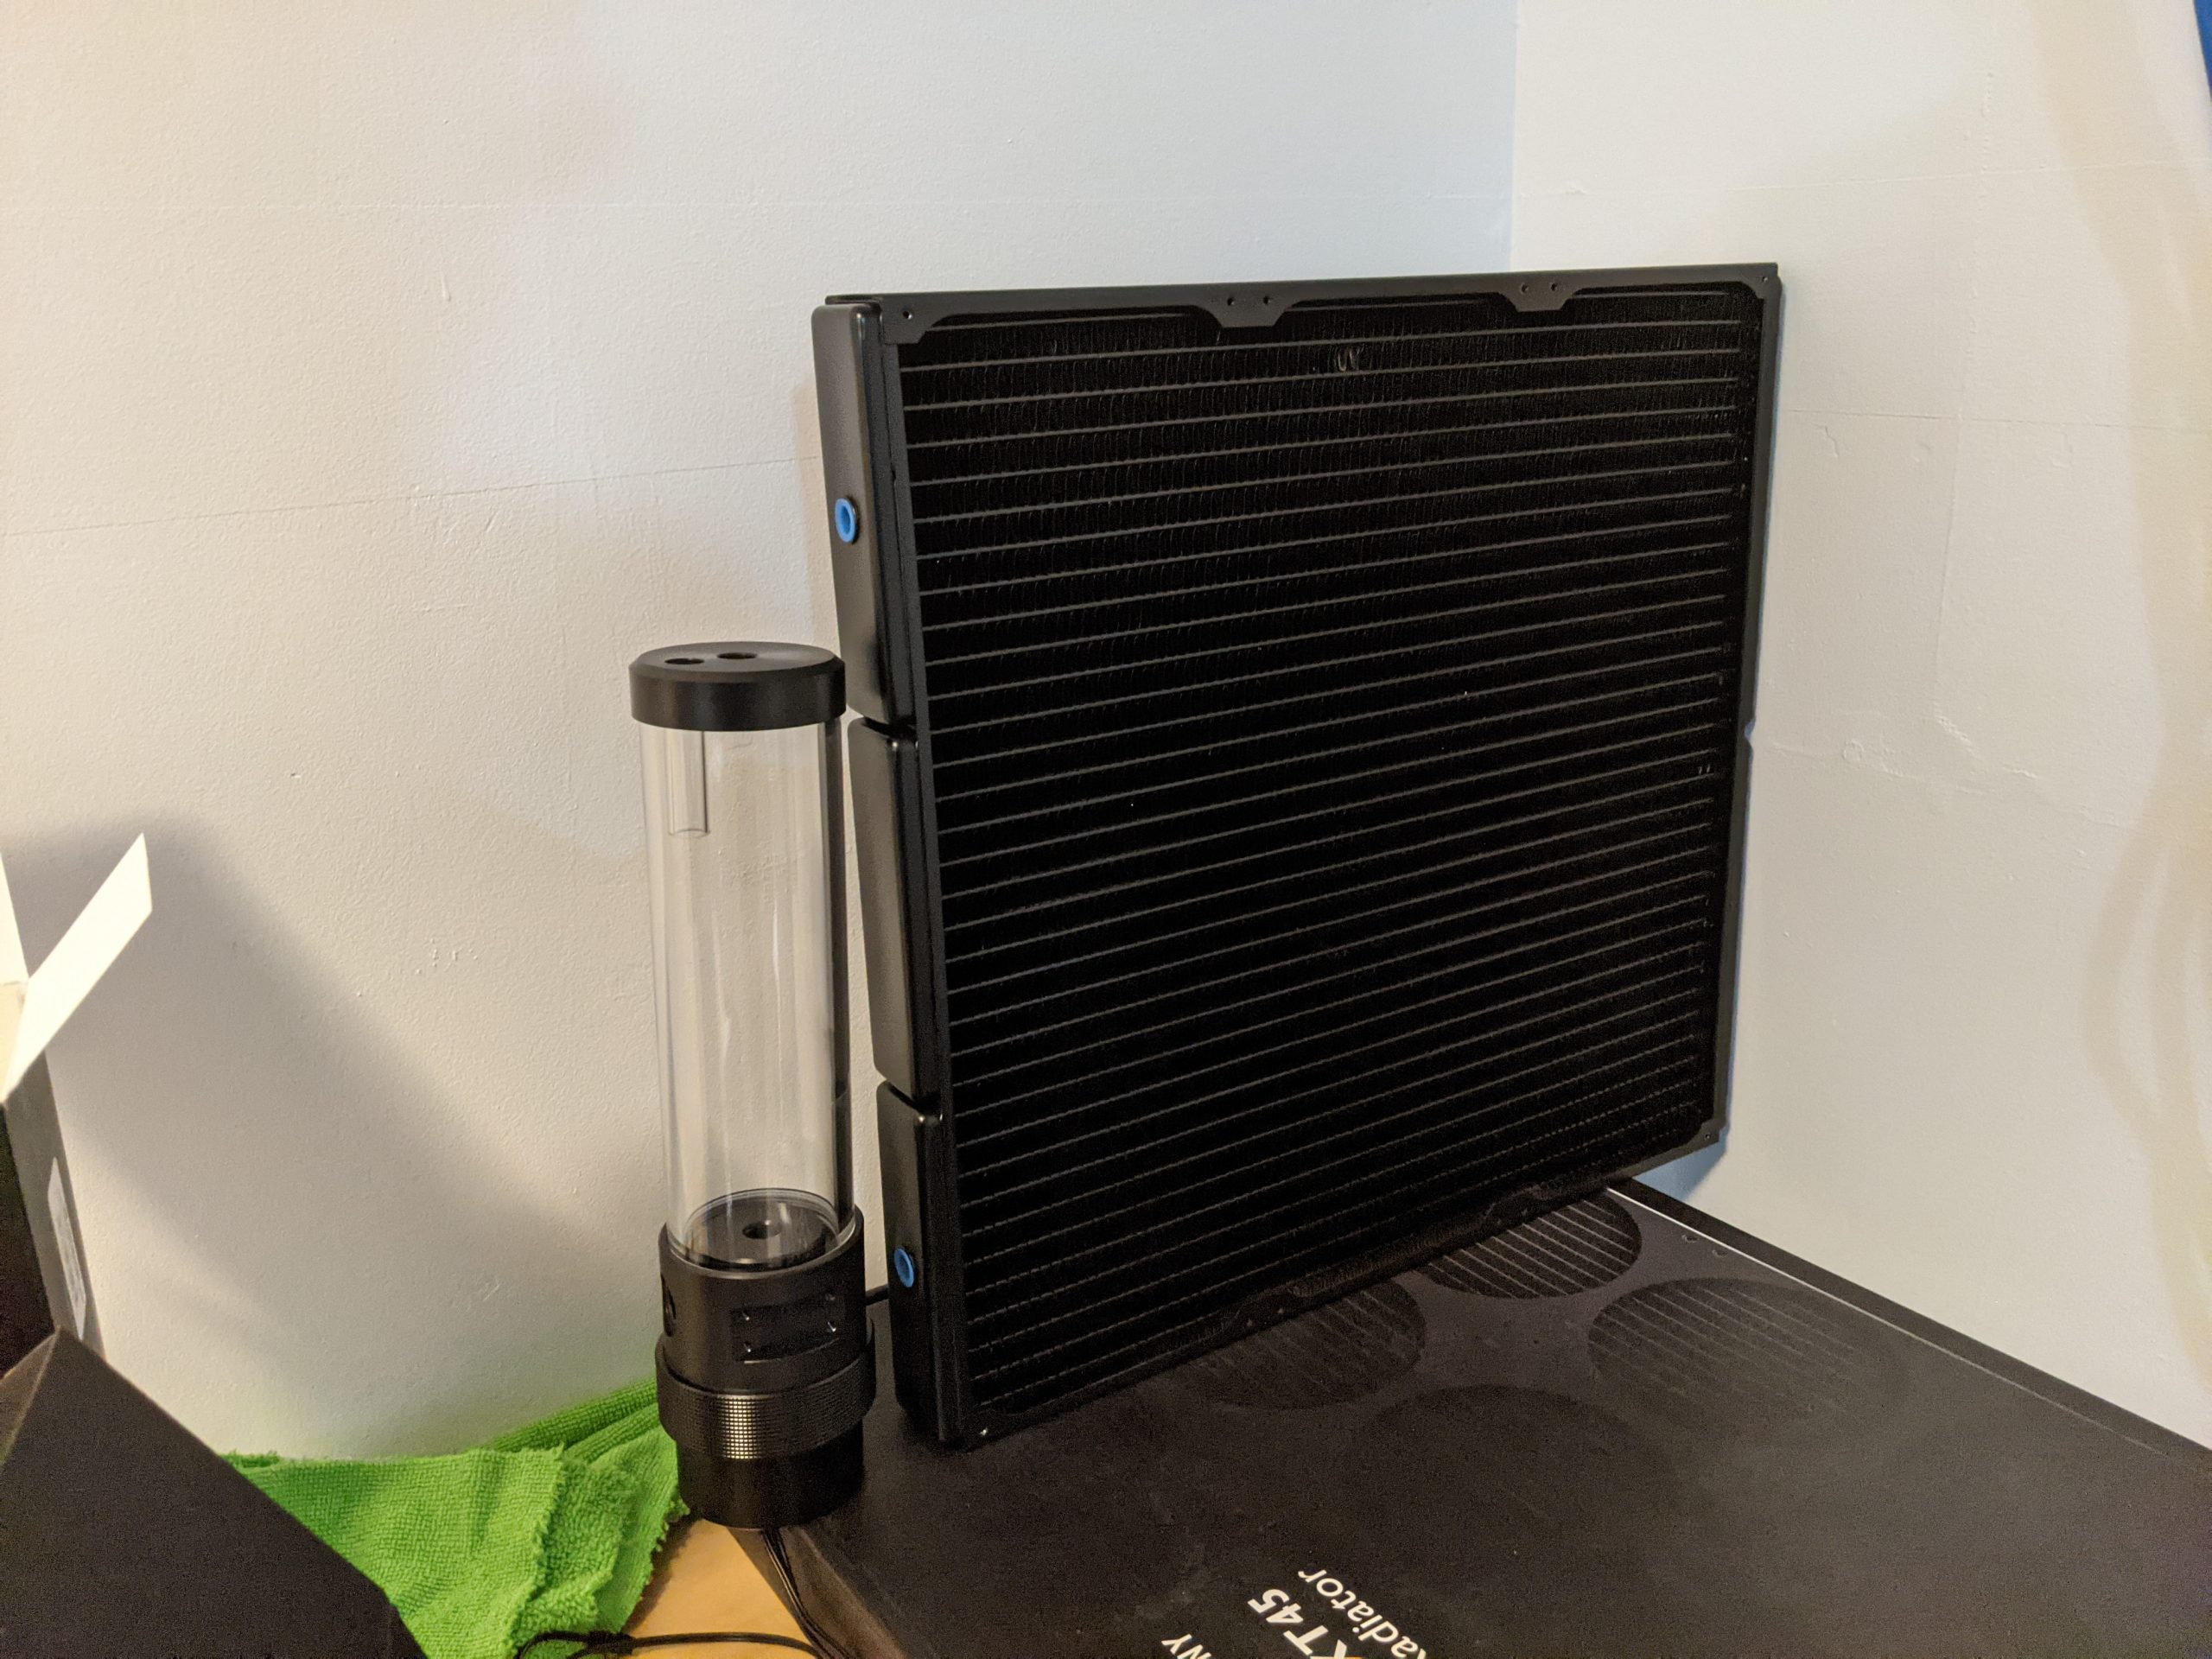
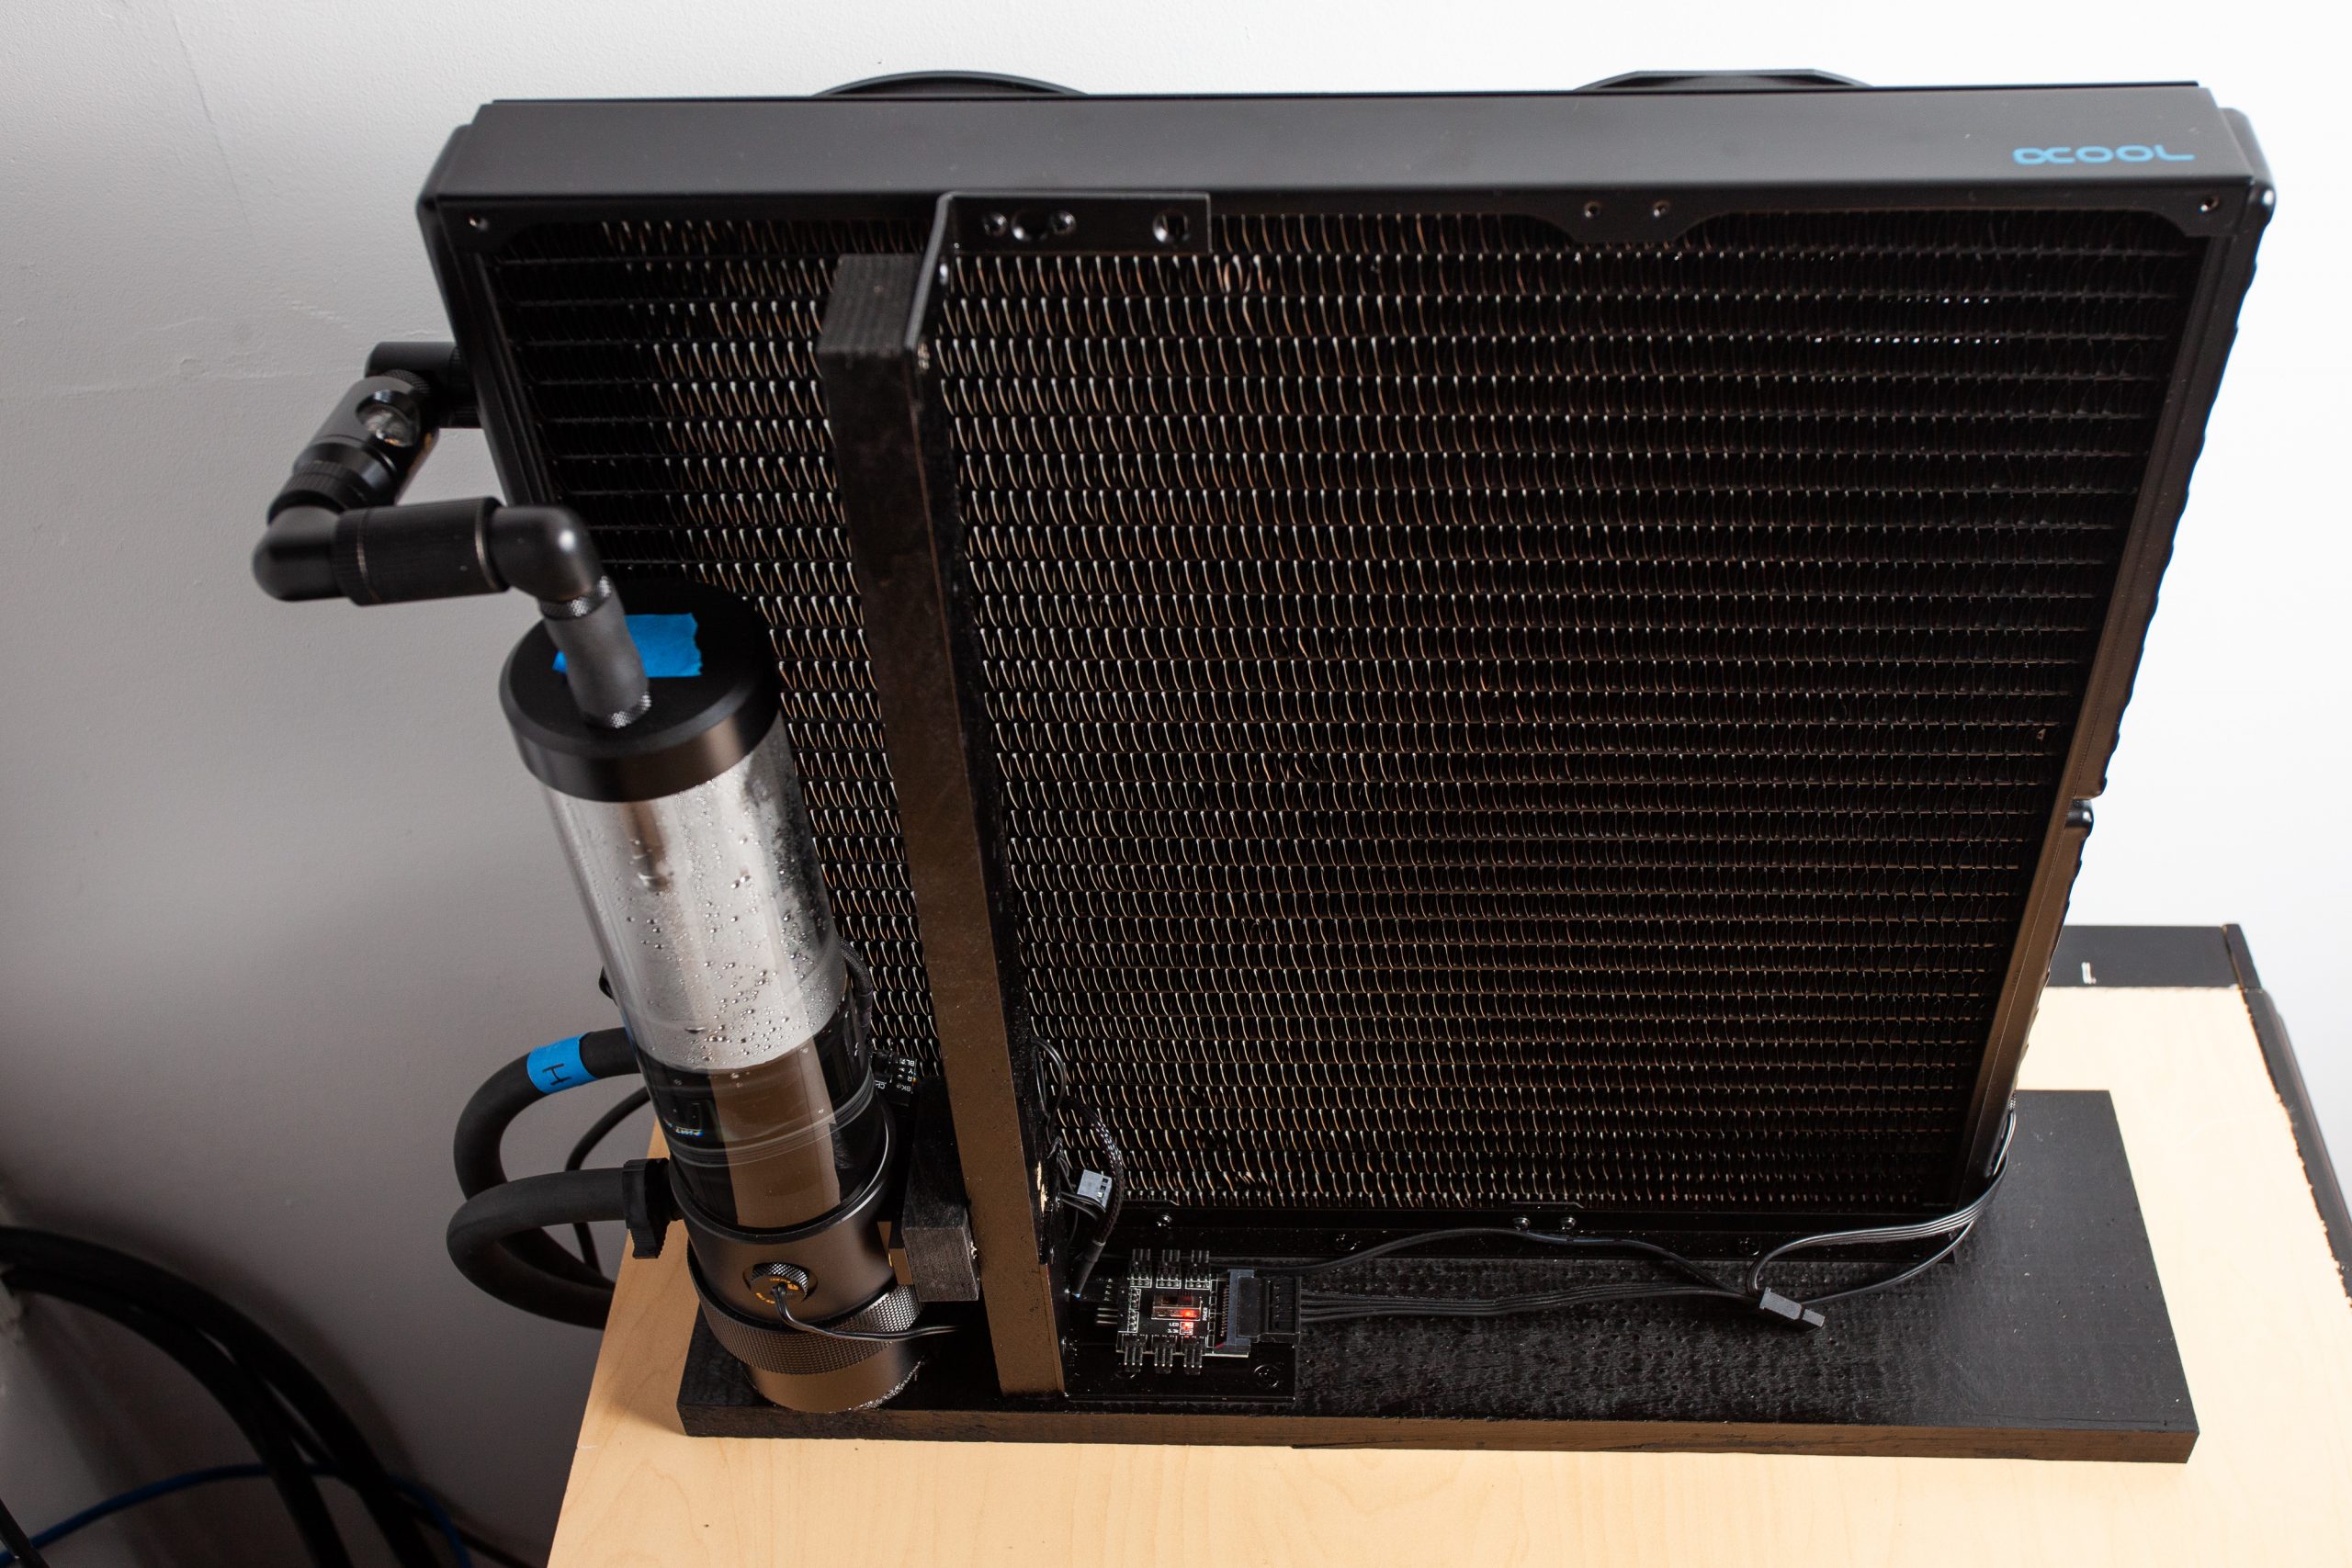
The beast behind majority of the cooling is this Alphacool NexXxoS XT45 Full Copper 1260mm Super Nova Radiator. It is the biggest computer specific radiator I have seen. Most people use the MORA-3 but I decided to get this instead as it was cheaper. This unit does not have to look aesthetically pleasing because it will be living in a different room outside the office. The problem with this radiator is that there are no mounting options so I had to get creative and design something myself. It started with mounting aluminum L brackets to the radiator.
This contraption was born to hold the pump reservoir combo and the radiator in a small package.
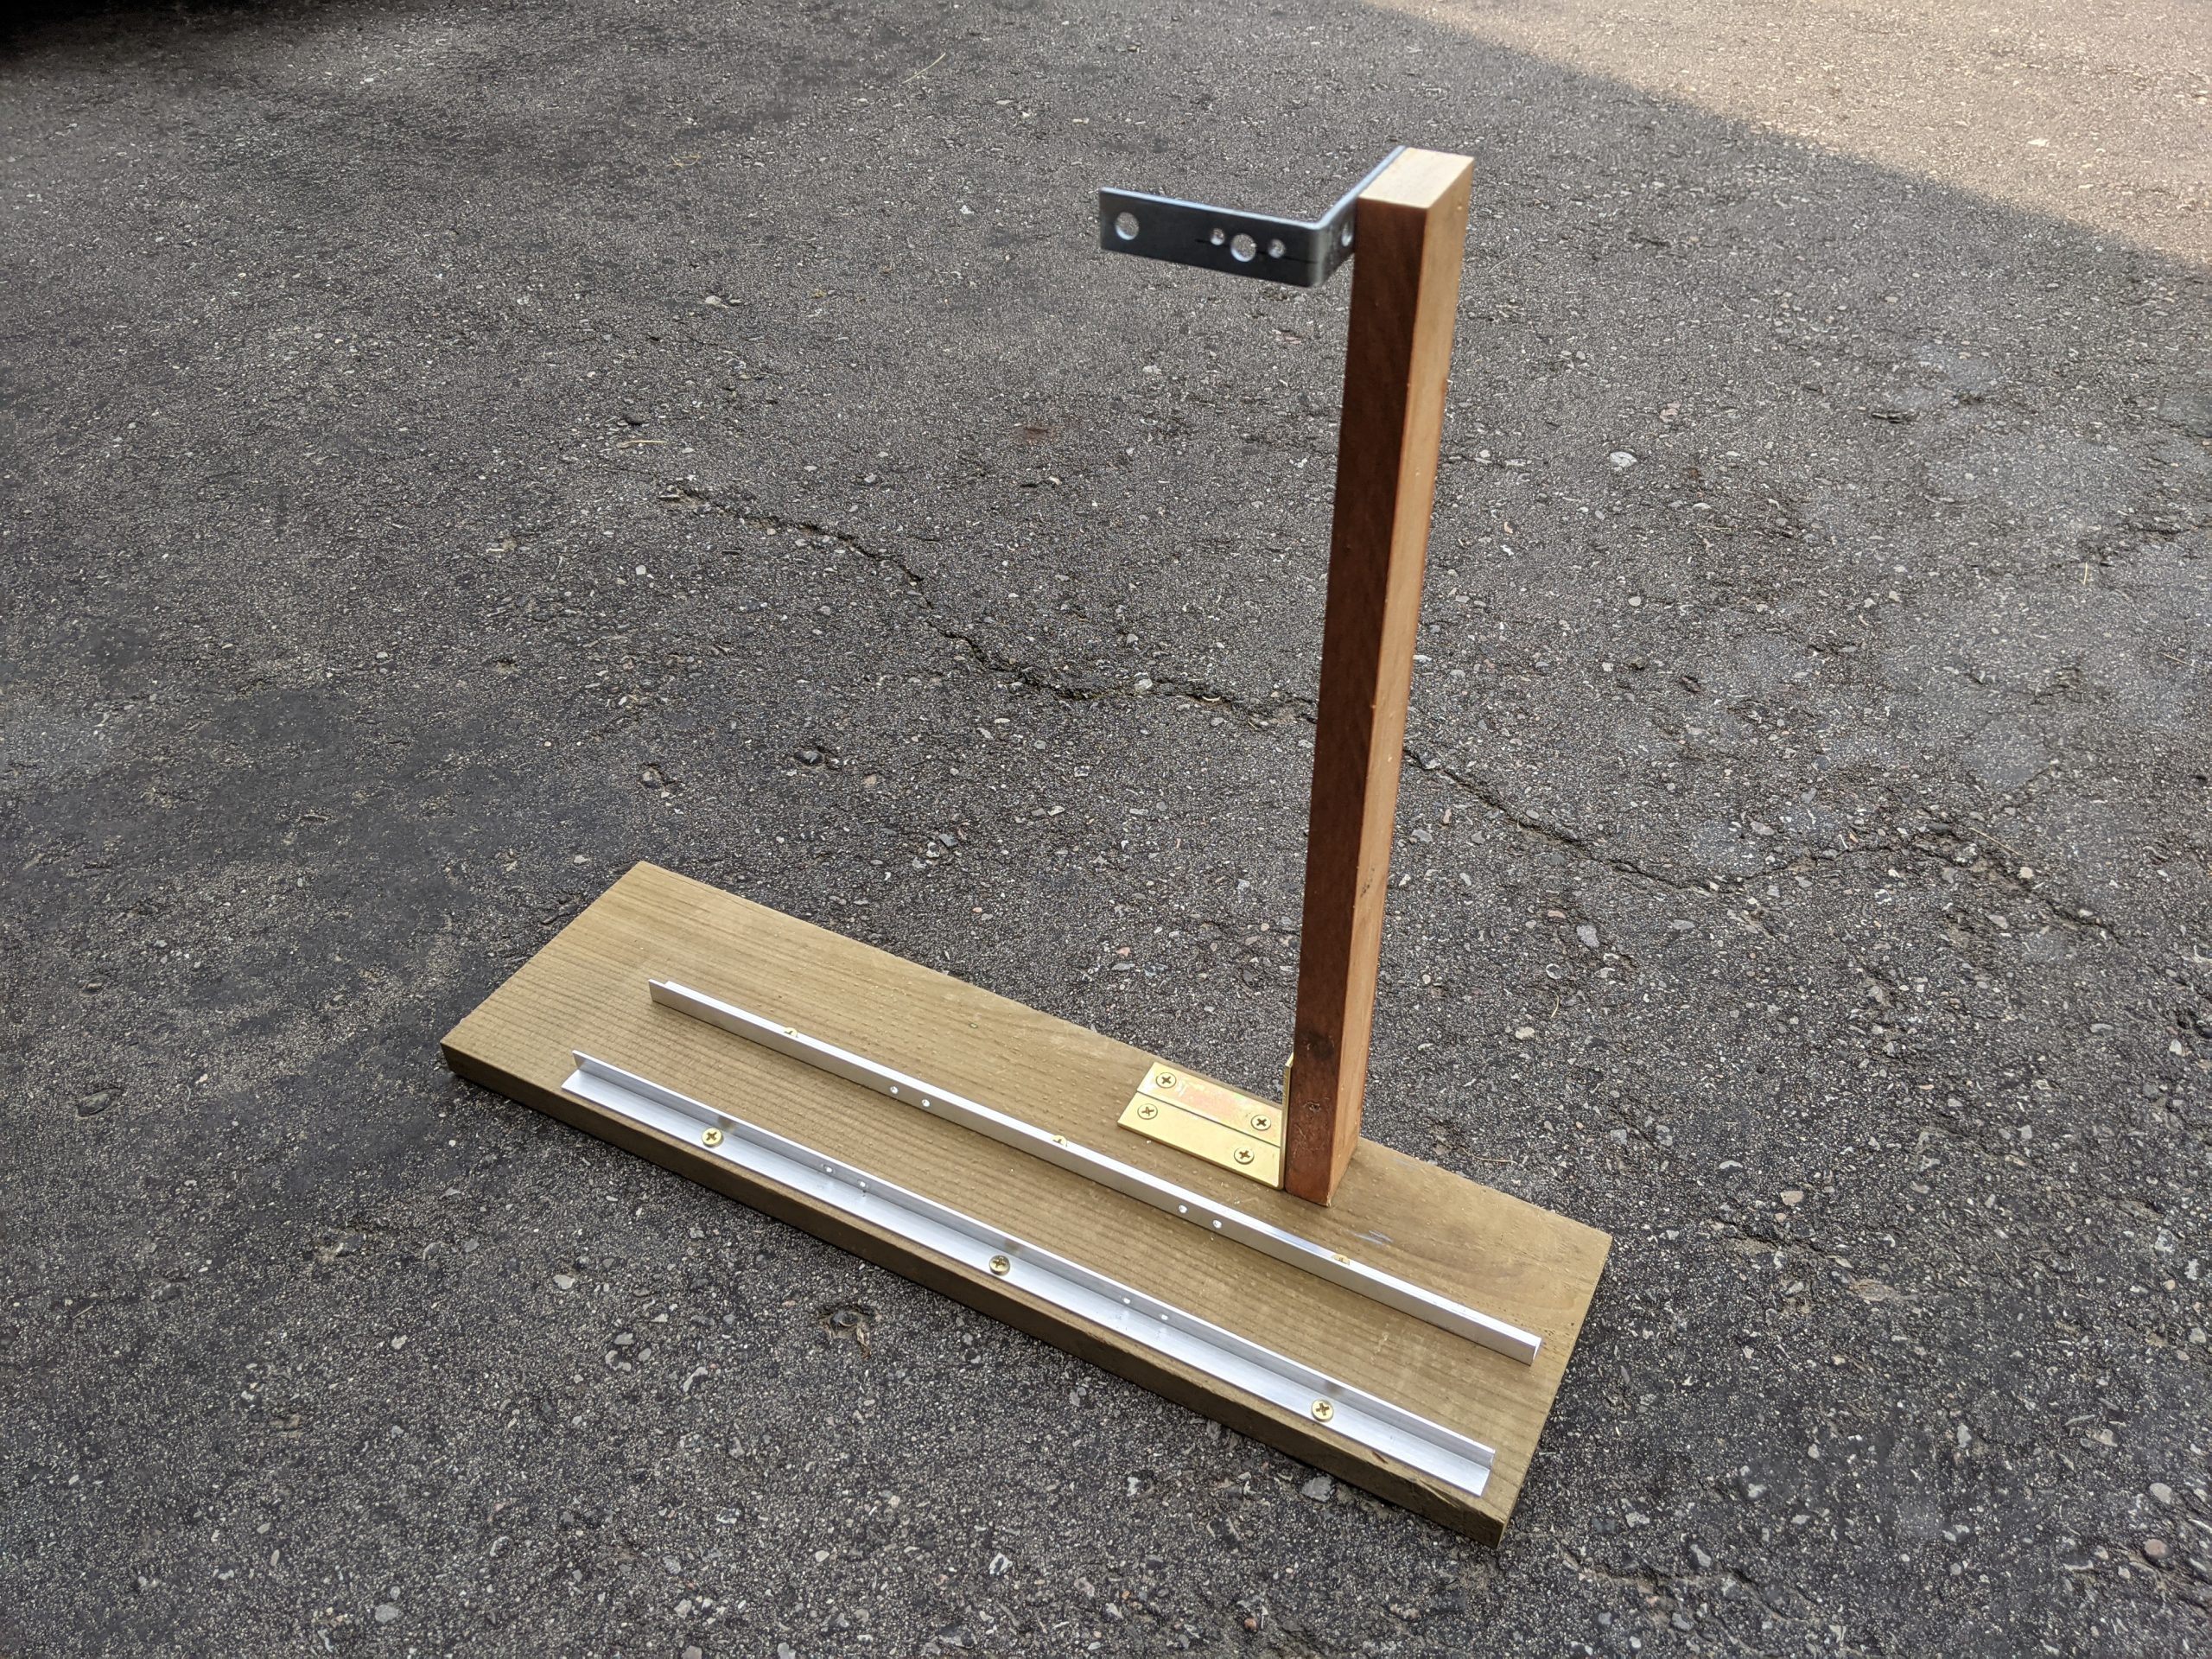
Vertical piece of wood is there for mounting the external pump and reservoir combo
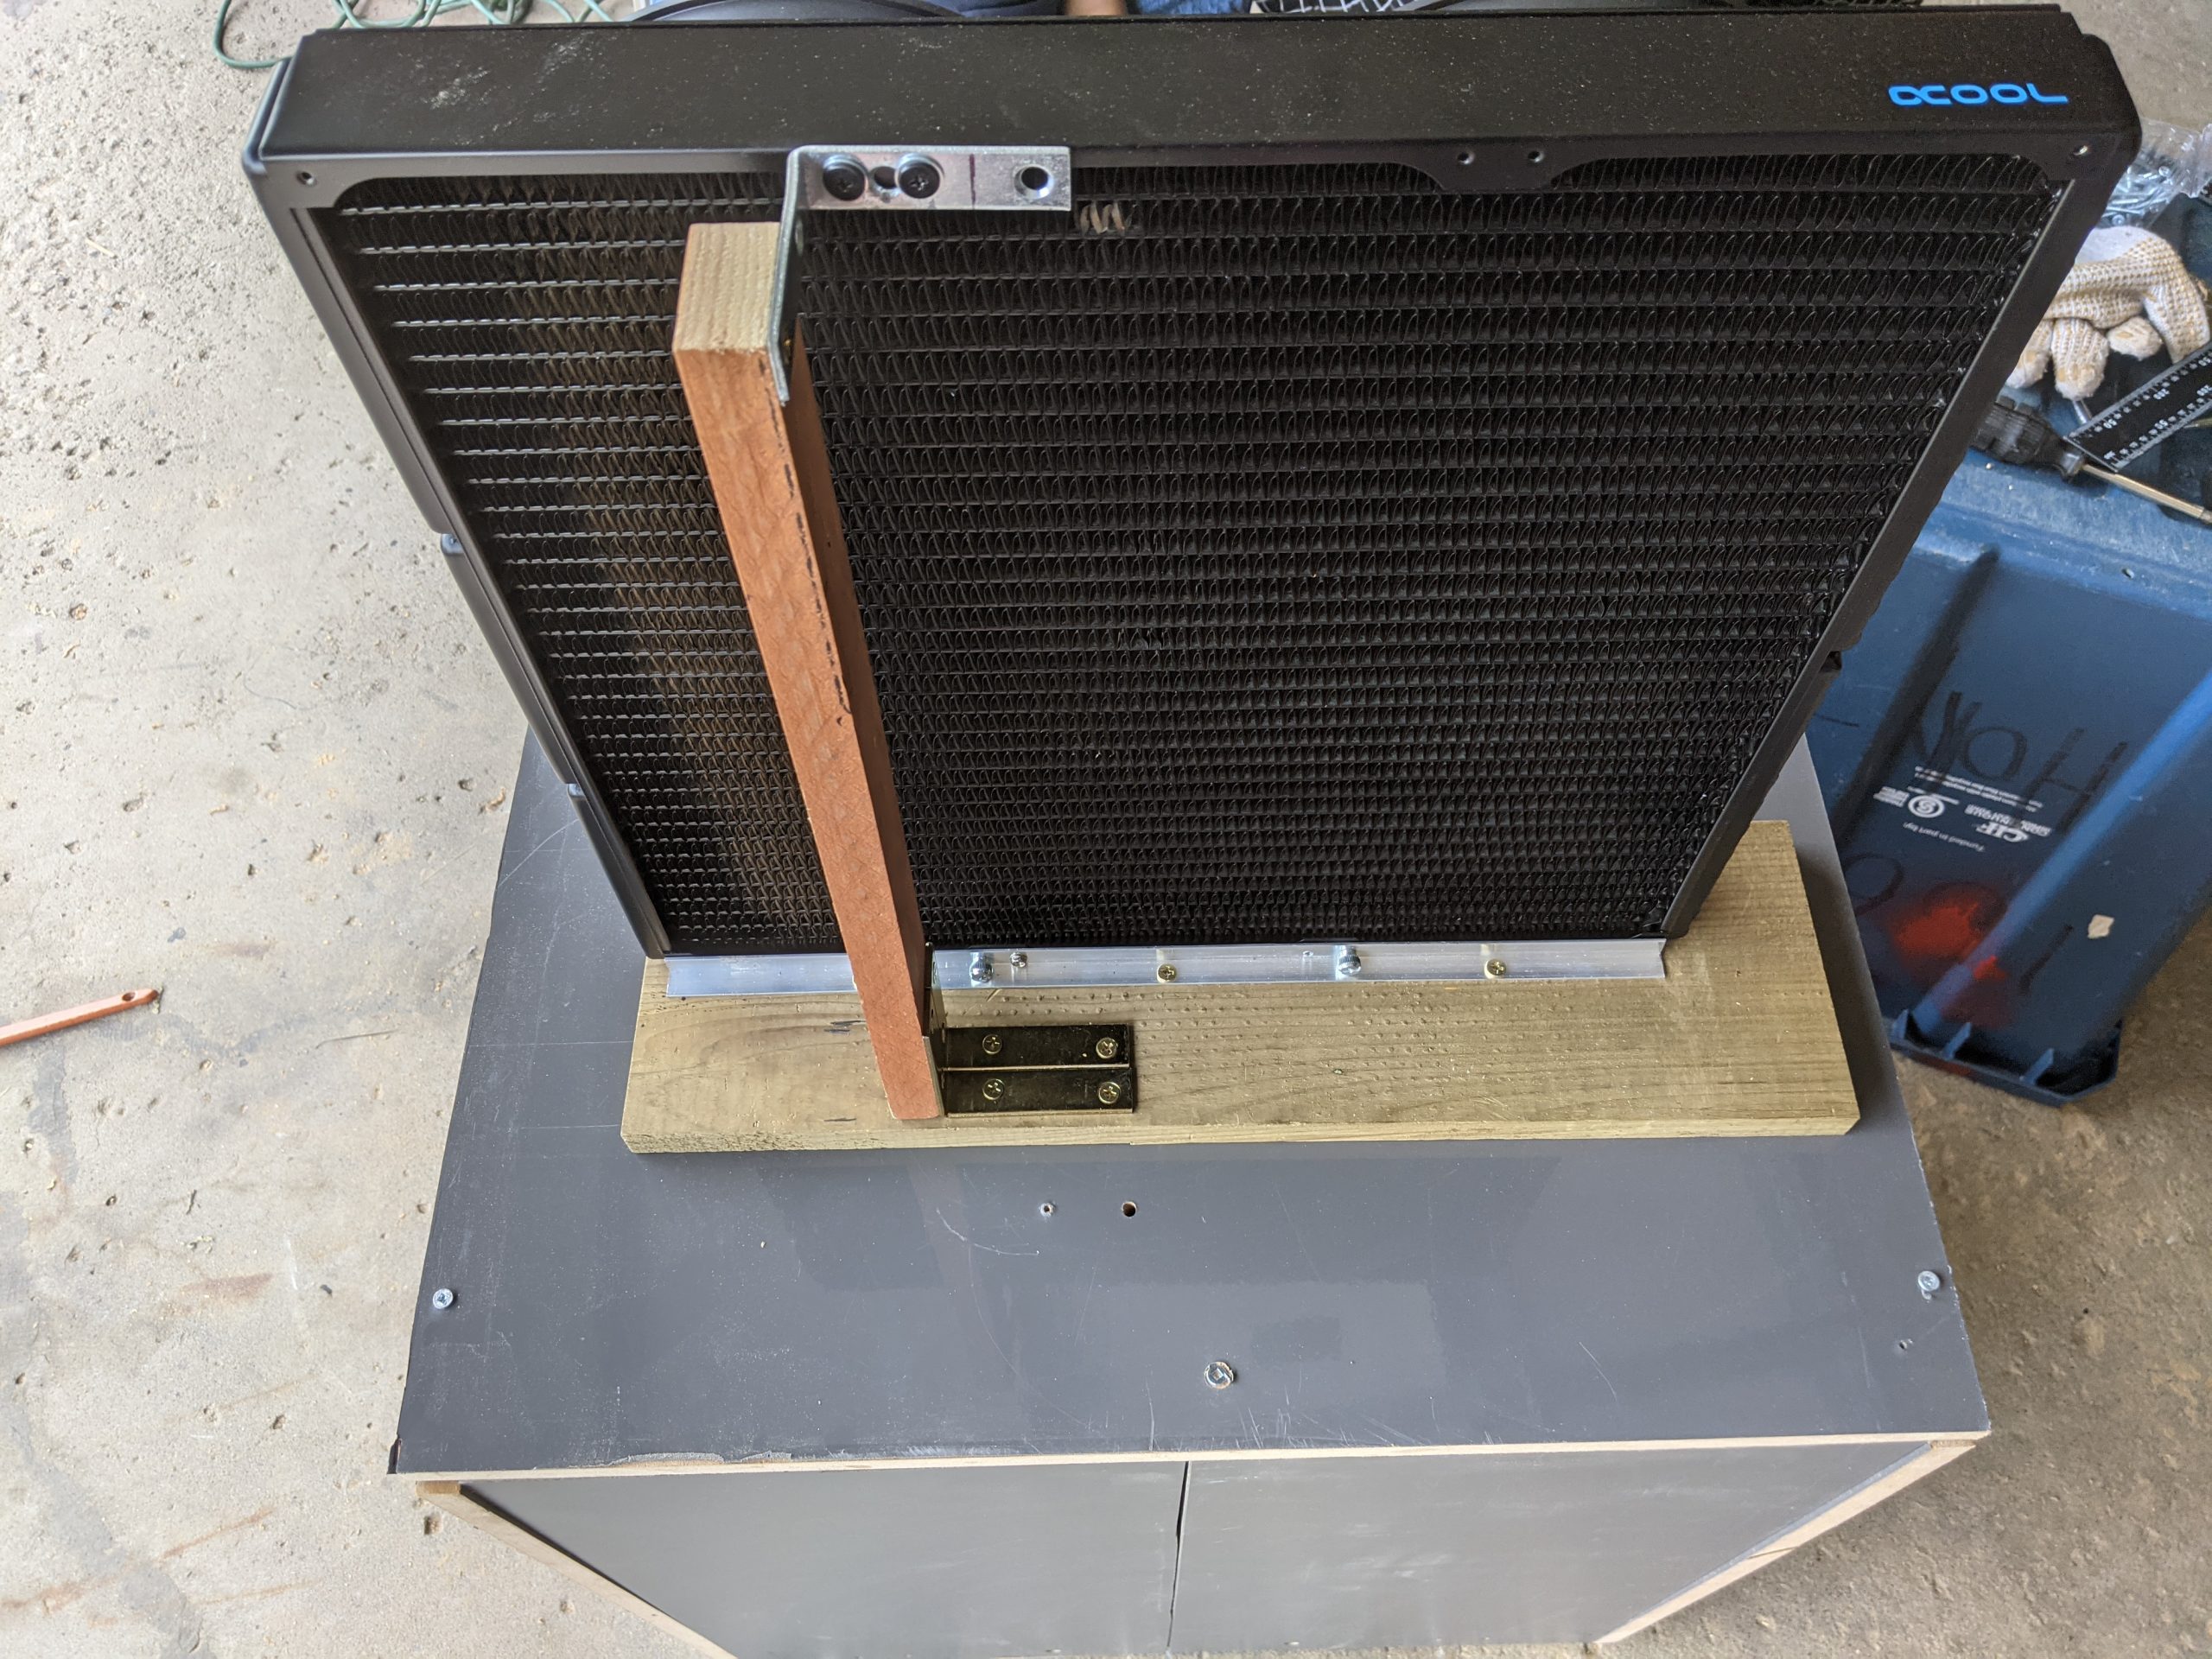
Painted black and assembled. There is a bitspower inline filter in there to catch any contaminants in the loop

ZMT Galore
To have the external cooling unit in another room I used 12 meters of 10/16mm EK ZMT (6 meter one way). ZMT stands for Zero Maintenance Tubing made of EPDM. As the name suggests it is popular for being the most stable rubber which does not release plasticizers or other contaminants in a water cooling loop.
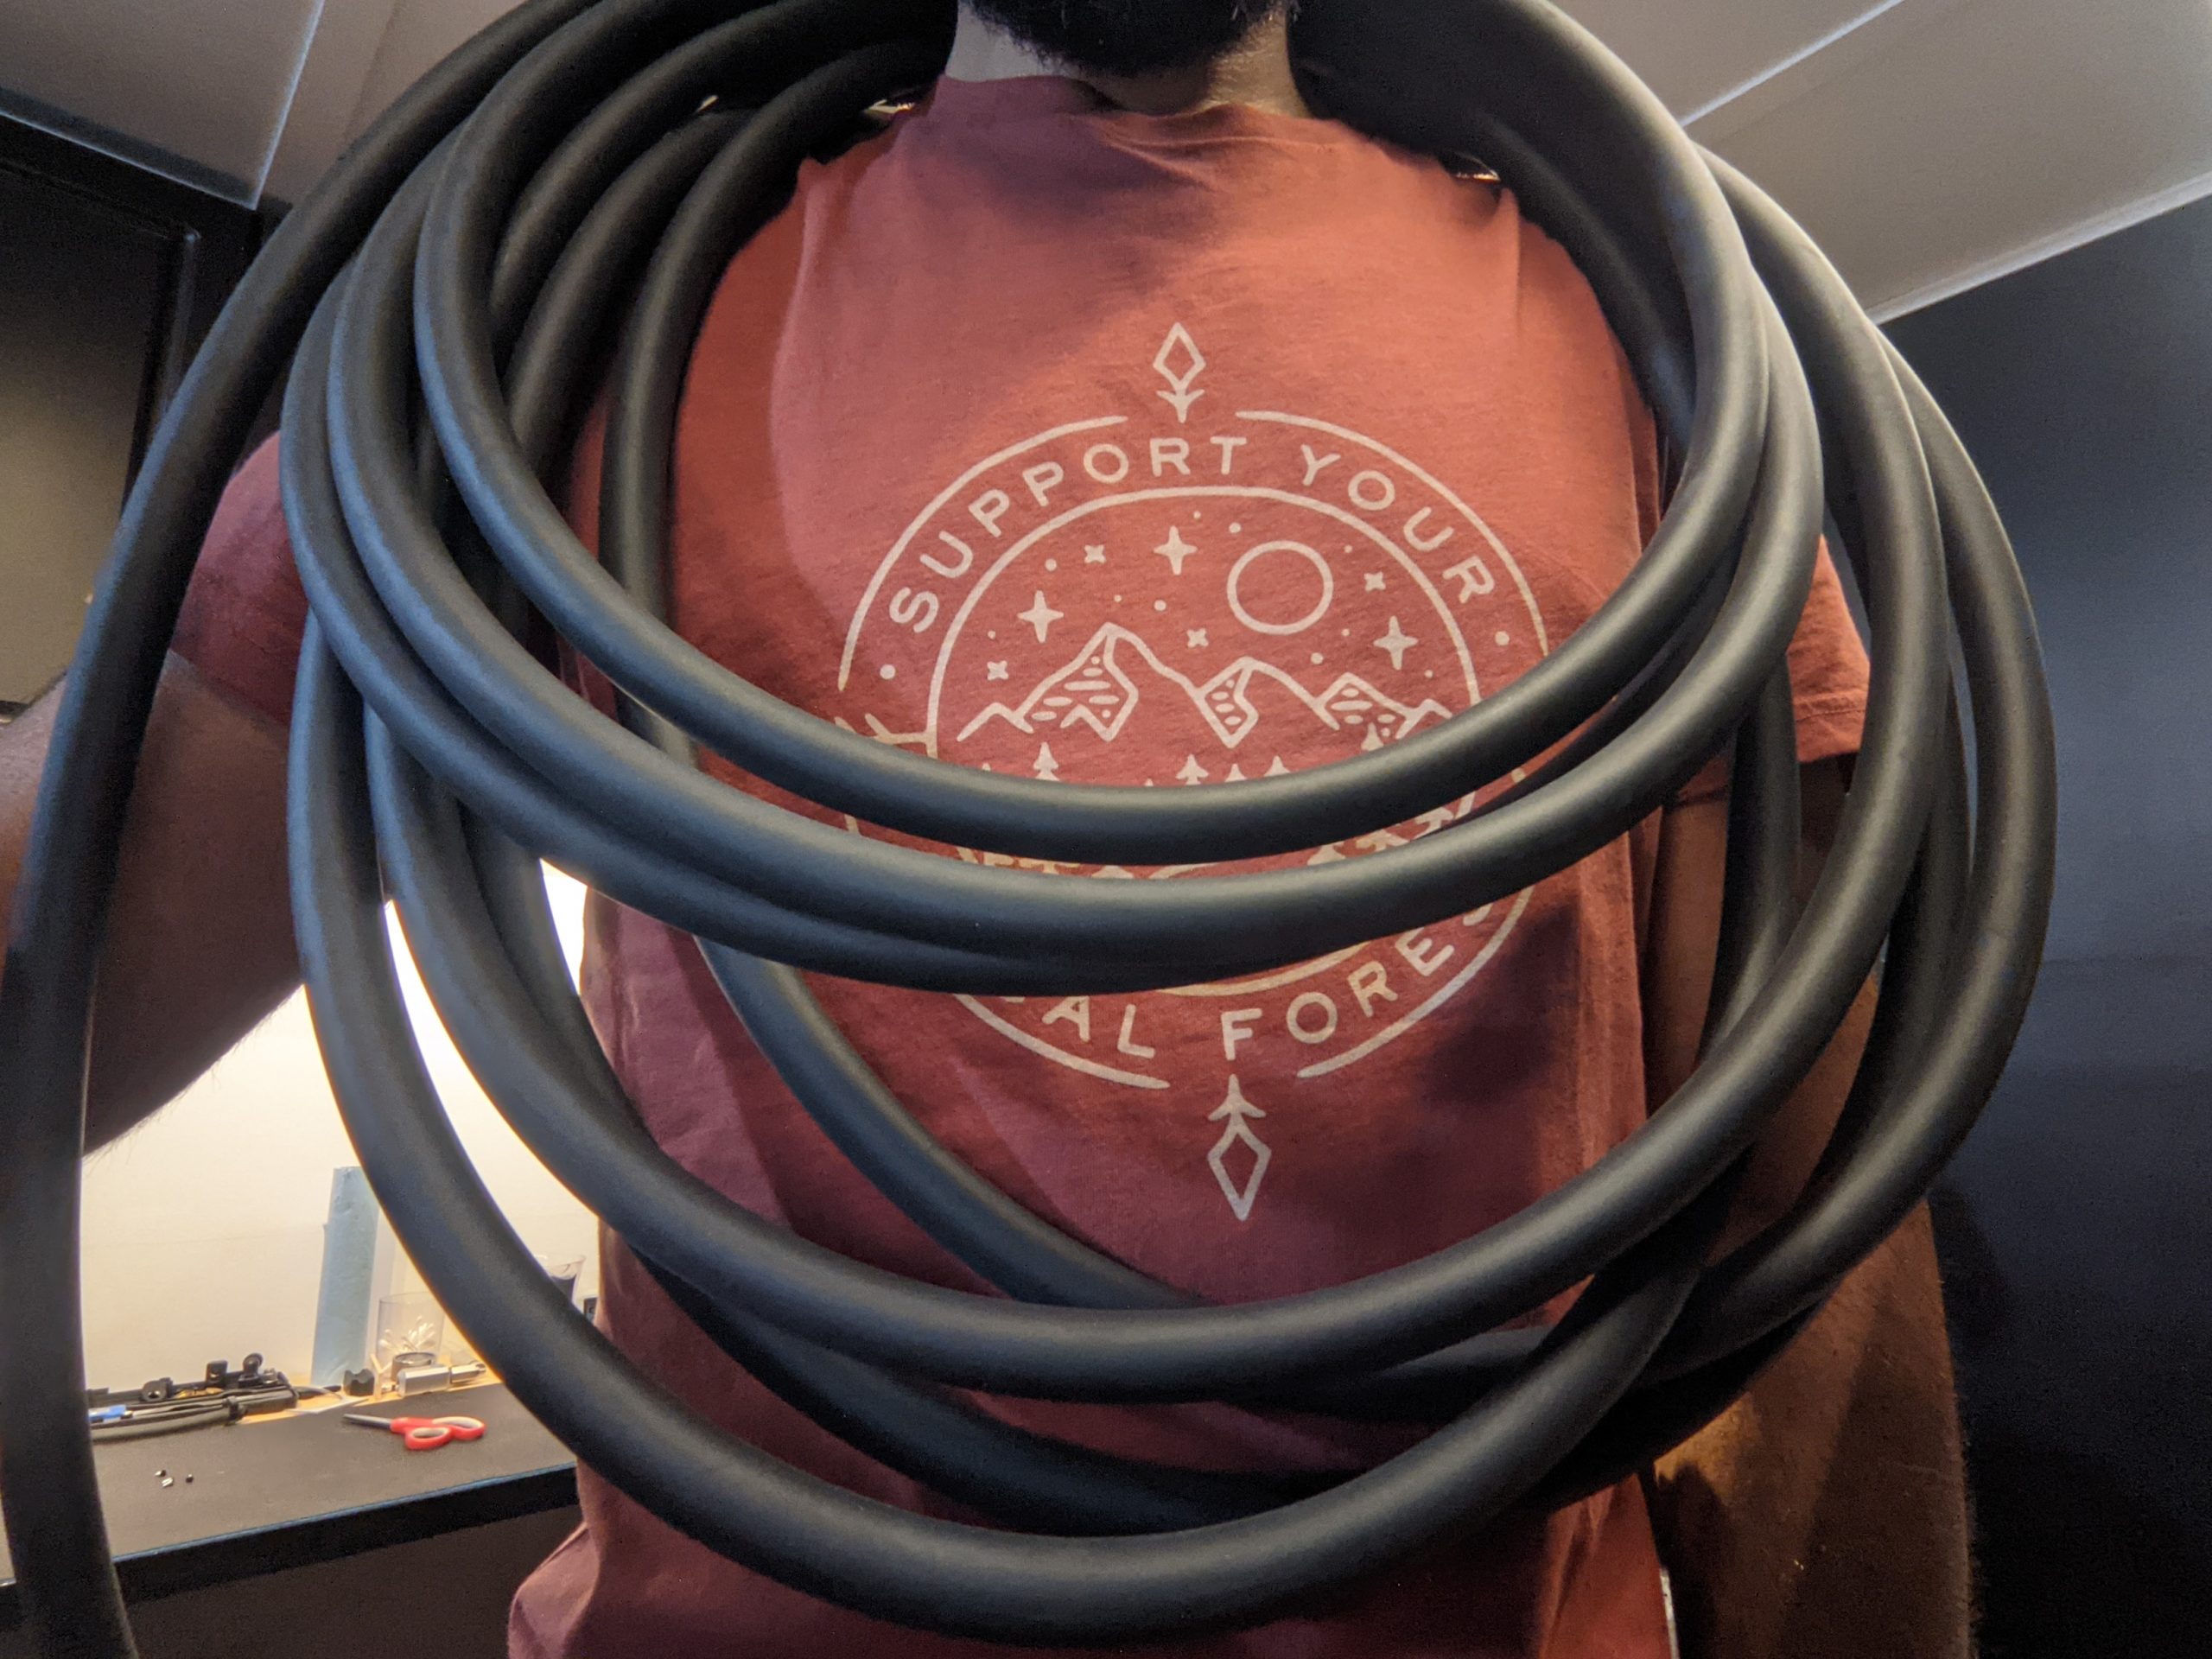
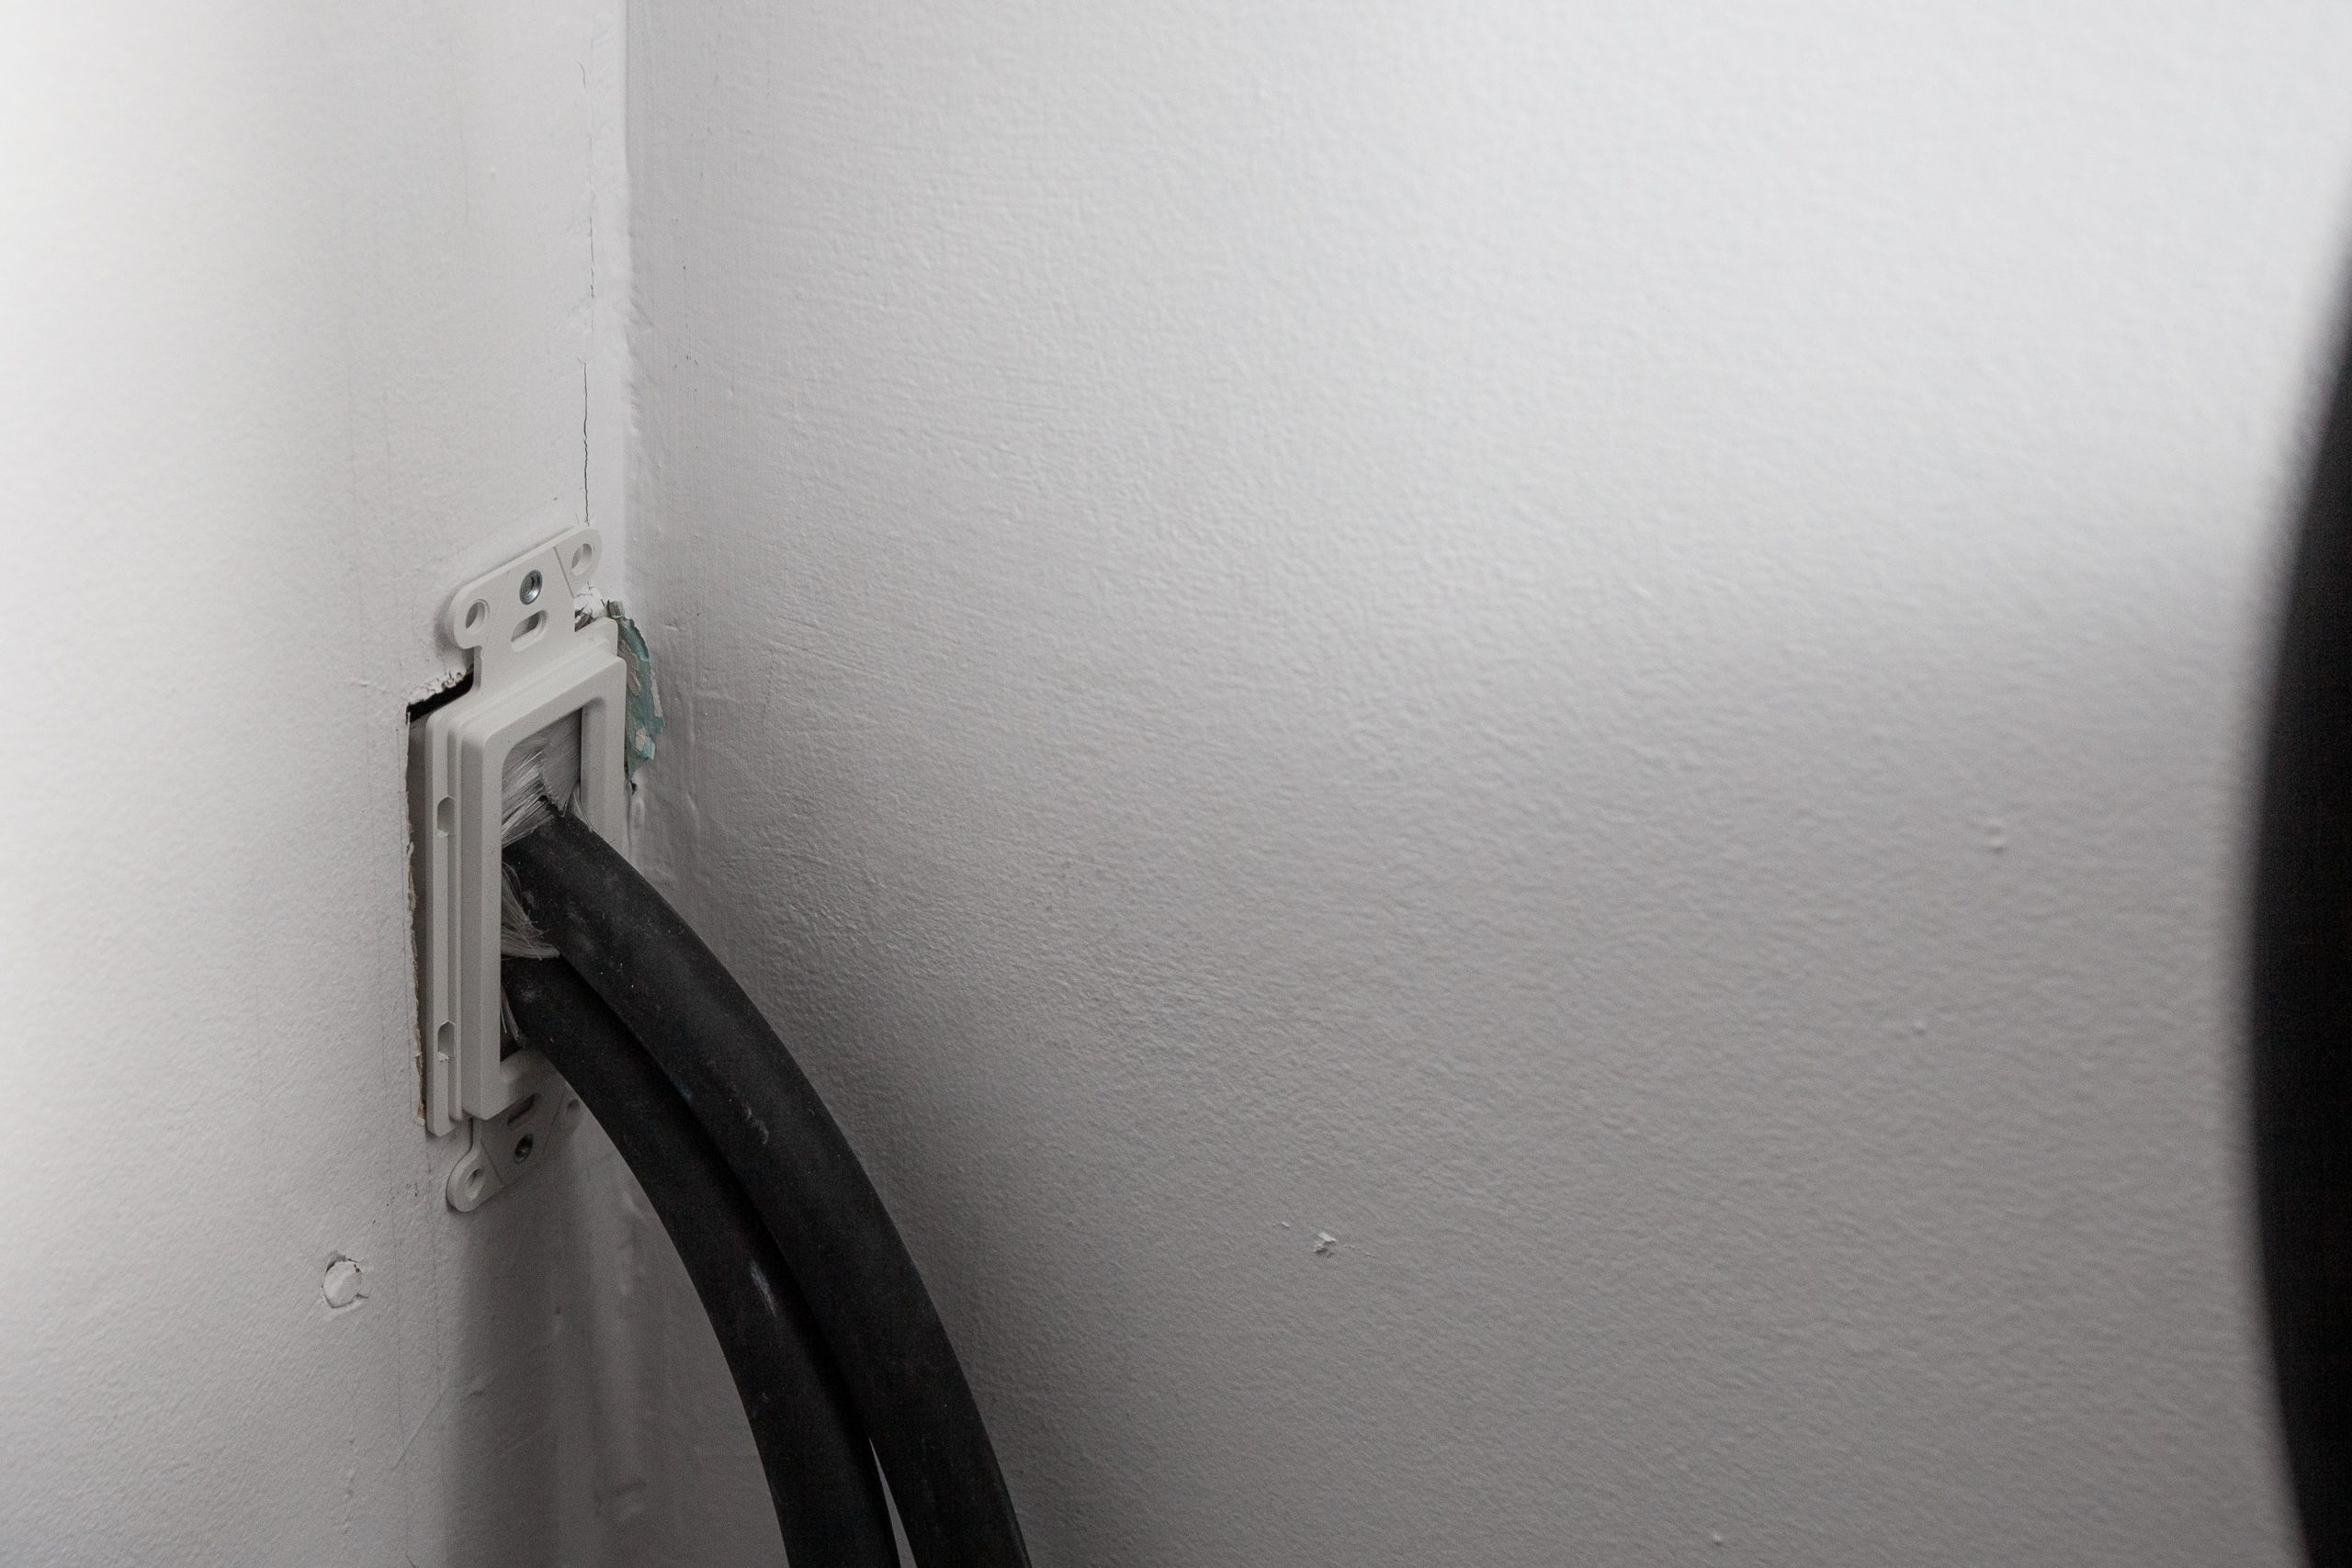
This soft tubing was neatly run under the table and through the drywall into next room
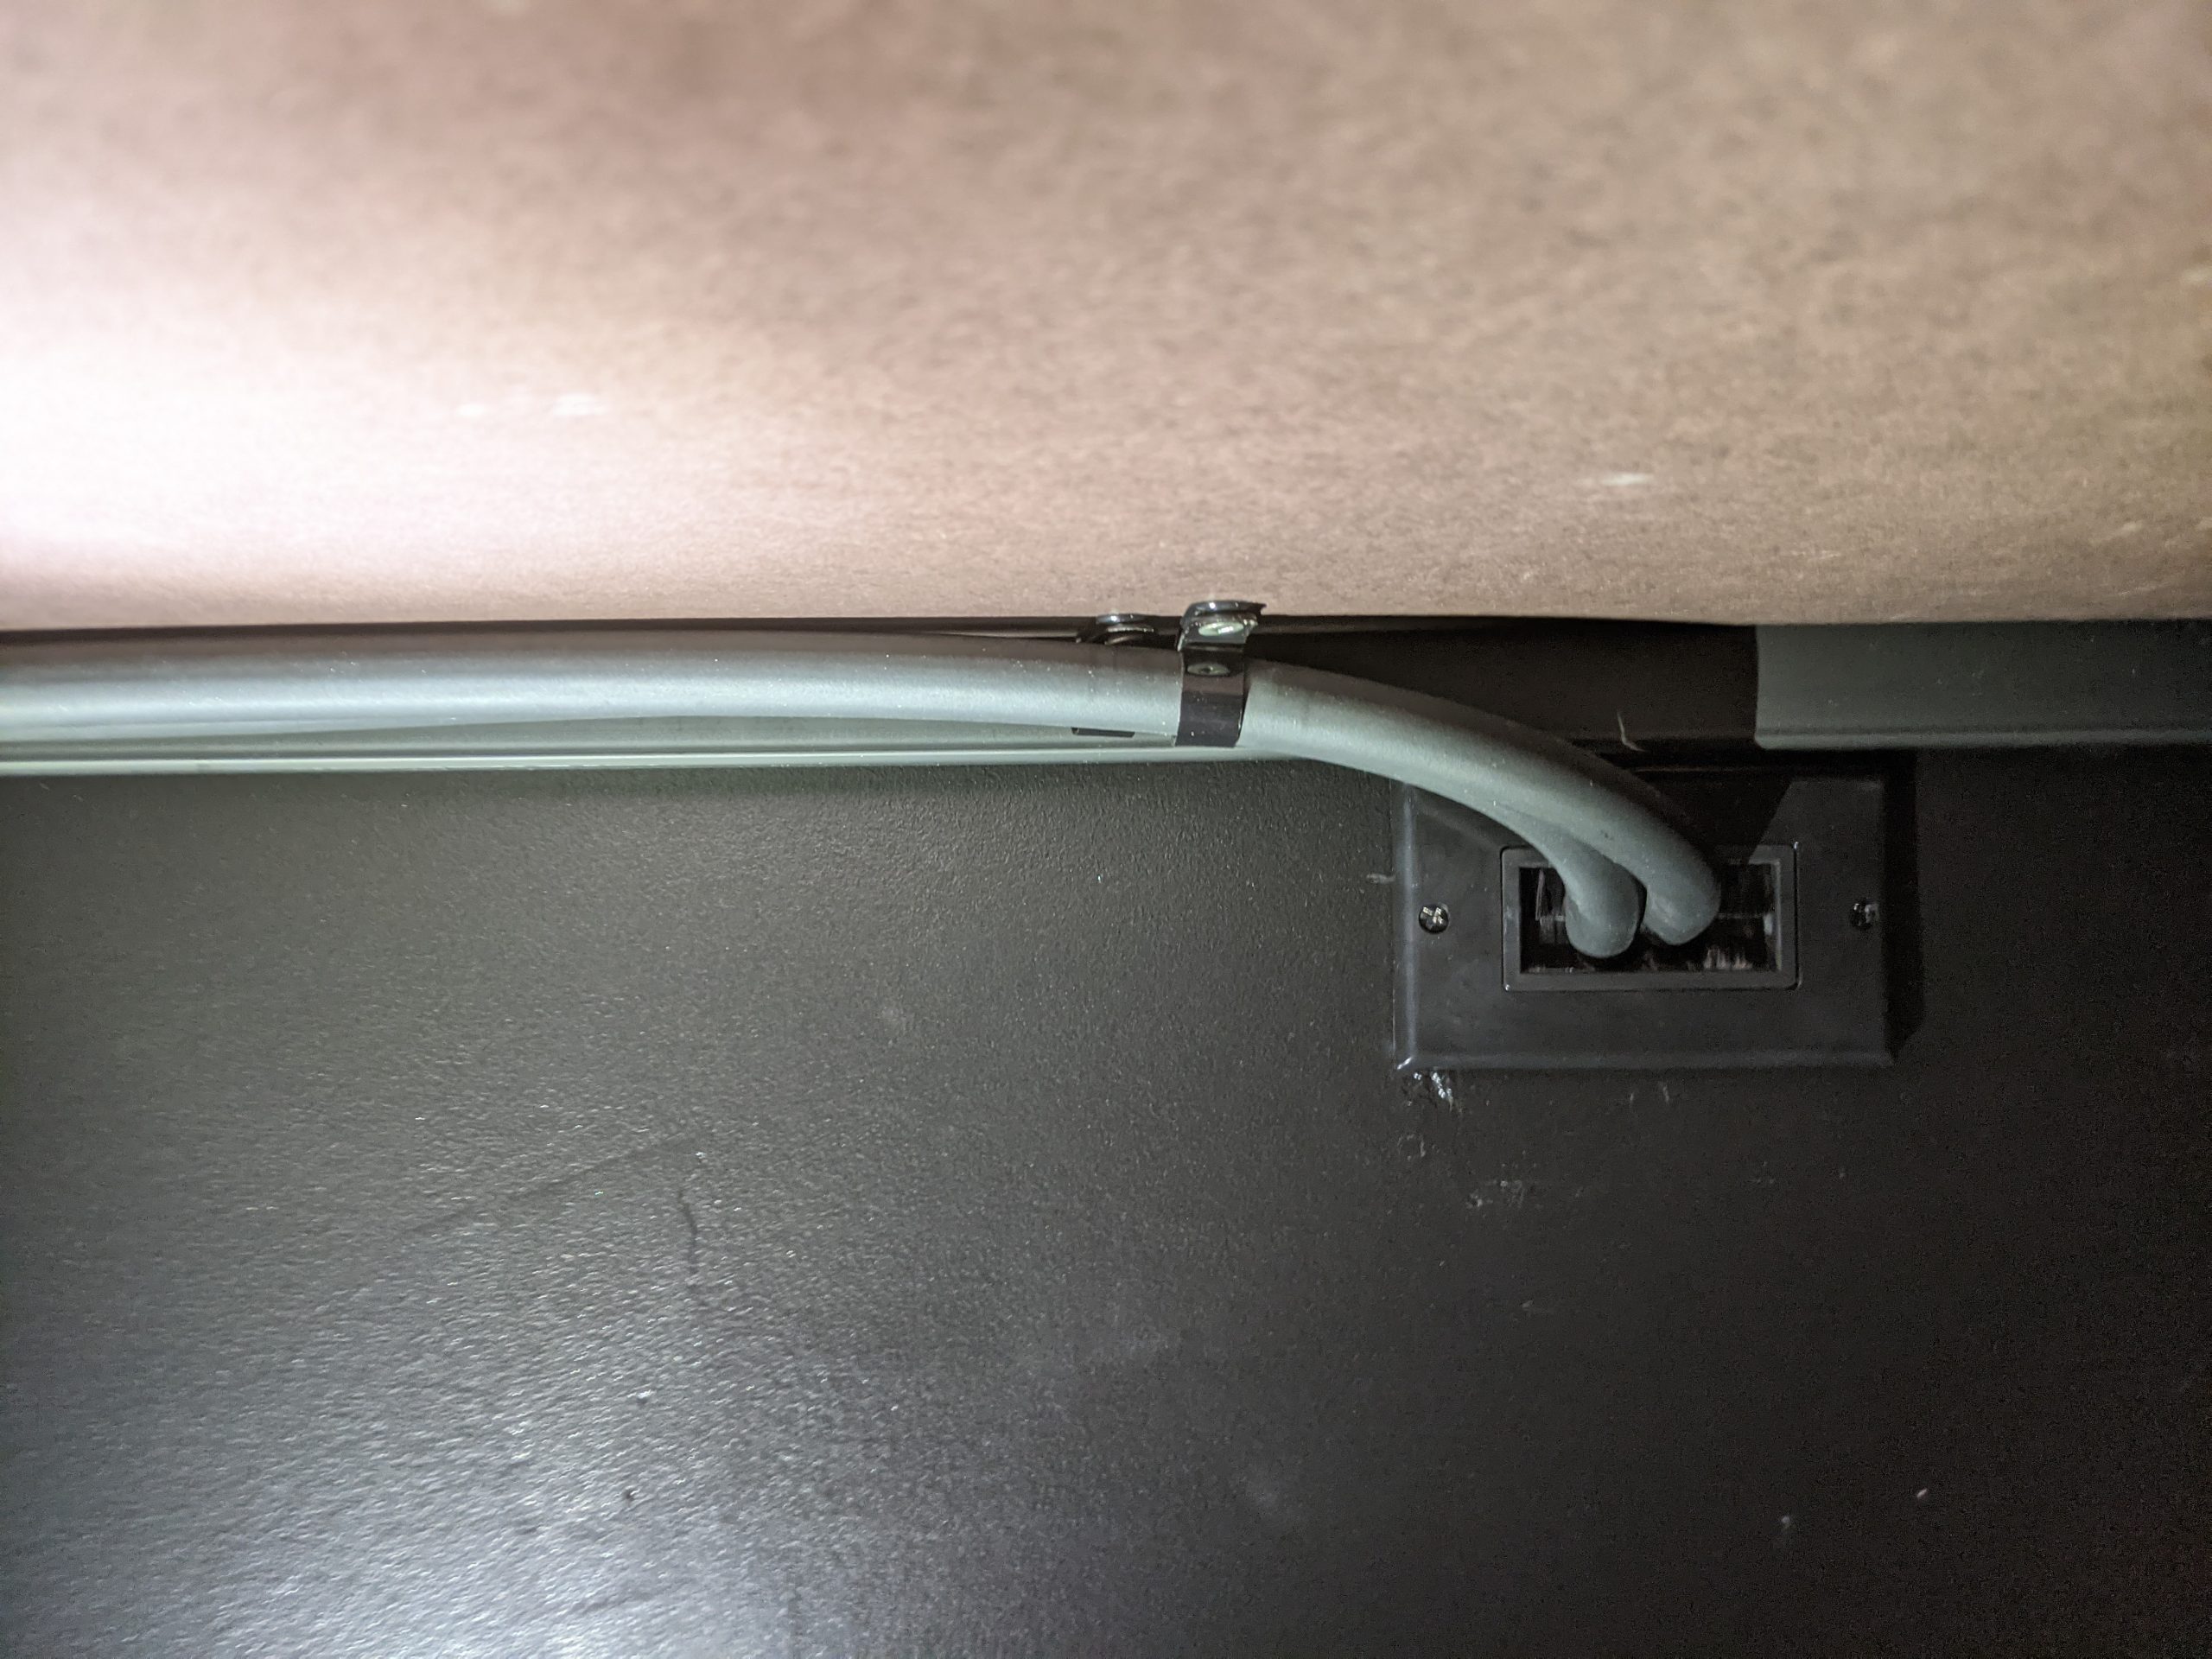
Here it is
Installed into the external cooling unit. Absolute chungus.
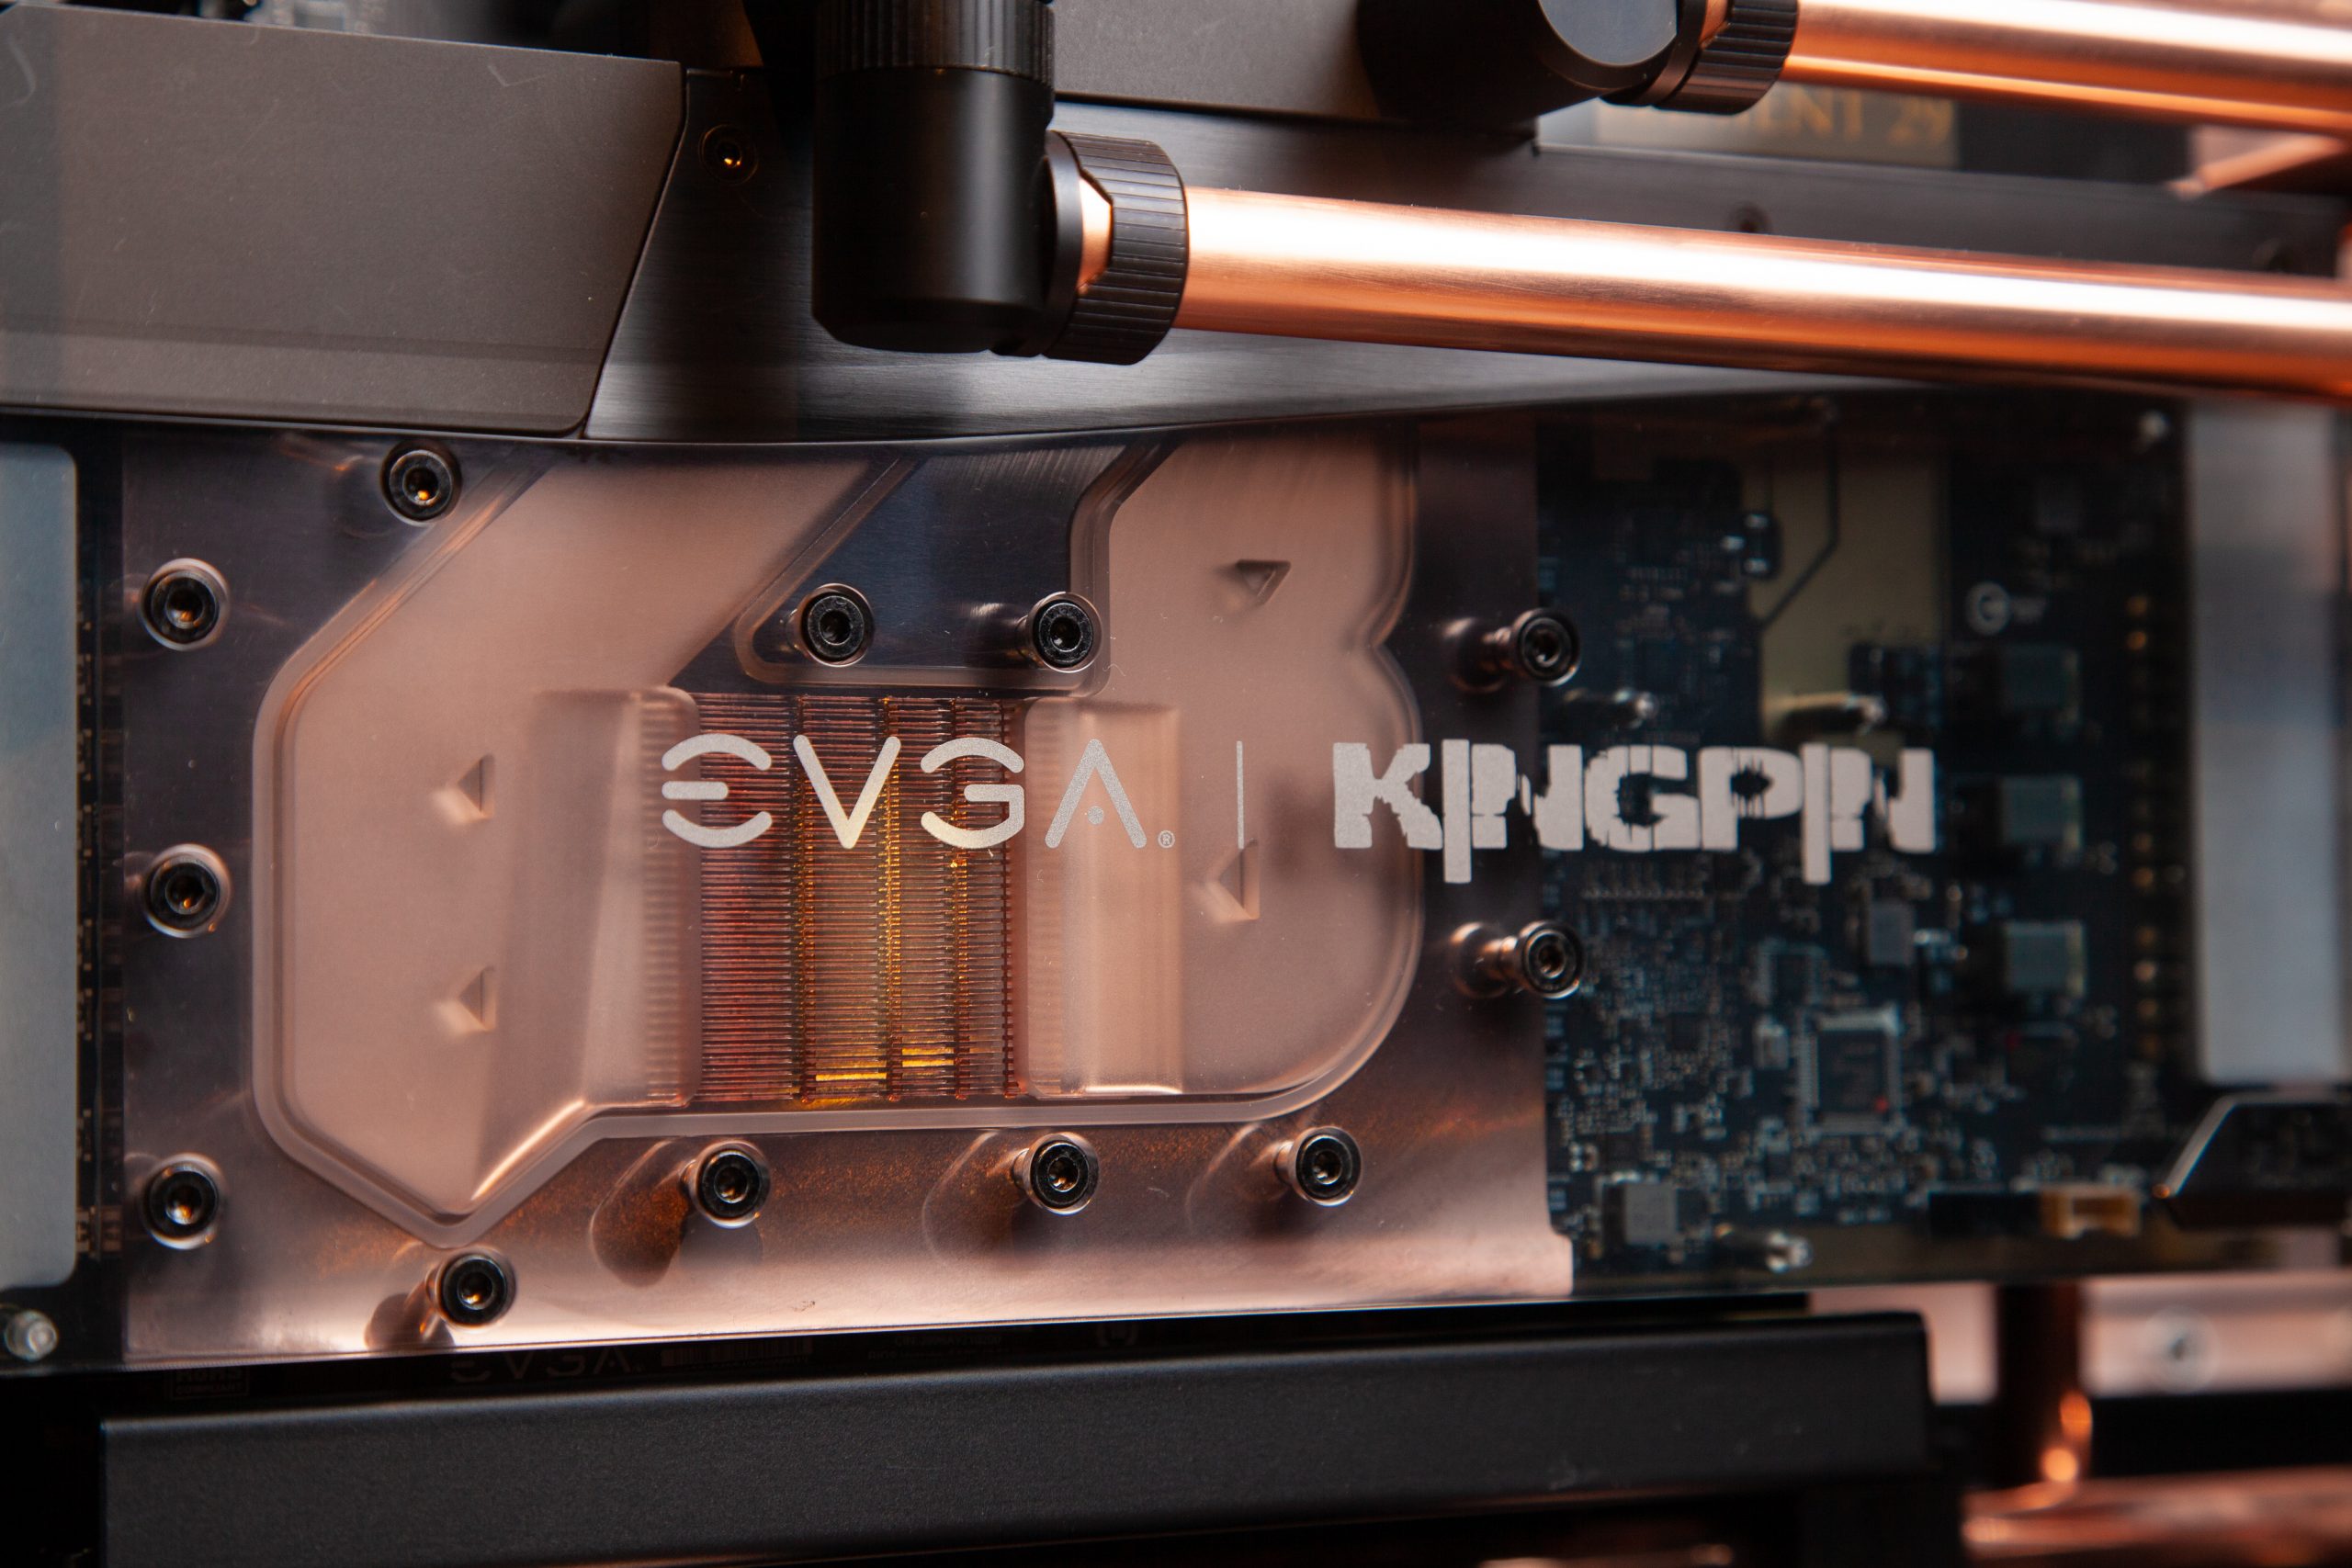
GPU Assembly
The EVGA Kingpin Nvidia RTX 3090 is Nvidia’s latest and greatest offering for the gaming segment. The GA102-300 core has 28.3 Billion transistors packed in the die. This particular model “Kingpin” is the fastest model available in North America and has custom PCB that is designed to push the 3090 chip to it’s limits in terms of overclocking. More details here: https://www.evga.com/products/product.aspx?pn=24G-P5-3998-KR
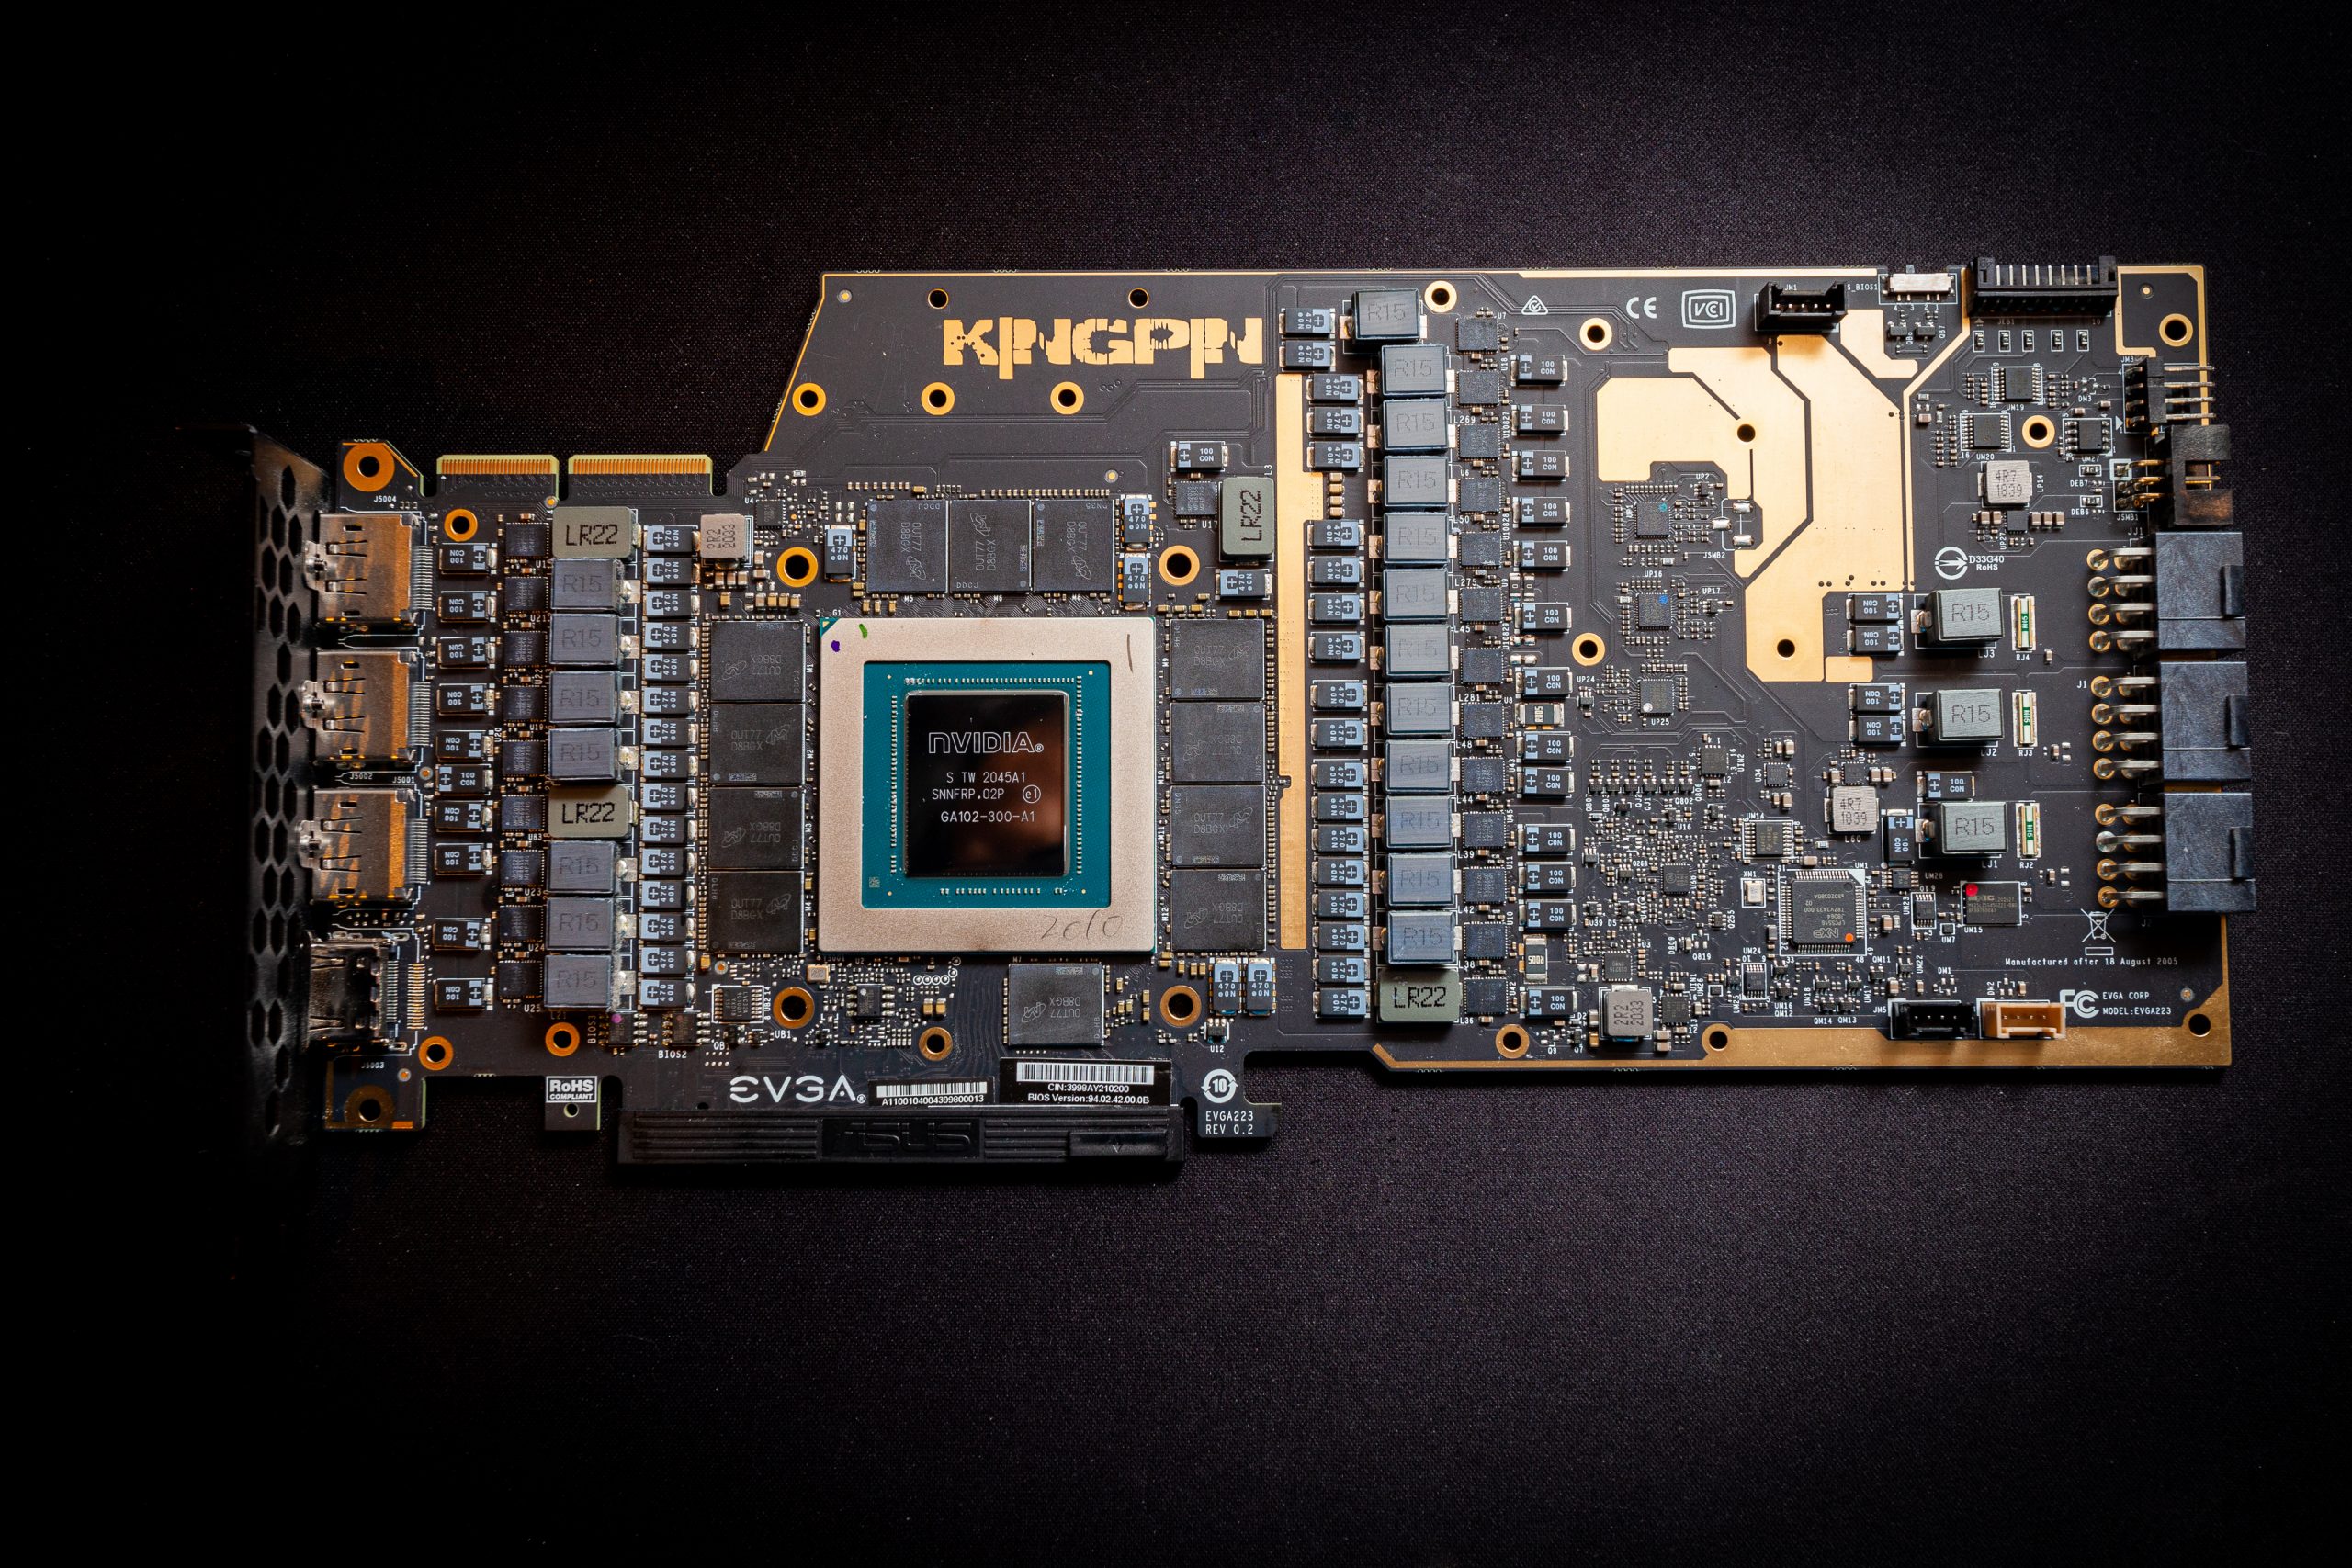
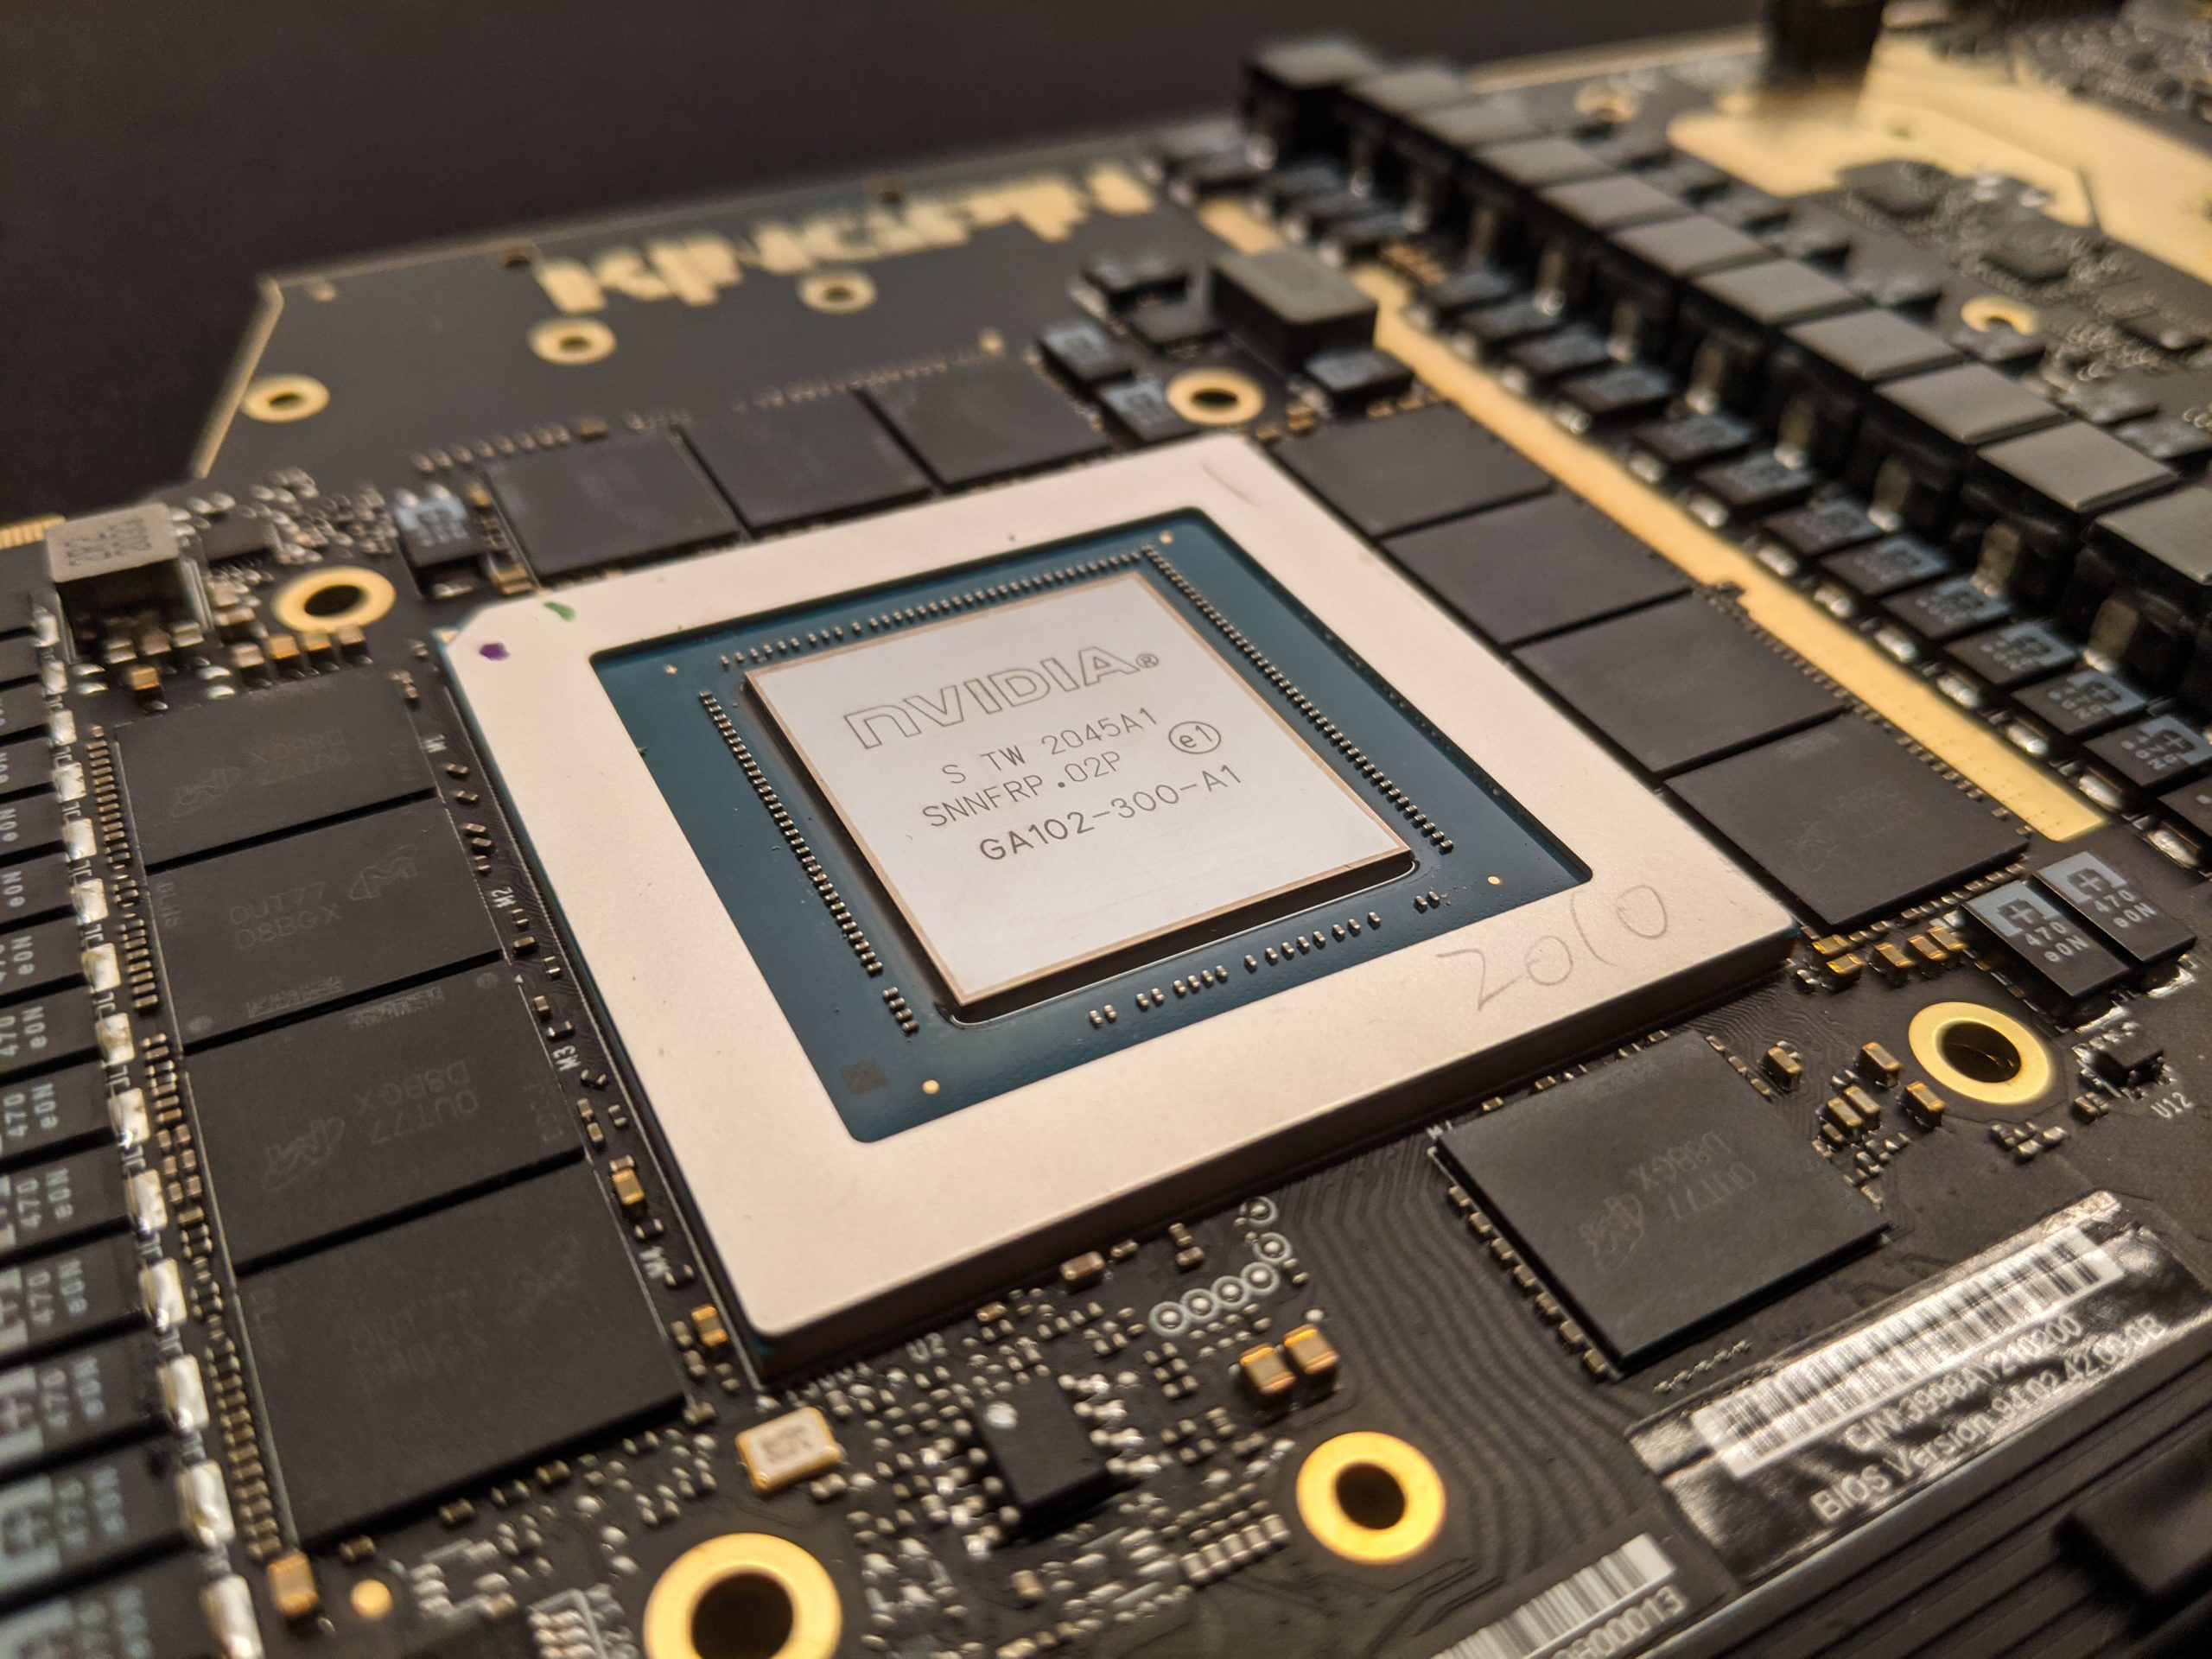
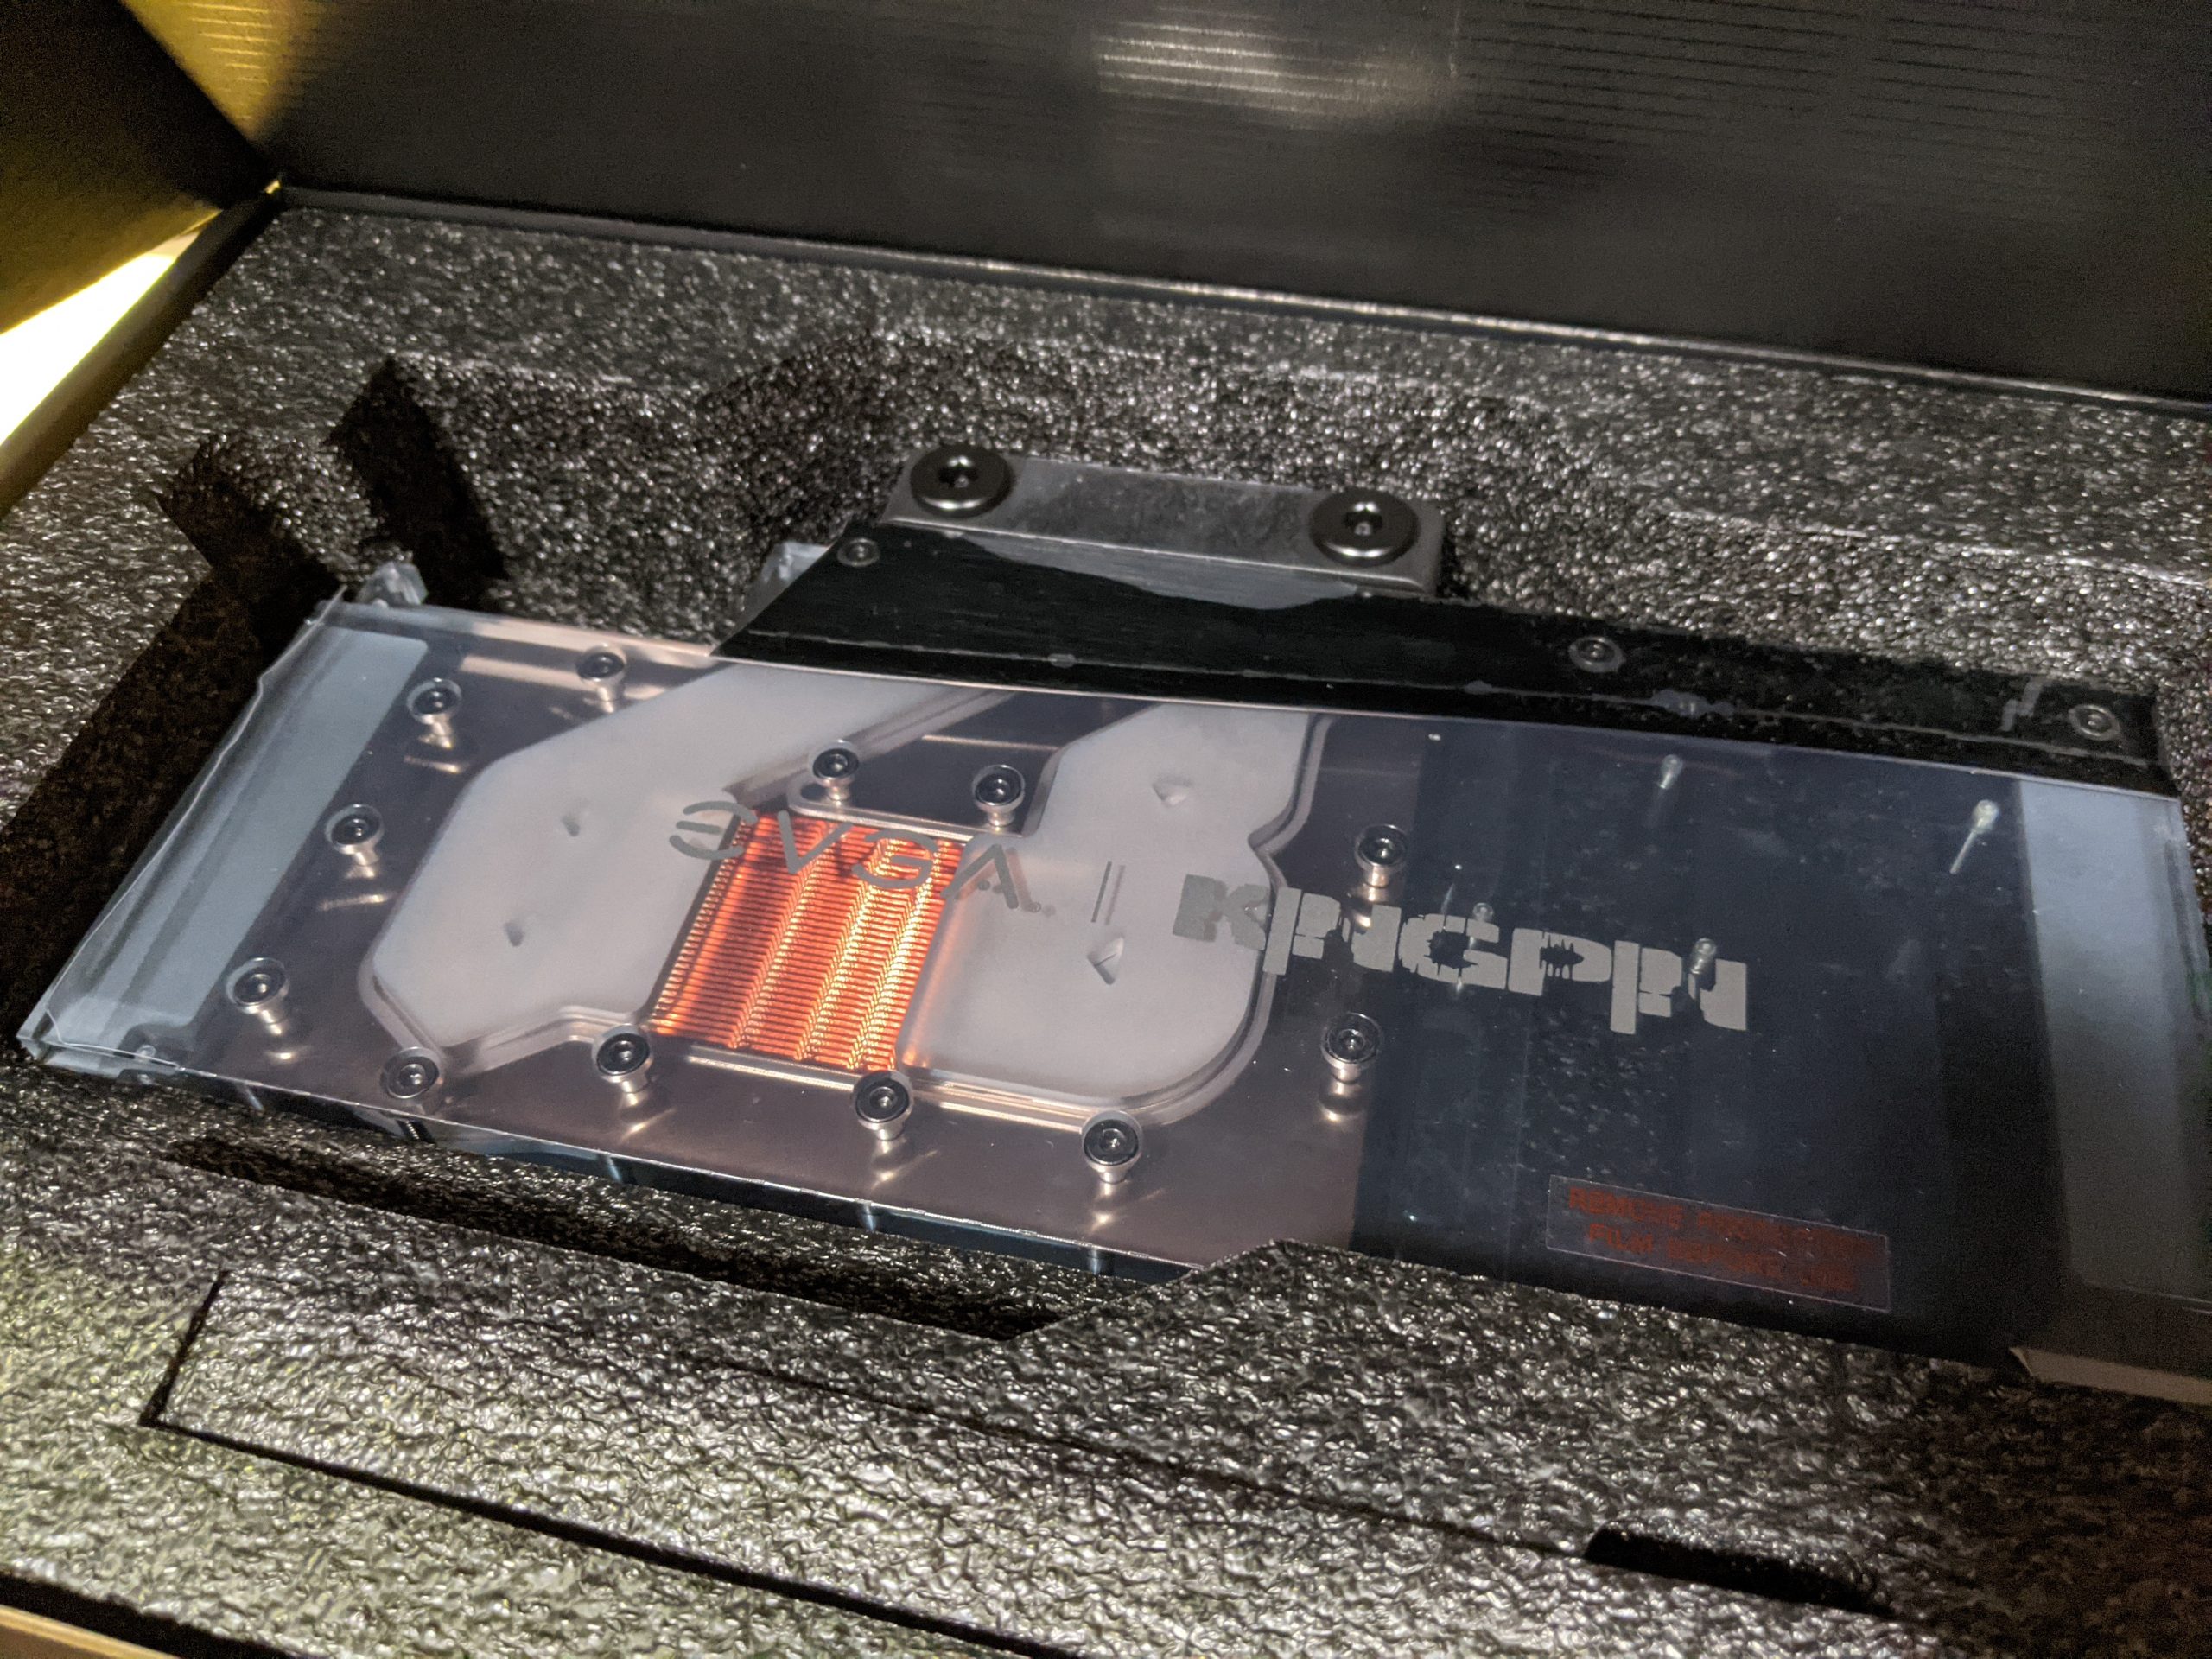
These cards can consume close to 500W under full load and generate a tremendous amount of heat. To take that I was able to get a hold of their custom made water block

Love at first sight. It weighs 3 LB and consists of a thick machined 8mm copper plate screwed to a heavy acrylic top. Absolute chonker.
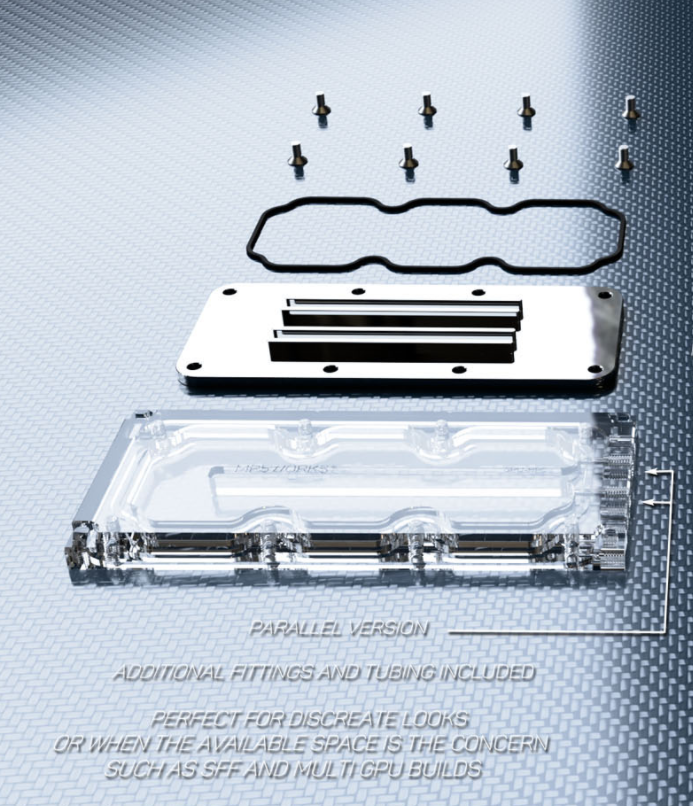
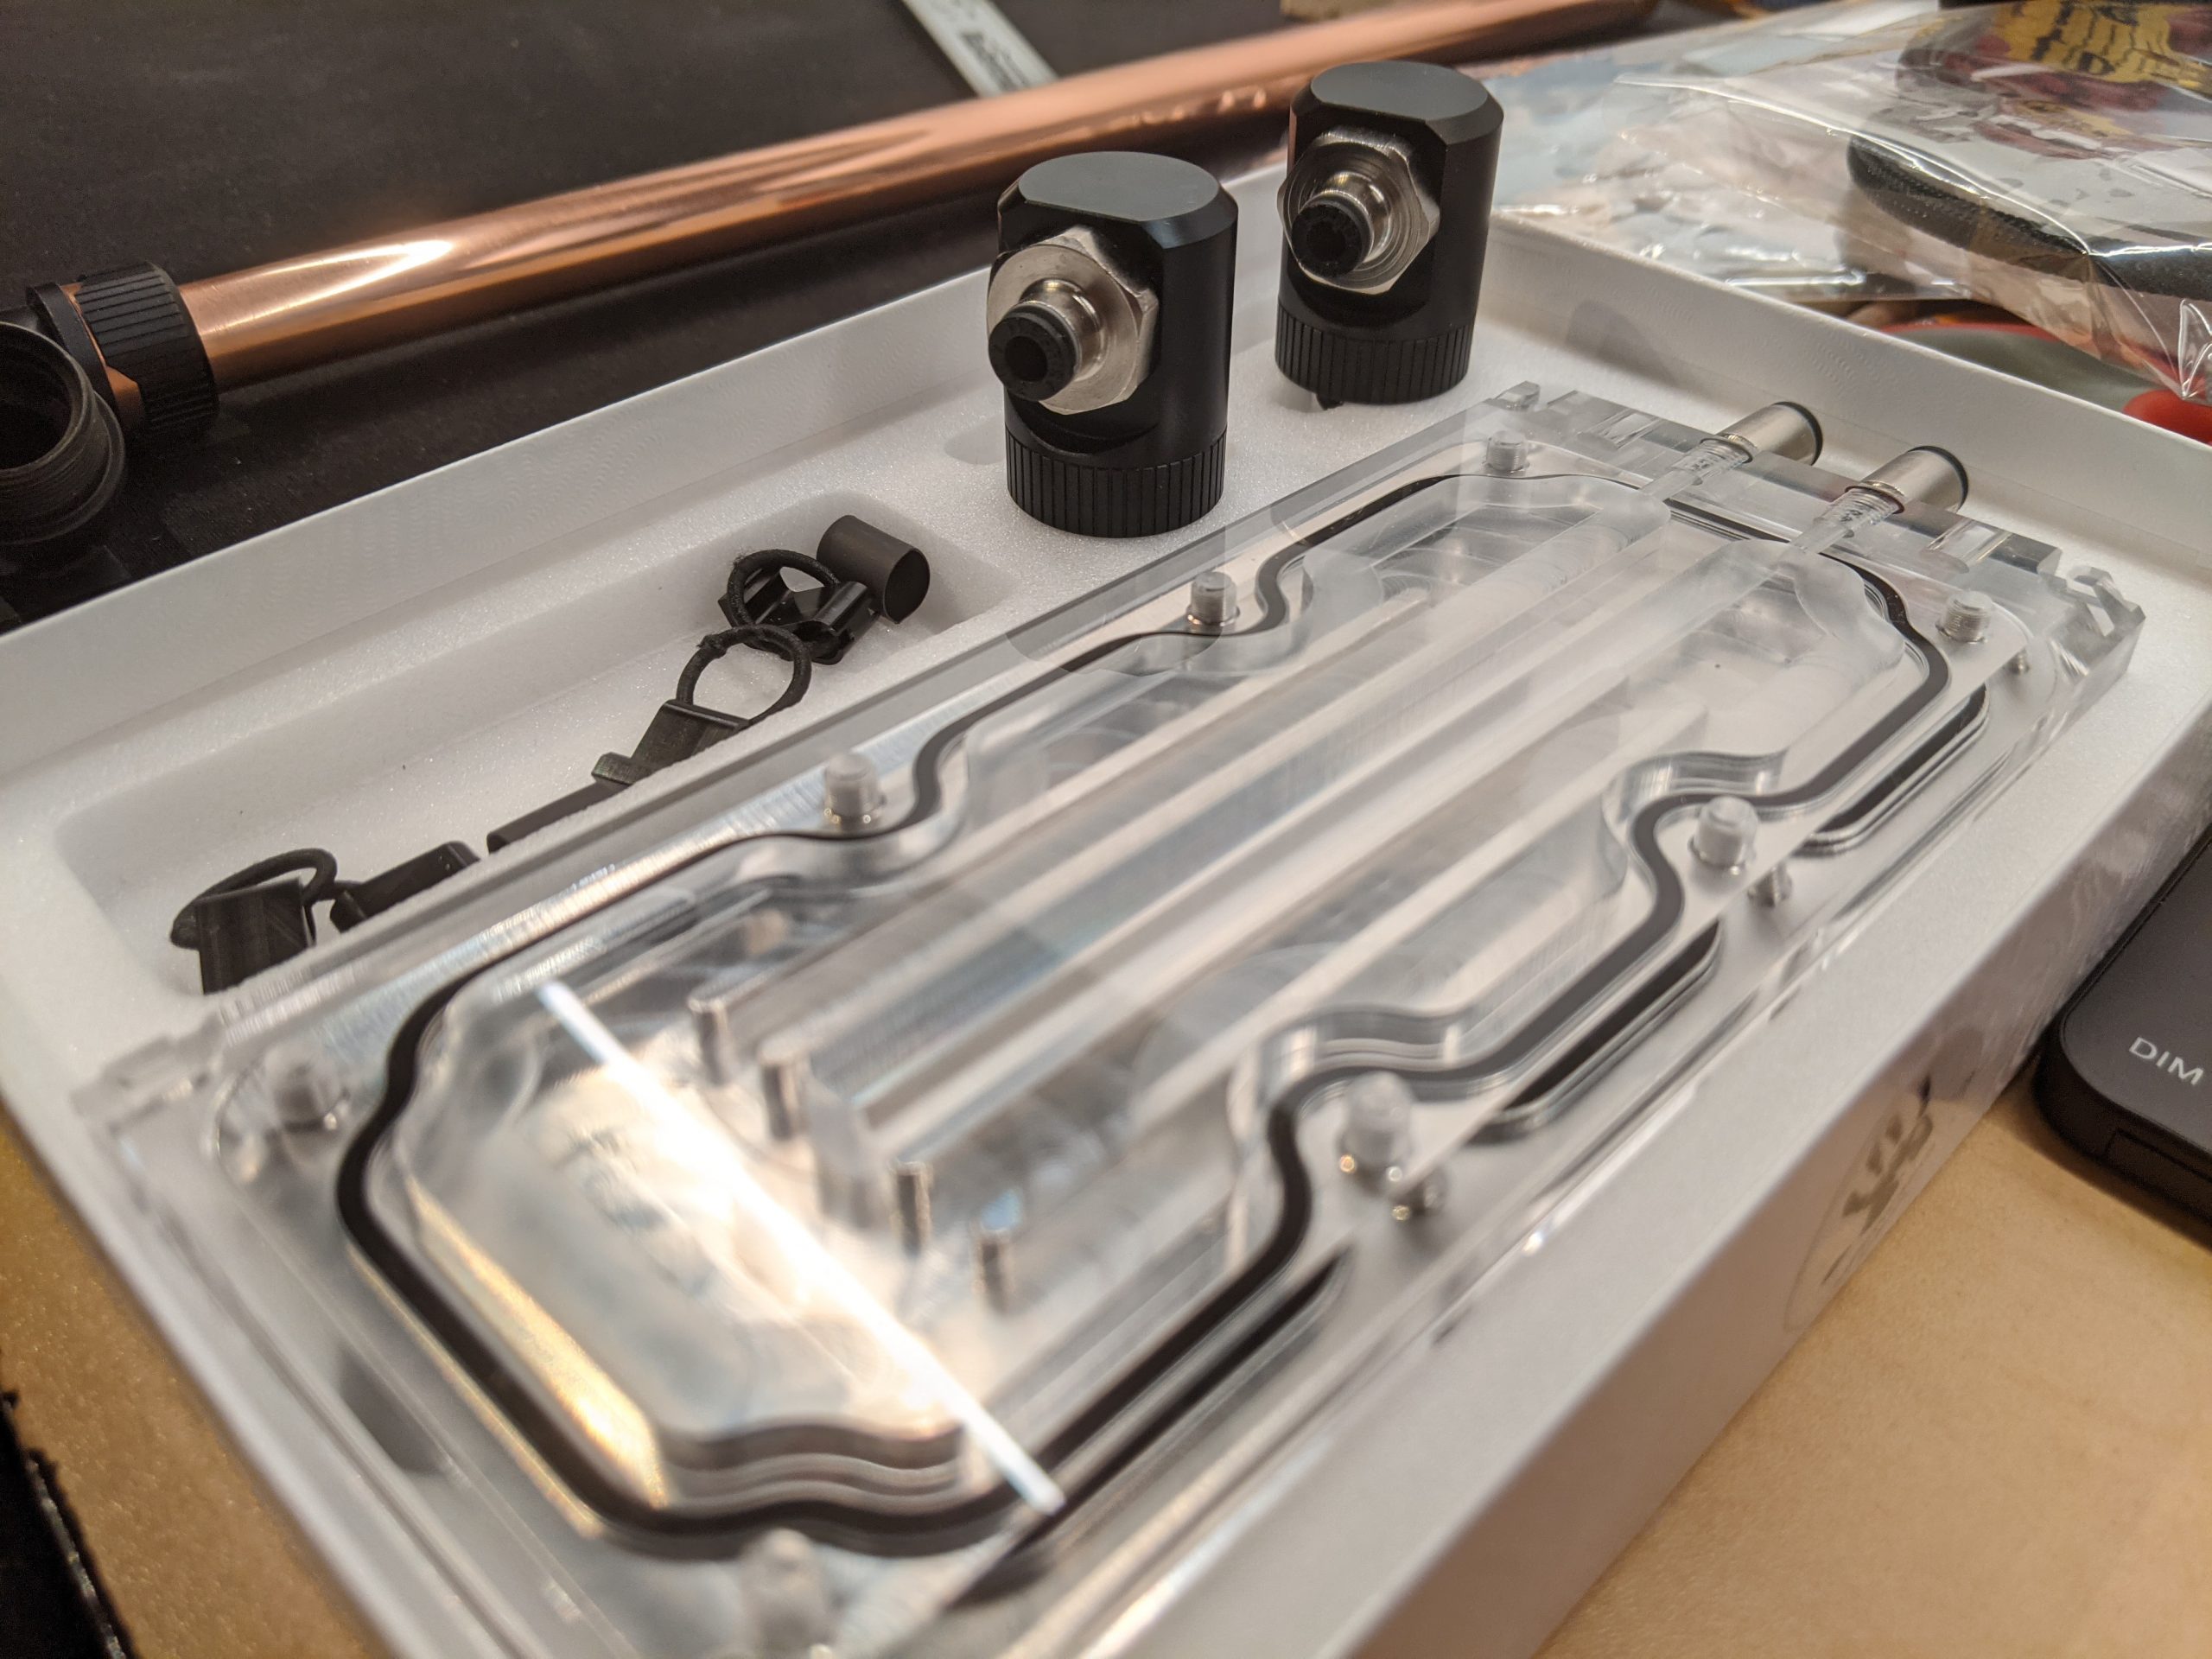
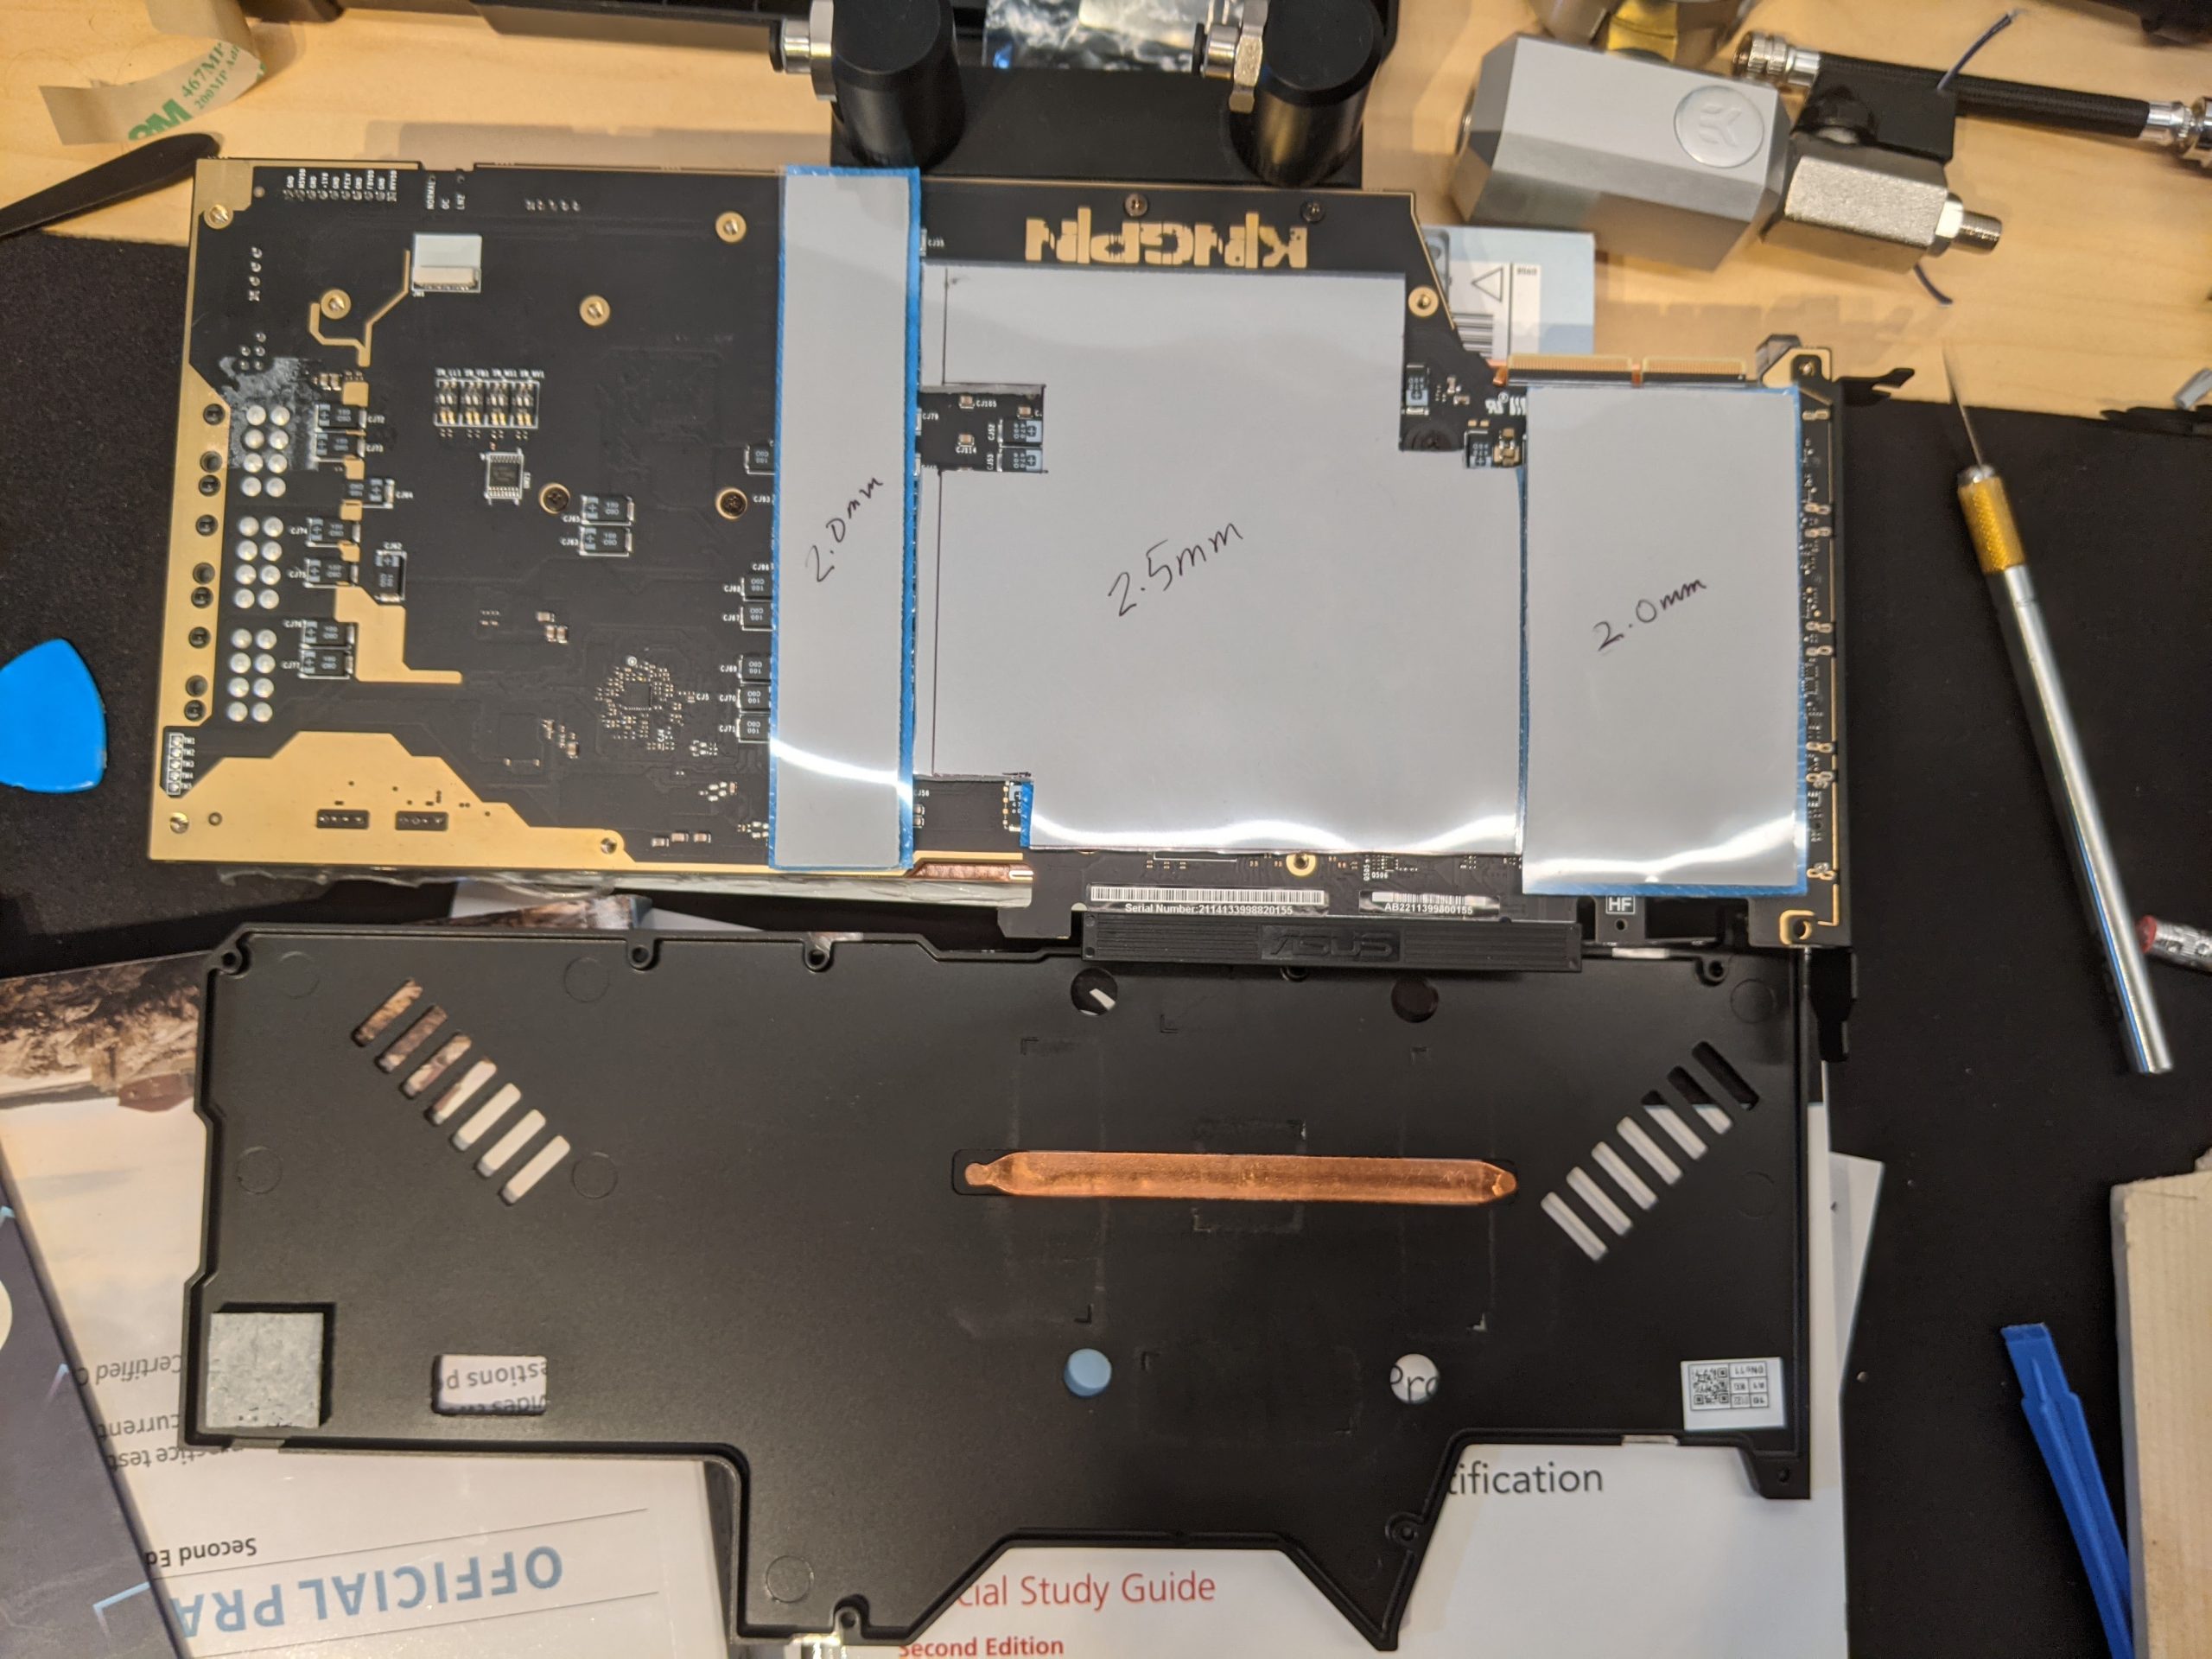
The 3090 cards come with 24GB of Micron’s blazing fast GDDR6x RAM. Half of the memory is located on the rear side of the card which can hit 110°C when left to cool using a conventional passively cooled backplate. This called for a custom made backplate cooling block made in the UK called “MP5 BPC” (backplate cooler).
Here is what the BPC looks like
Loads of thermal pad was used on the rear VRAM to siphon heat from the PCB into this MP5 block. Measurements were done by tracing a photocopy of the PCB to get a full coverage of all rear components. Thermalright Extreme Odyssey 12.8 W/mK pads were used due to their excellent heat transferring capability

The thickness of the various surface mounted components was measured
Memory Modules 1 mm
SMD Capacitors 2.00 mm
MLC Capacitors 1.24 mm
Based on these numbers, the appropriate thermal pad thickness was chosen
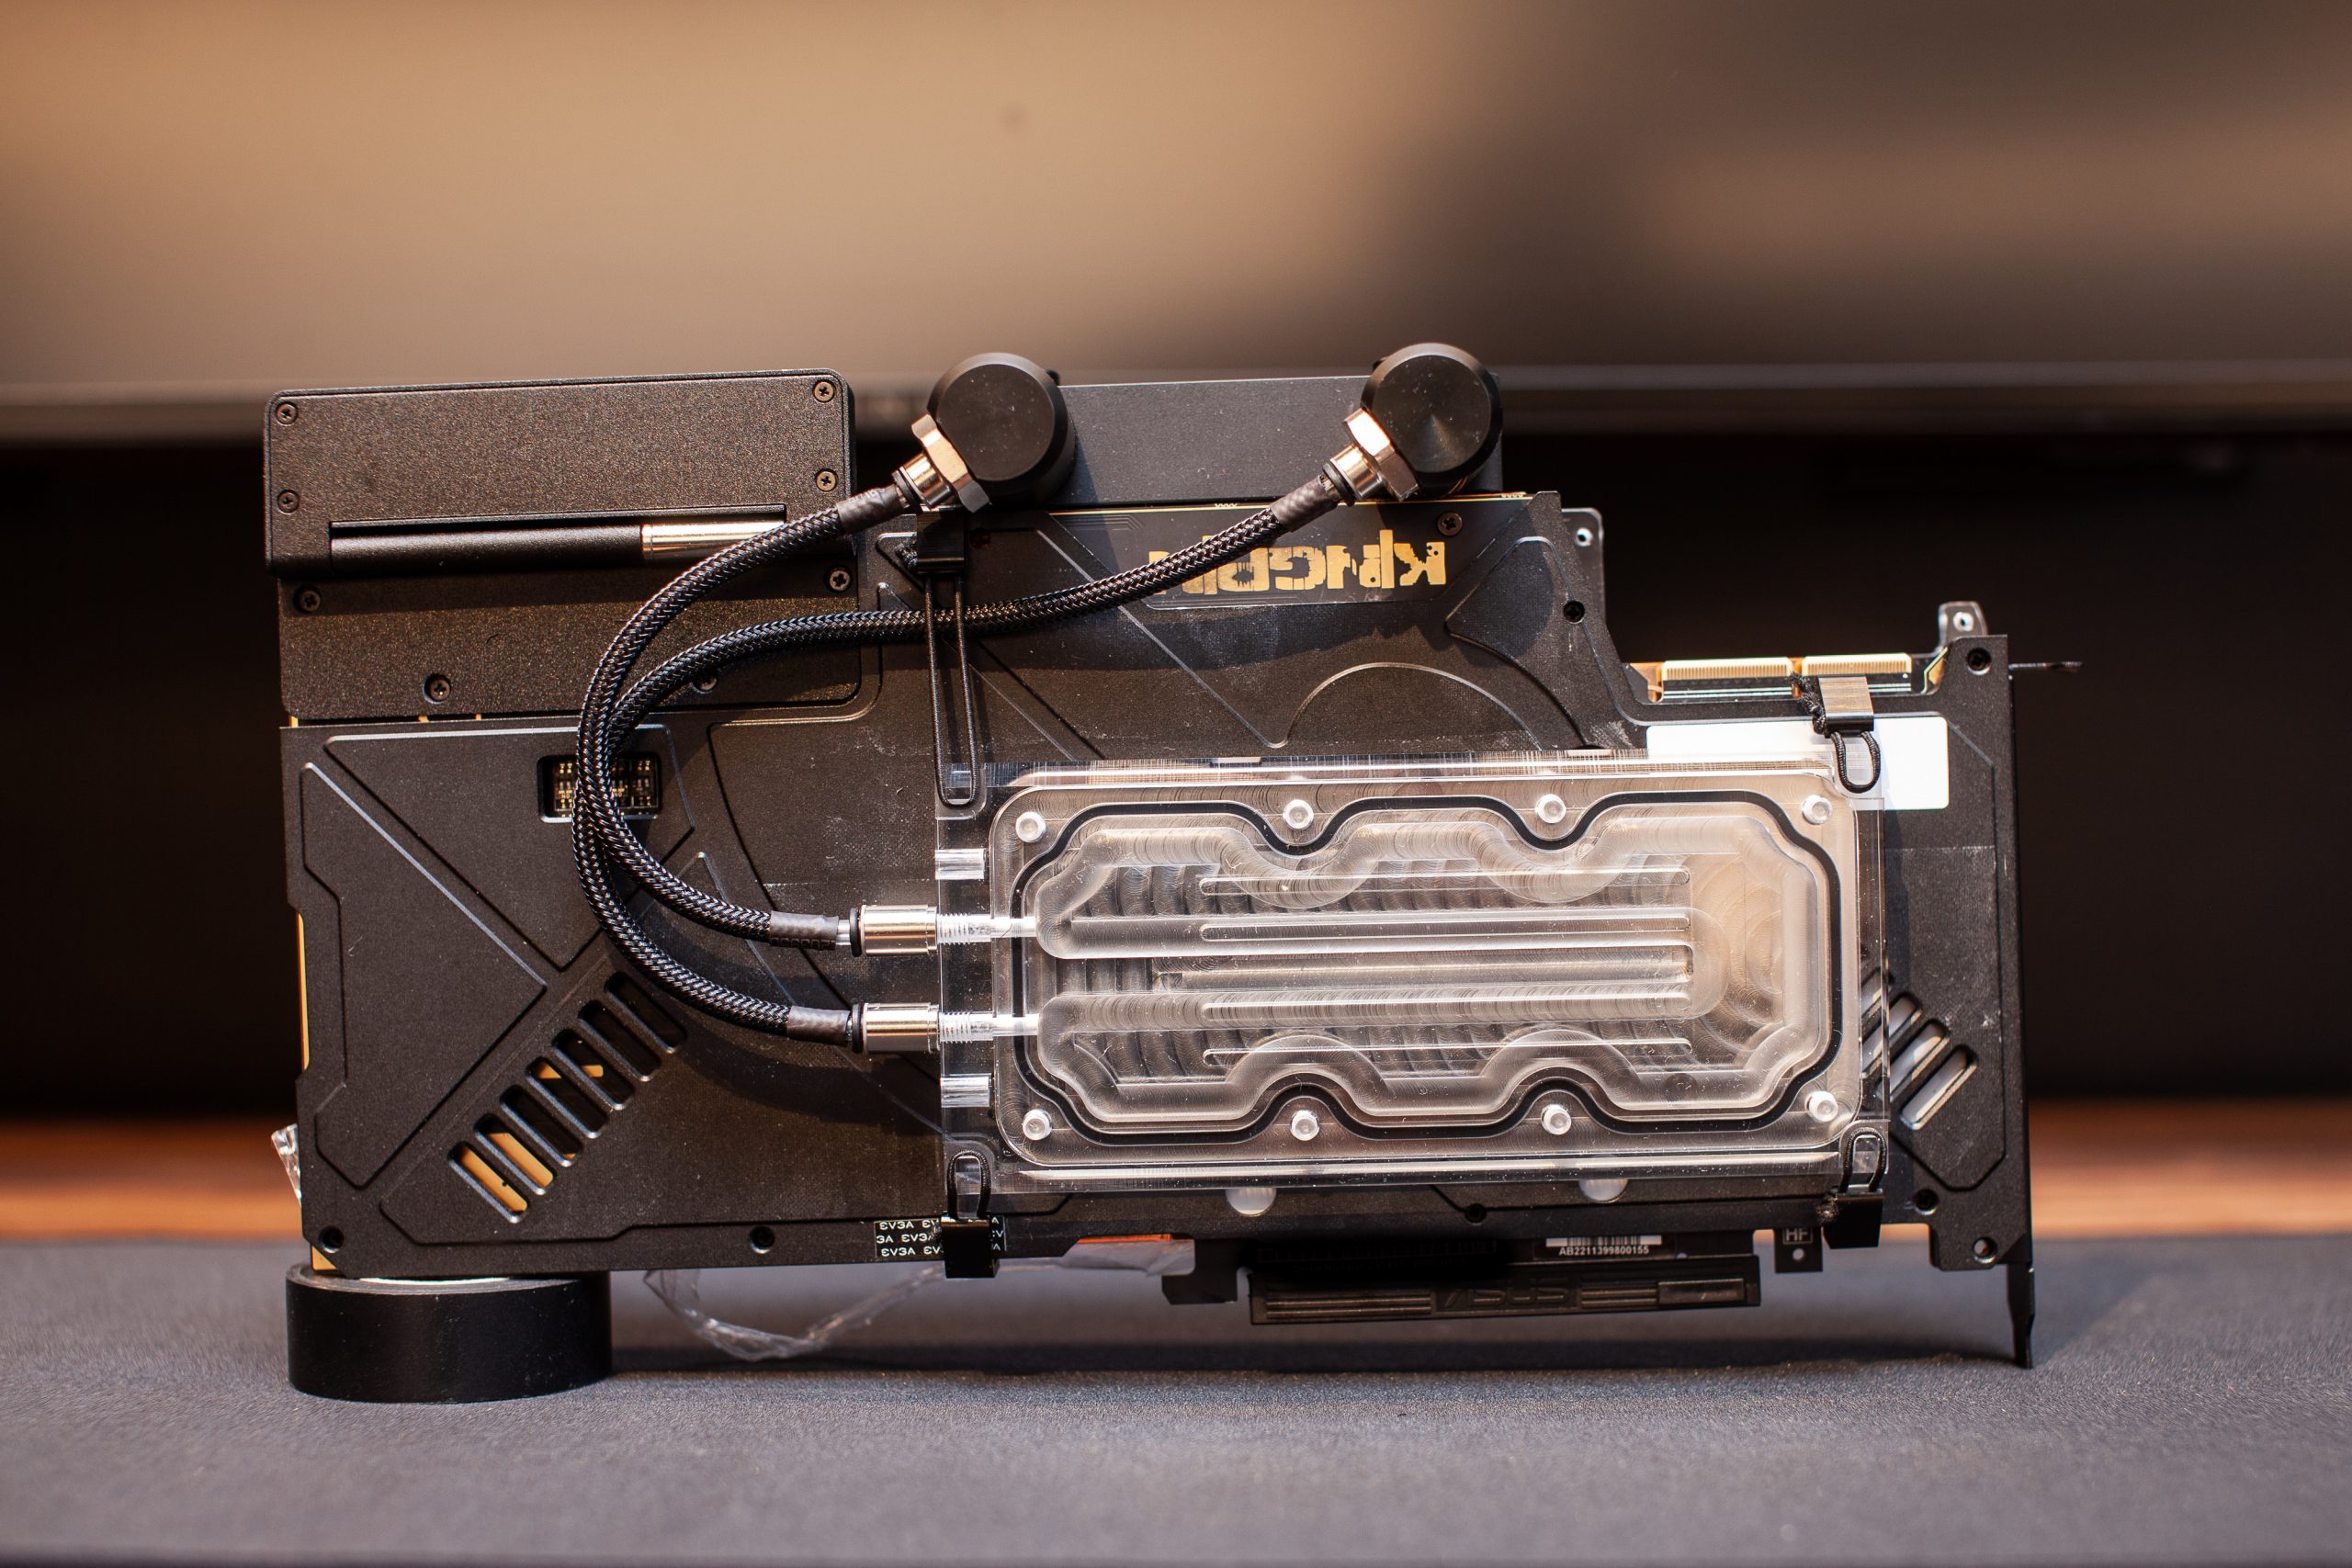
Here is the card fully assembled in this water cooling pancake
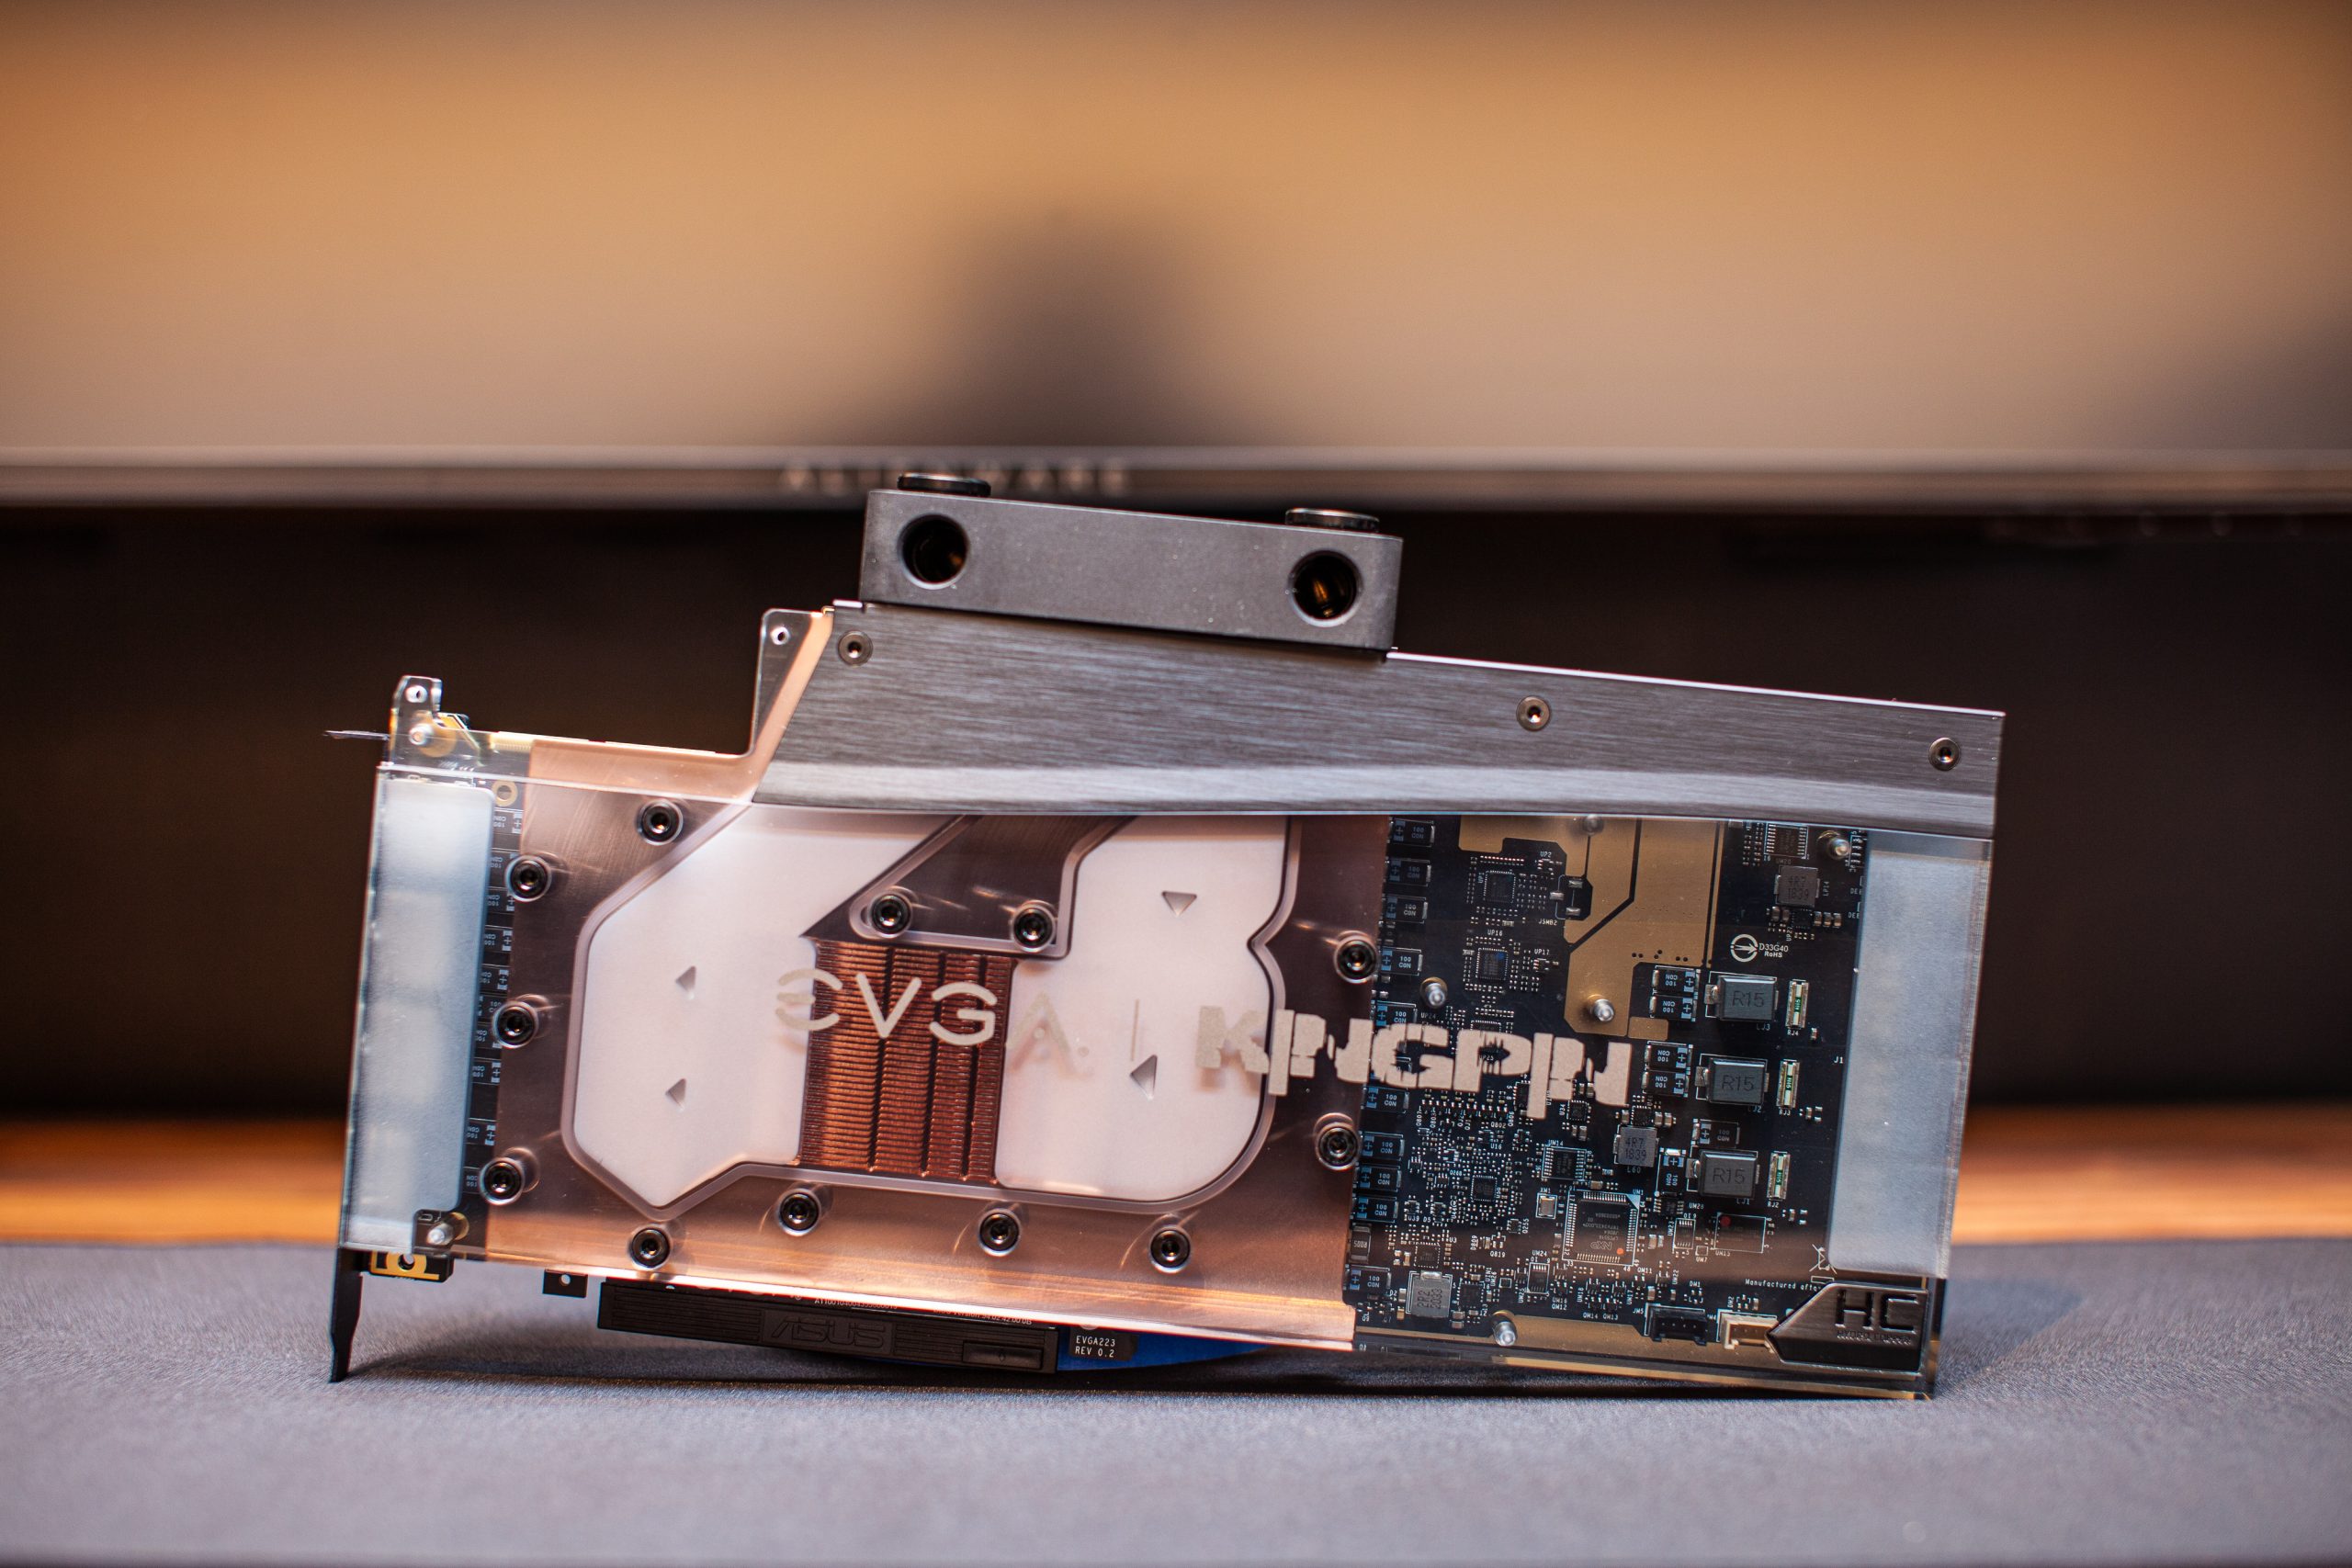
MP5 BPC installed in parallel
That is 6 LB in total just for the video card. Holy moly.

The Details
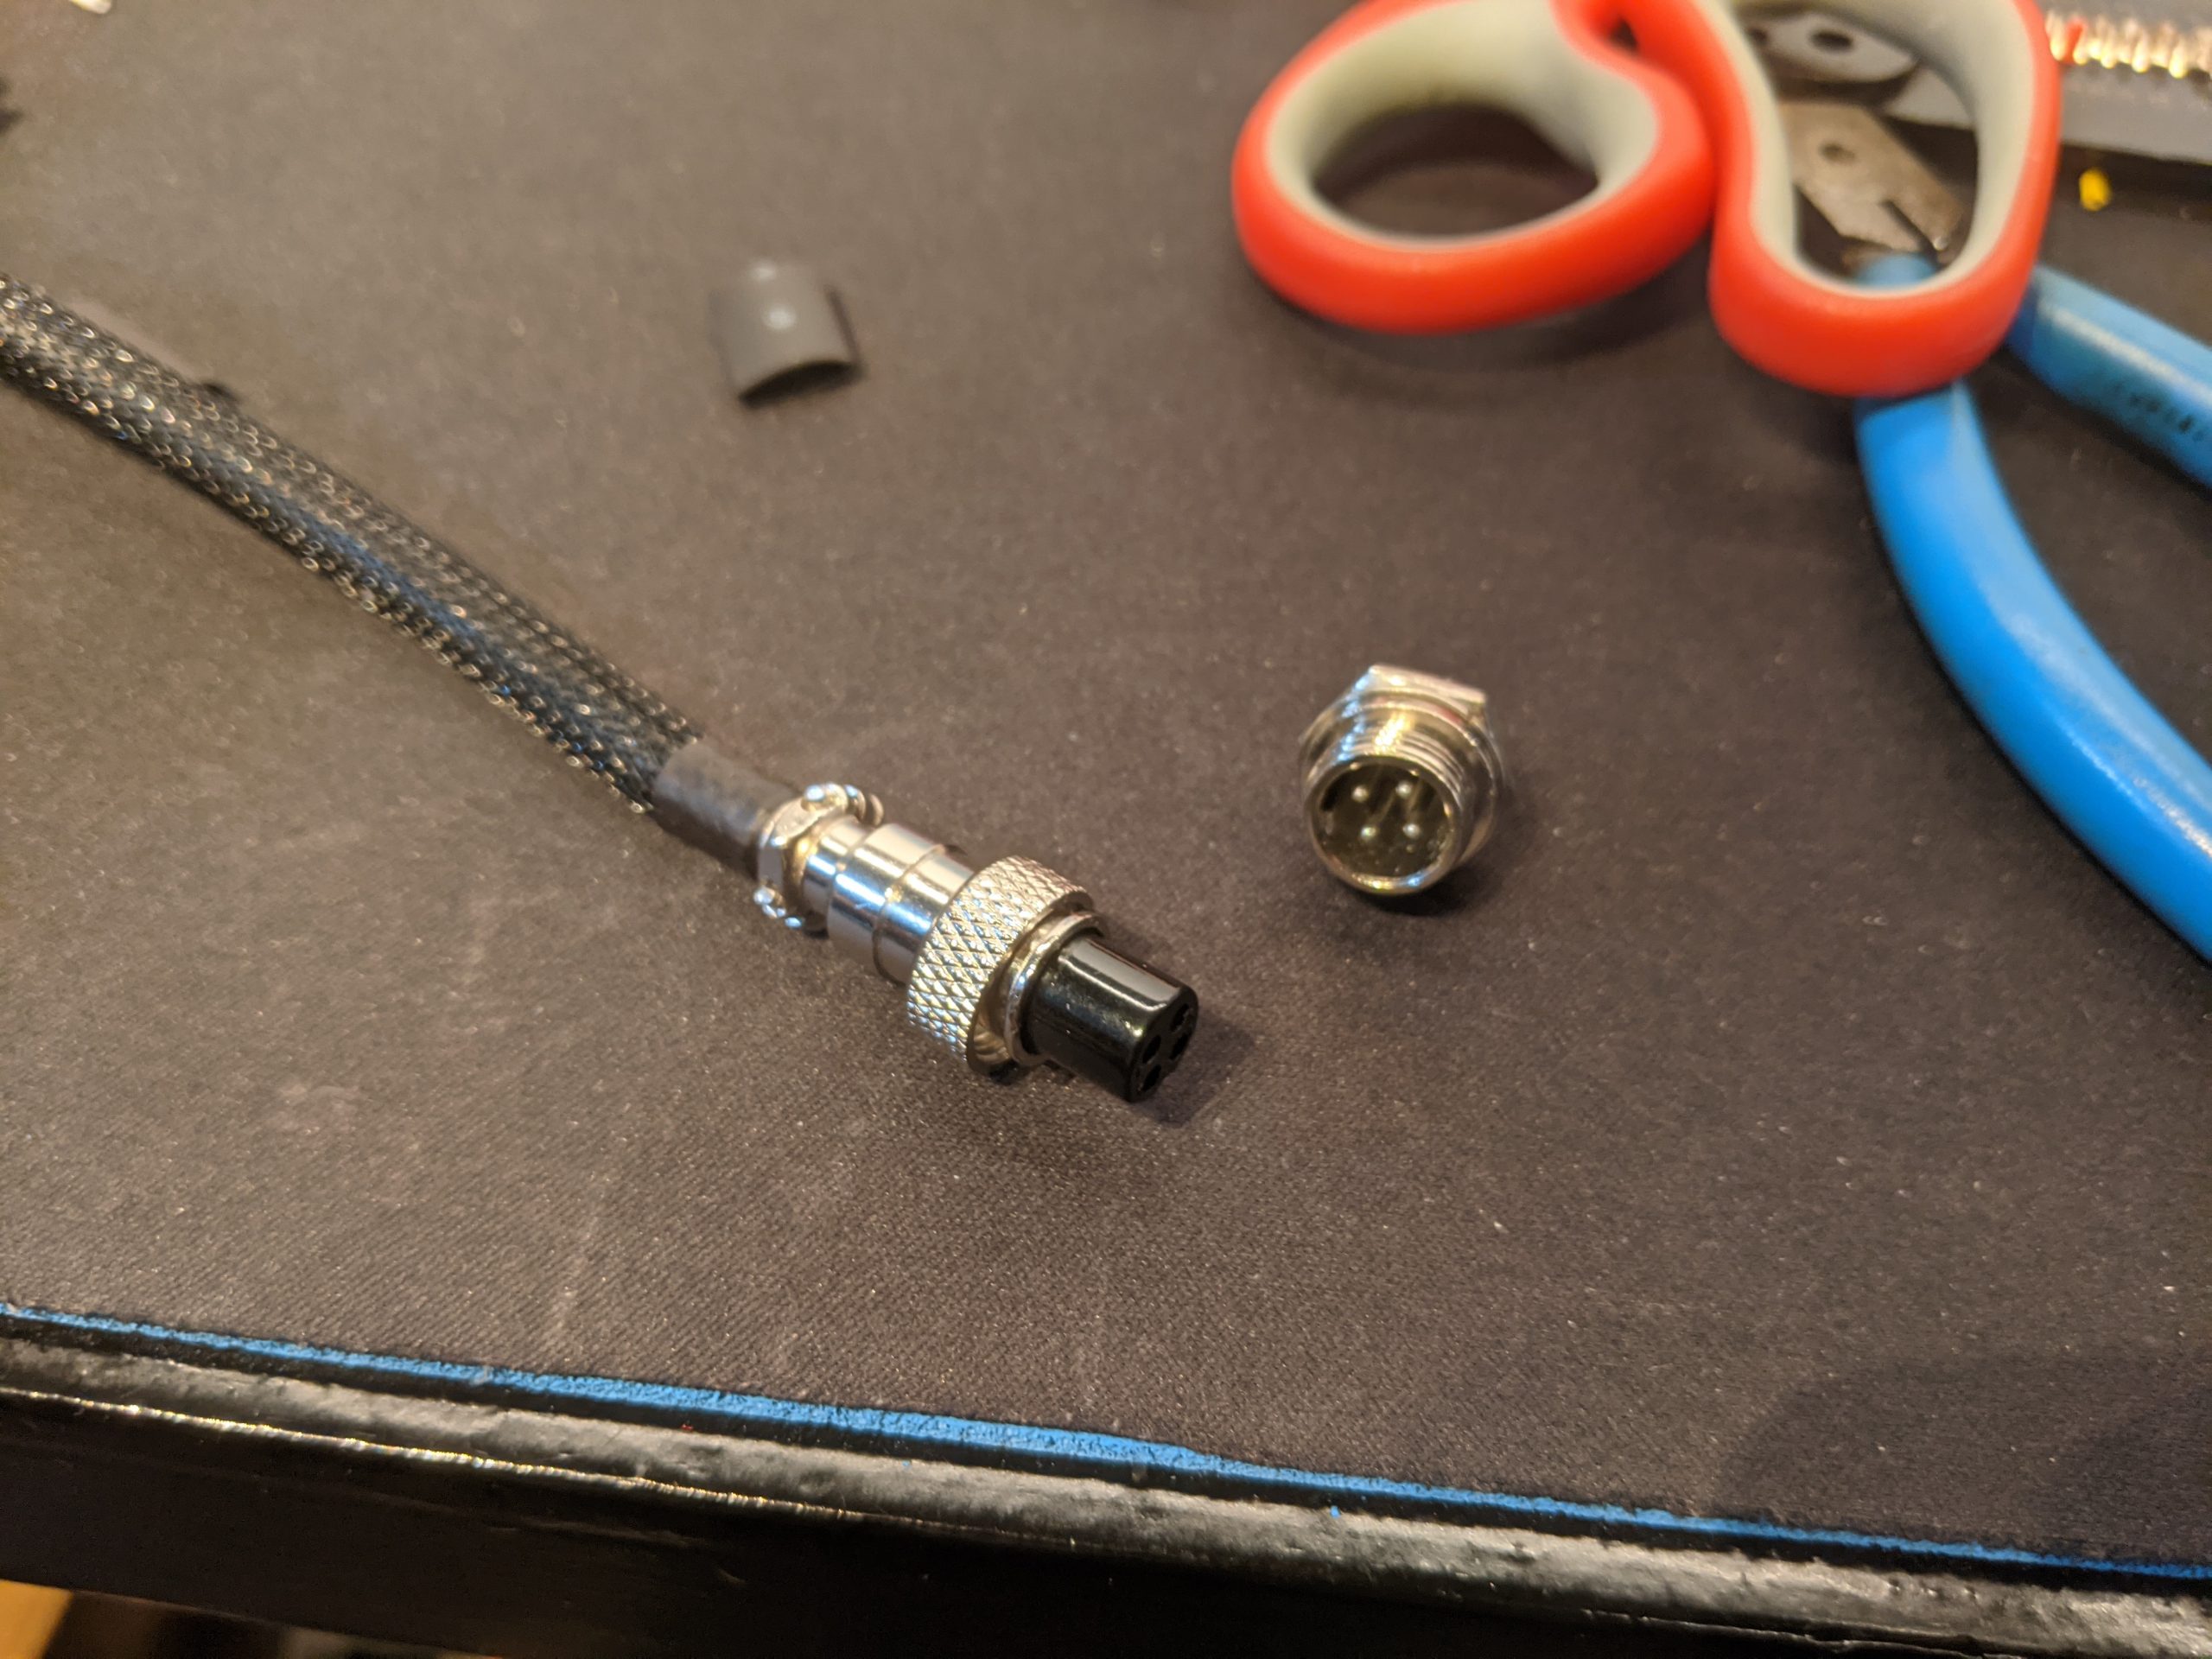
Umbilical
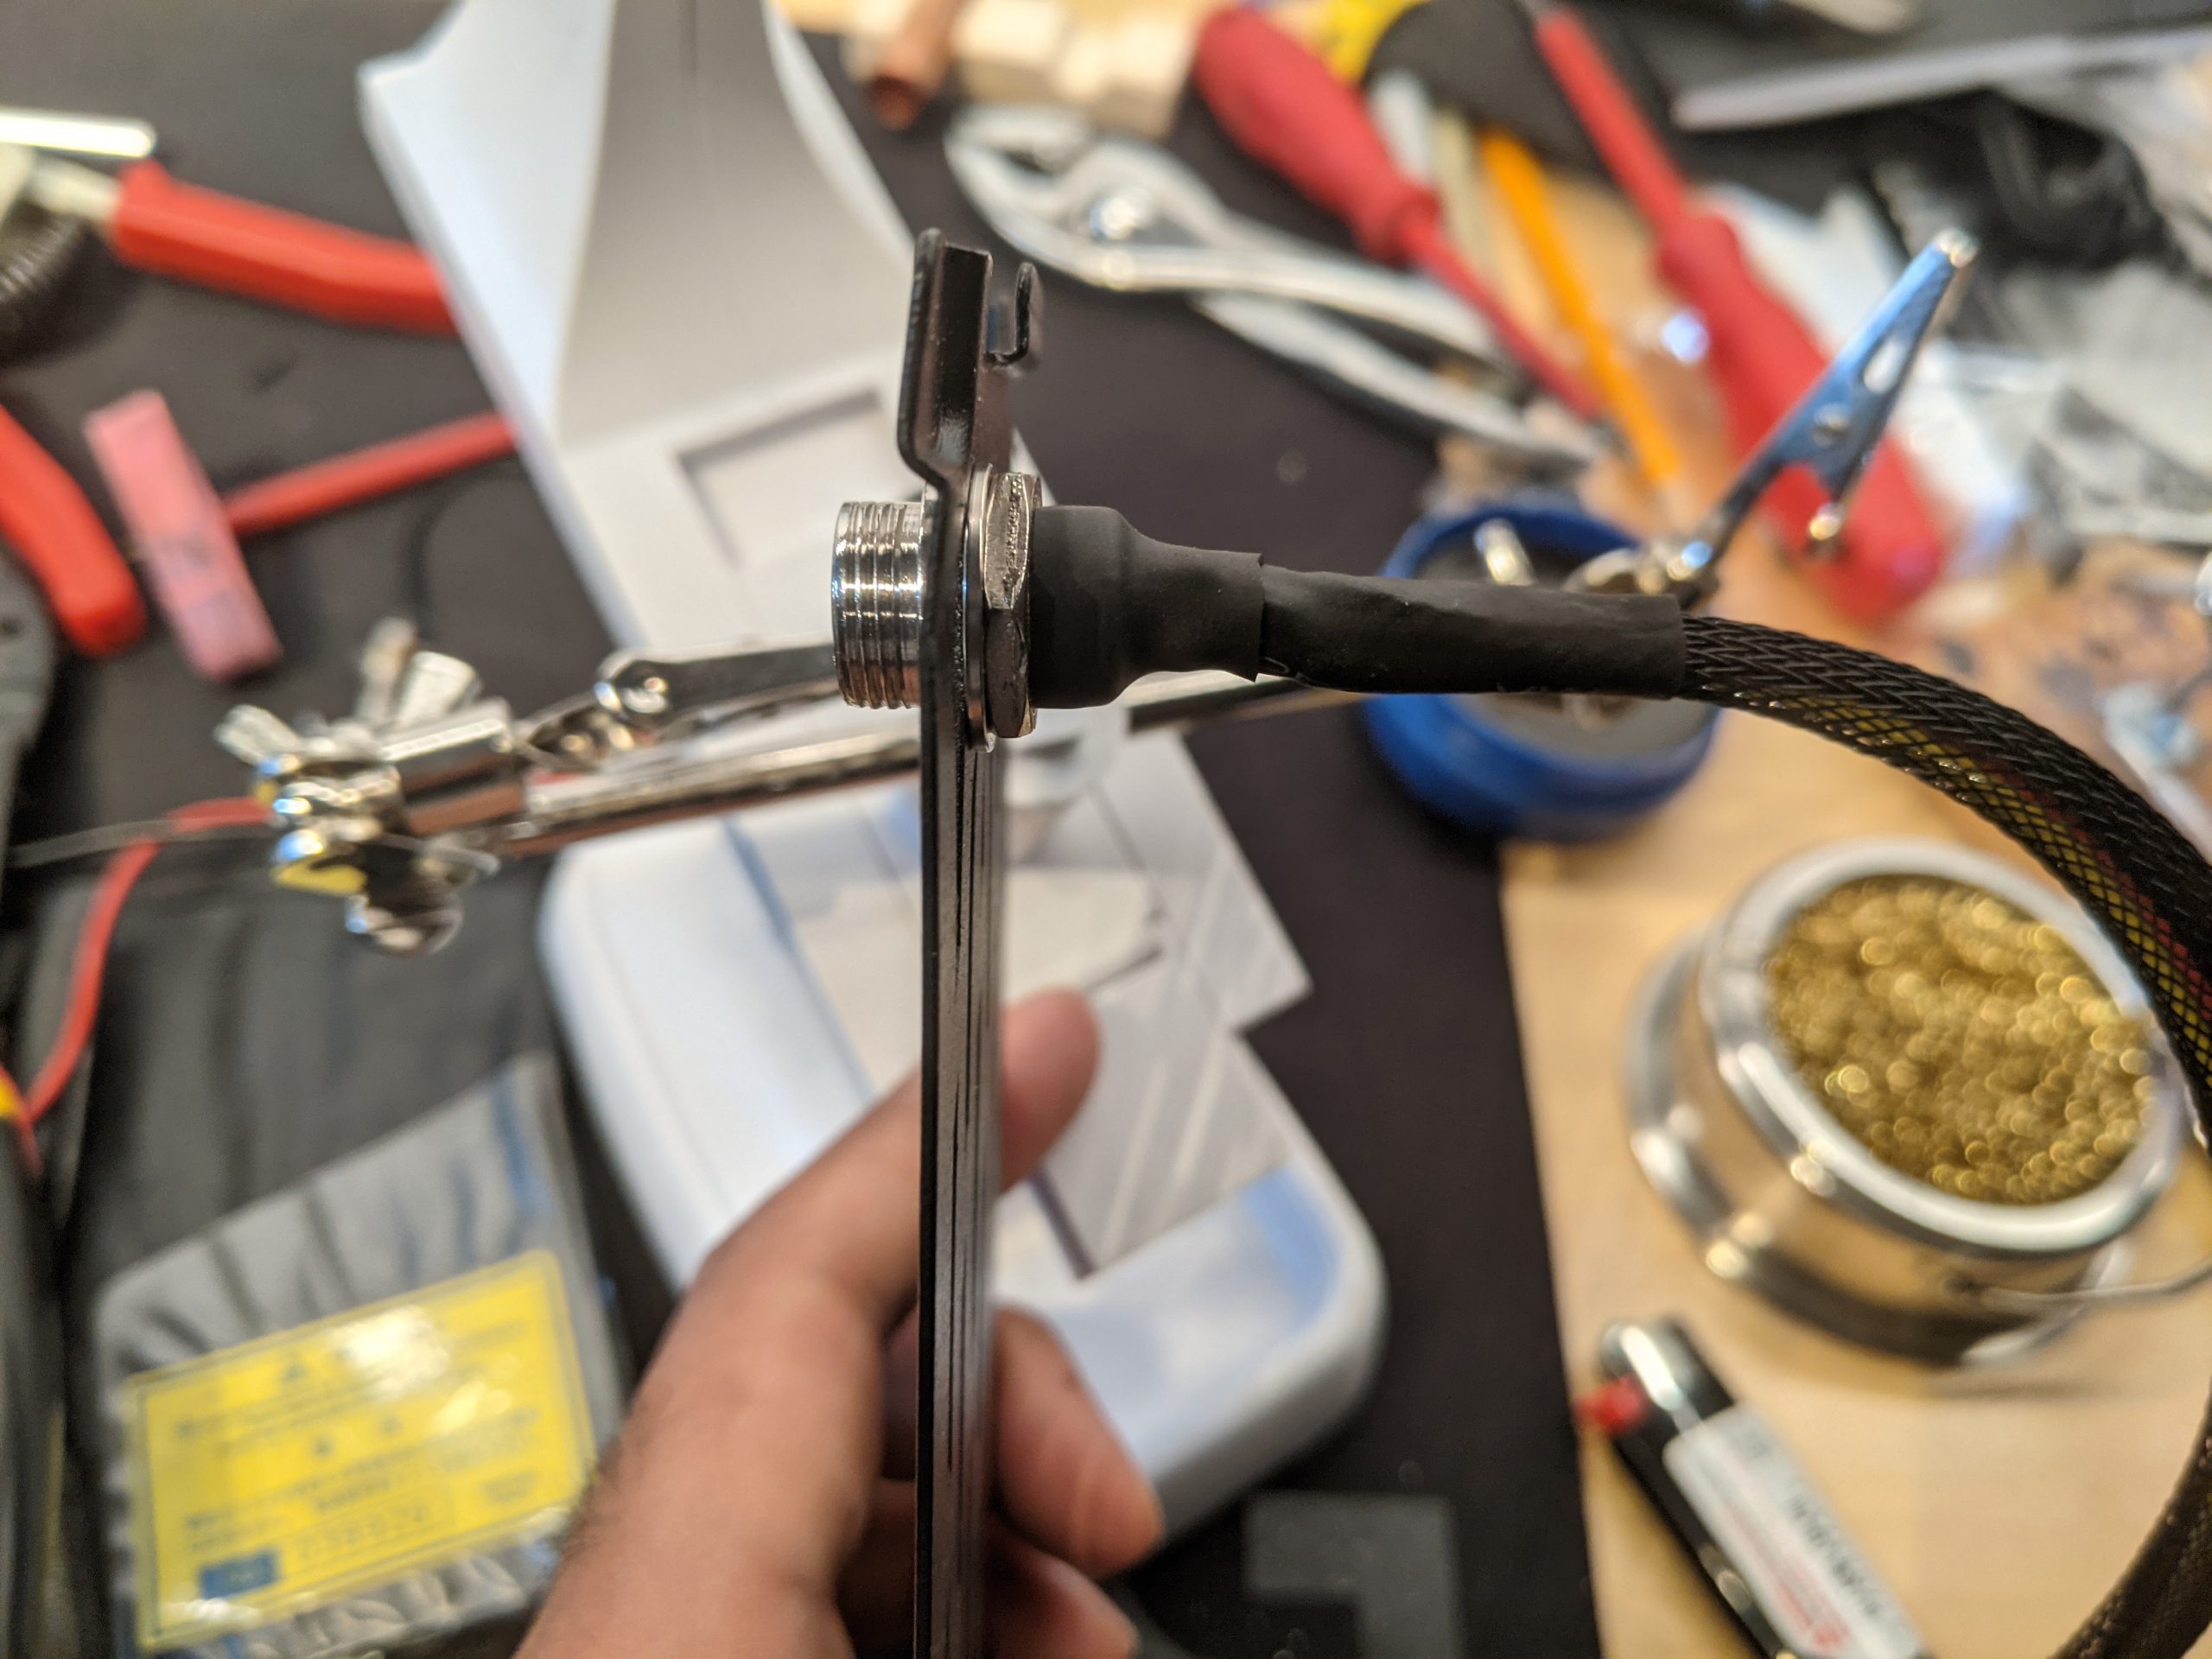
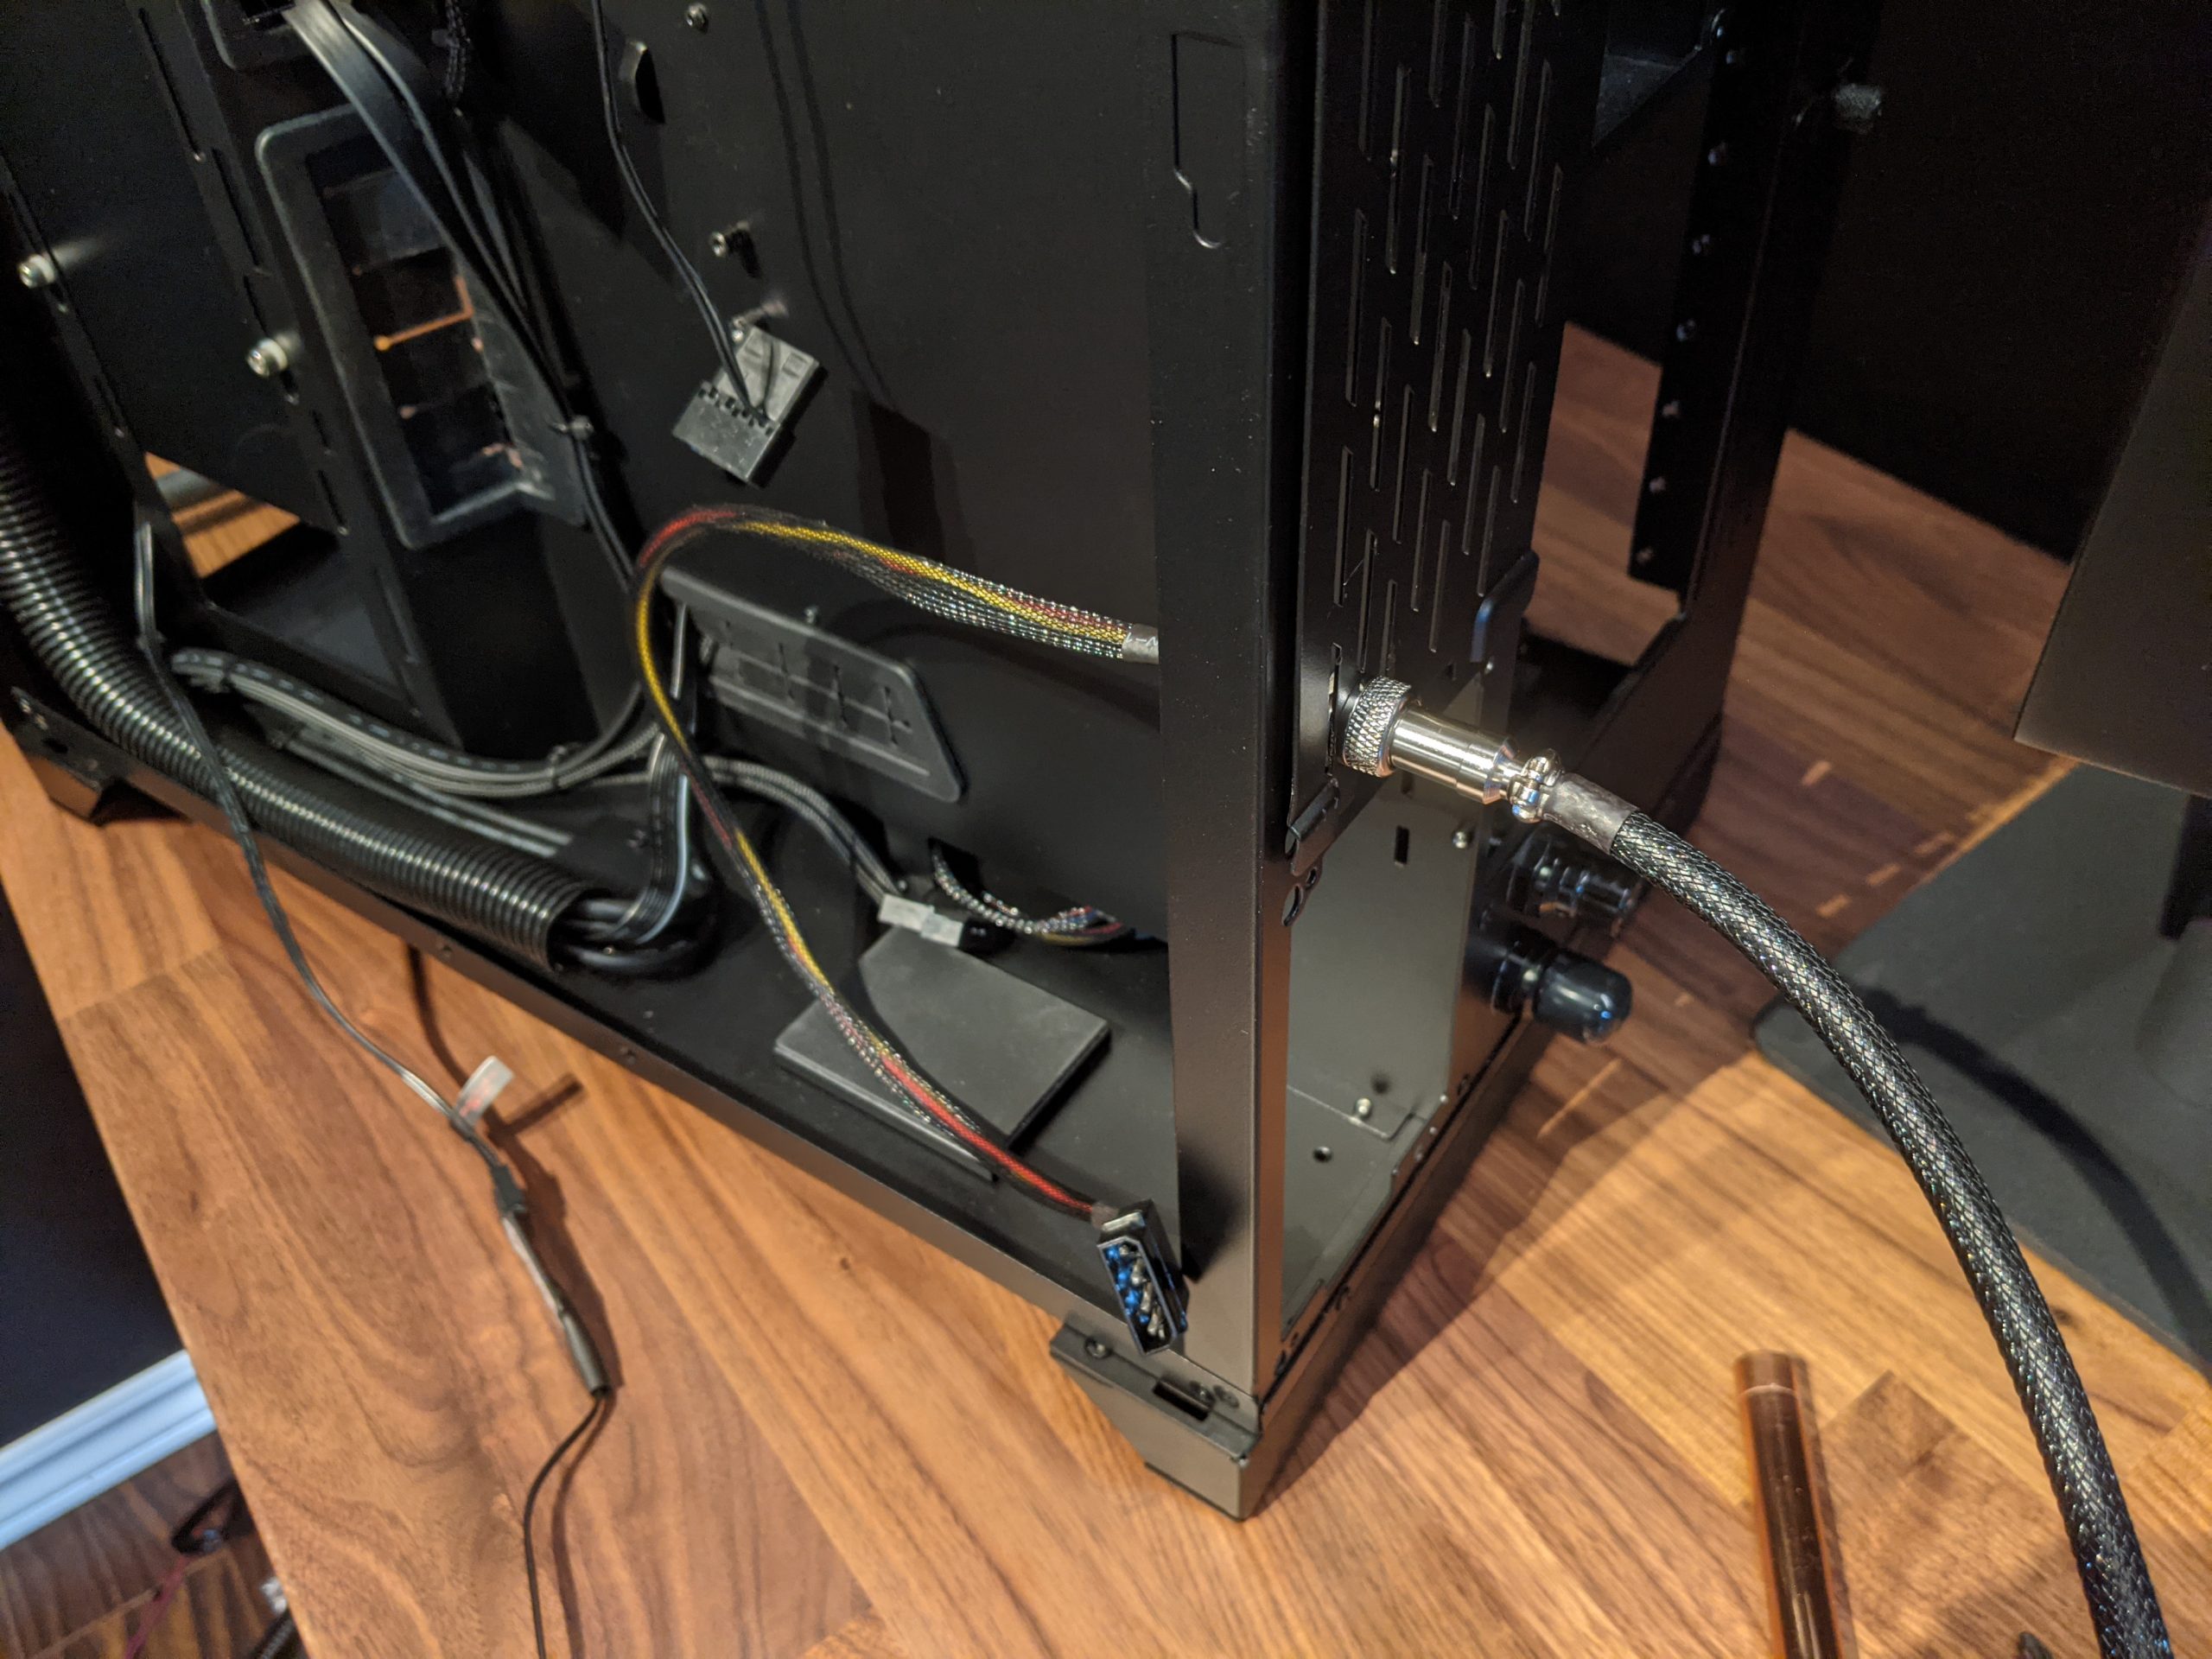
The external cooling unit needs power for pump and fans so I decided to build a sturdy 12V/5V extension cord using aviator plugs for added security. These plugs screw into the female socket so no one can accidentally yank them out while the computer is running.
Started with 18 AWG speaker wire
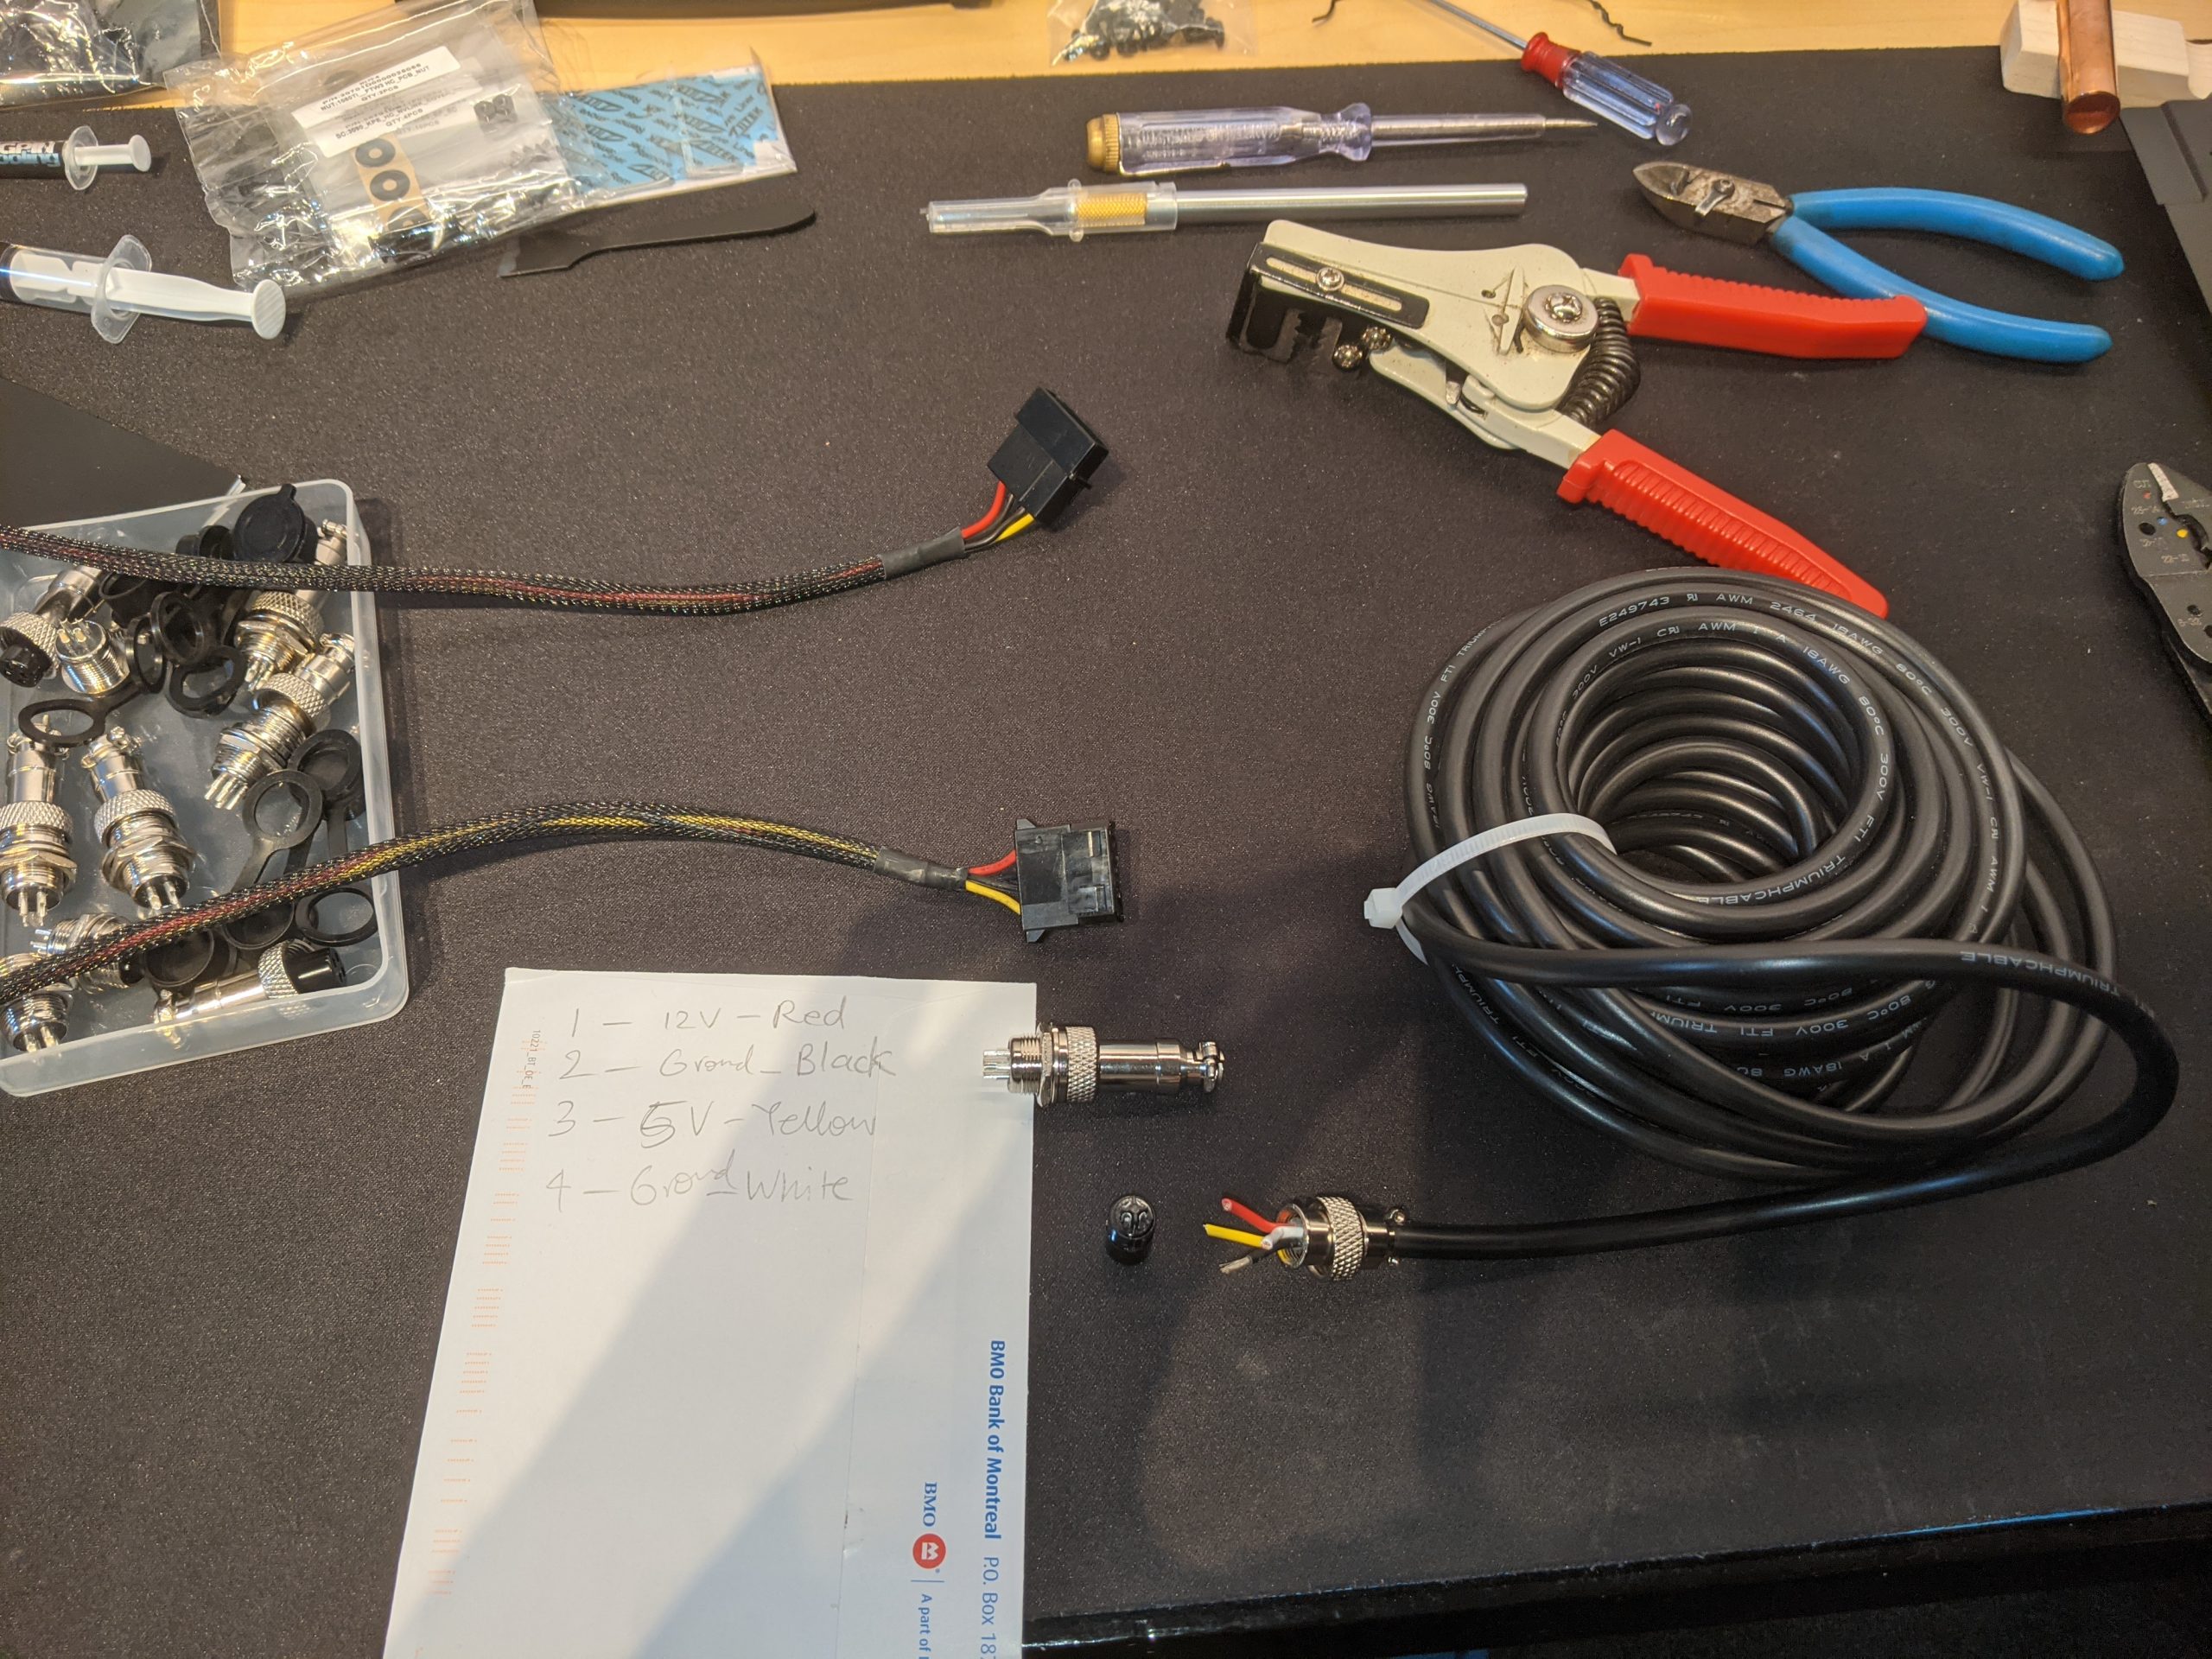
18 AWG was a snug fit in this plug but it worked in the end

Heat shrink housing and sleeved for extra points
Female connector mounted on case
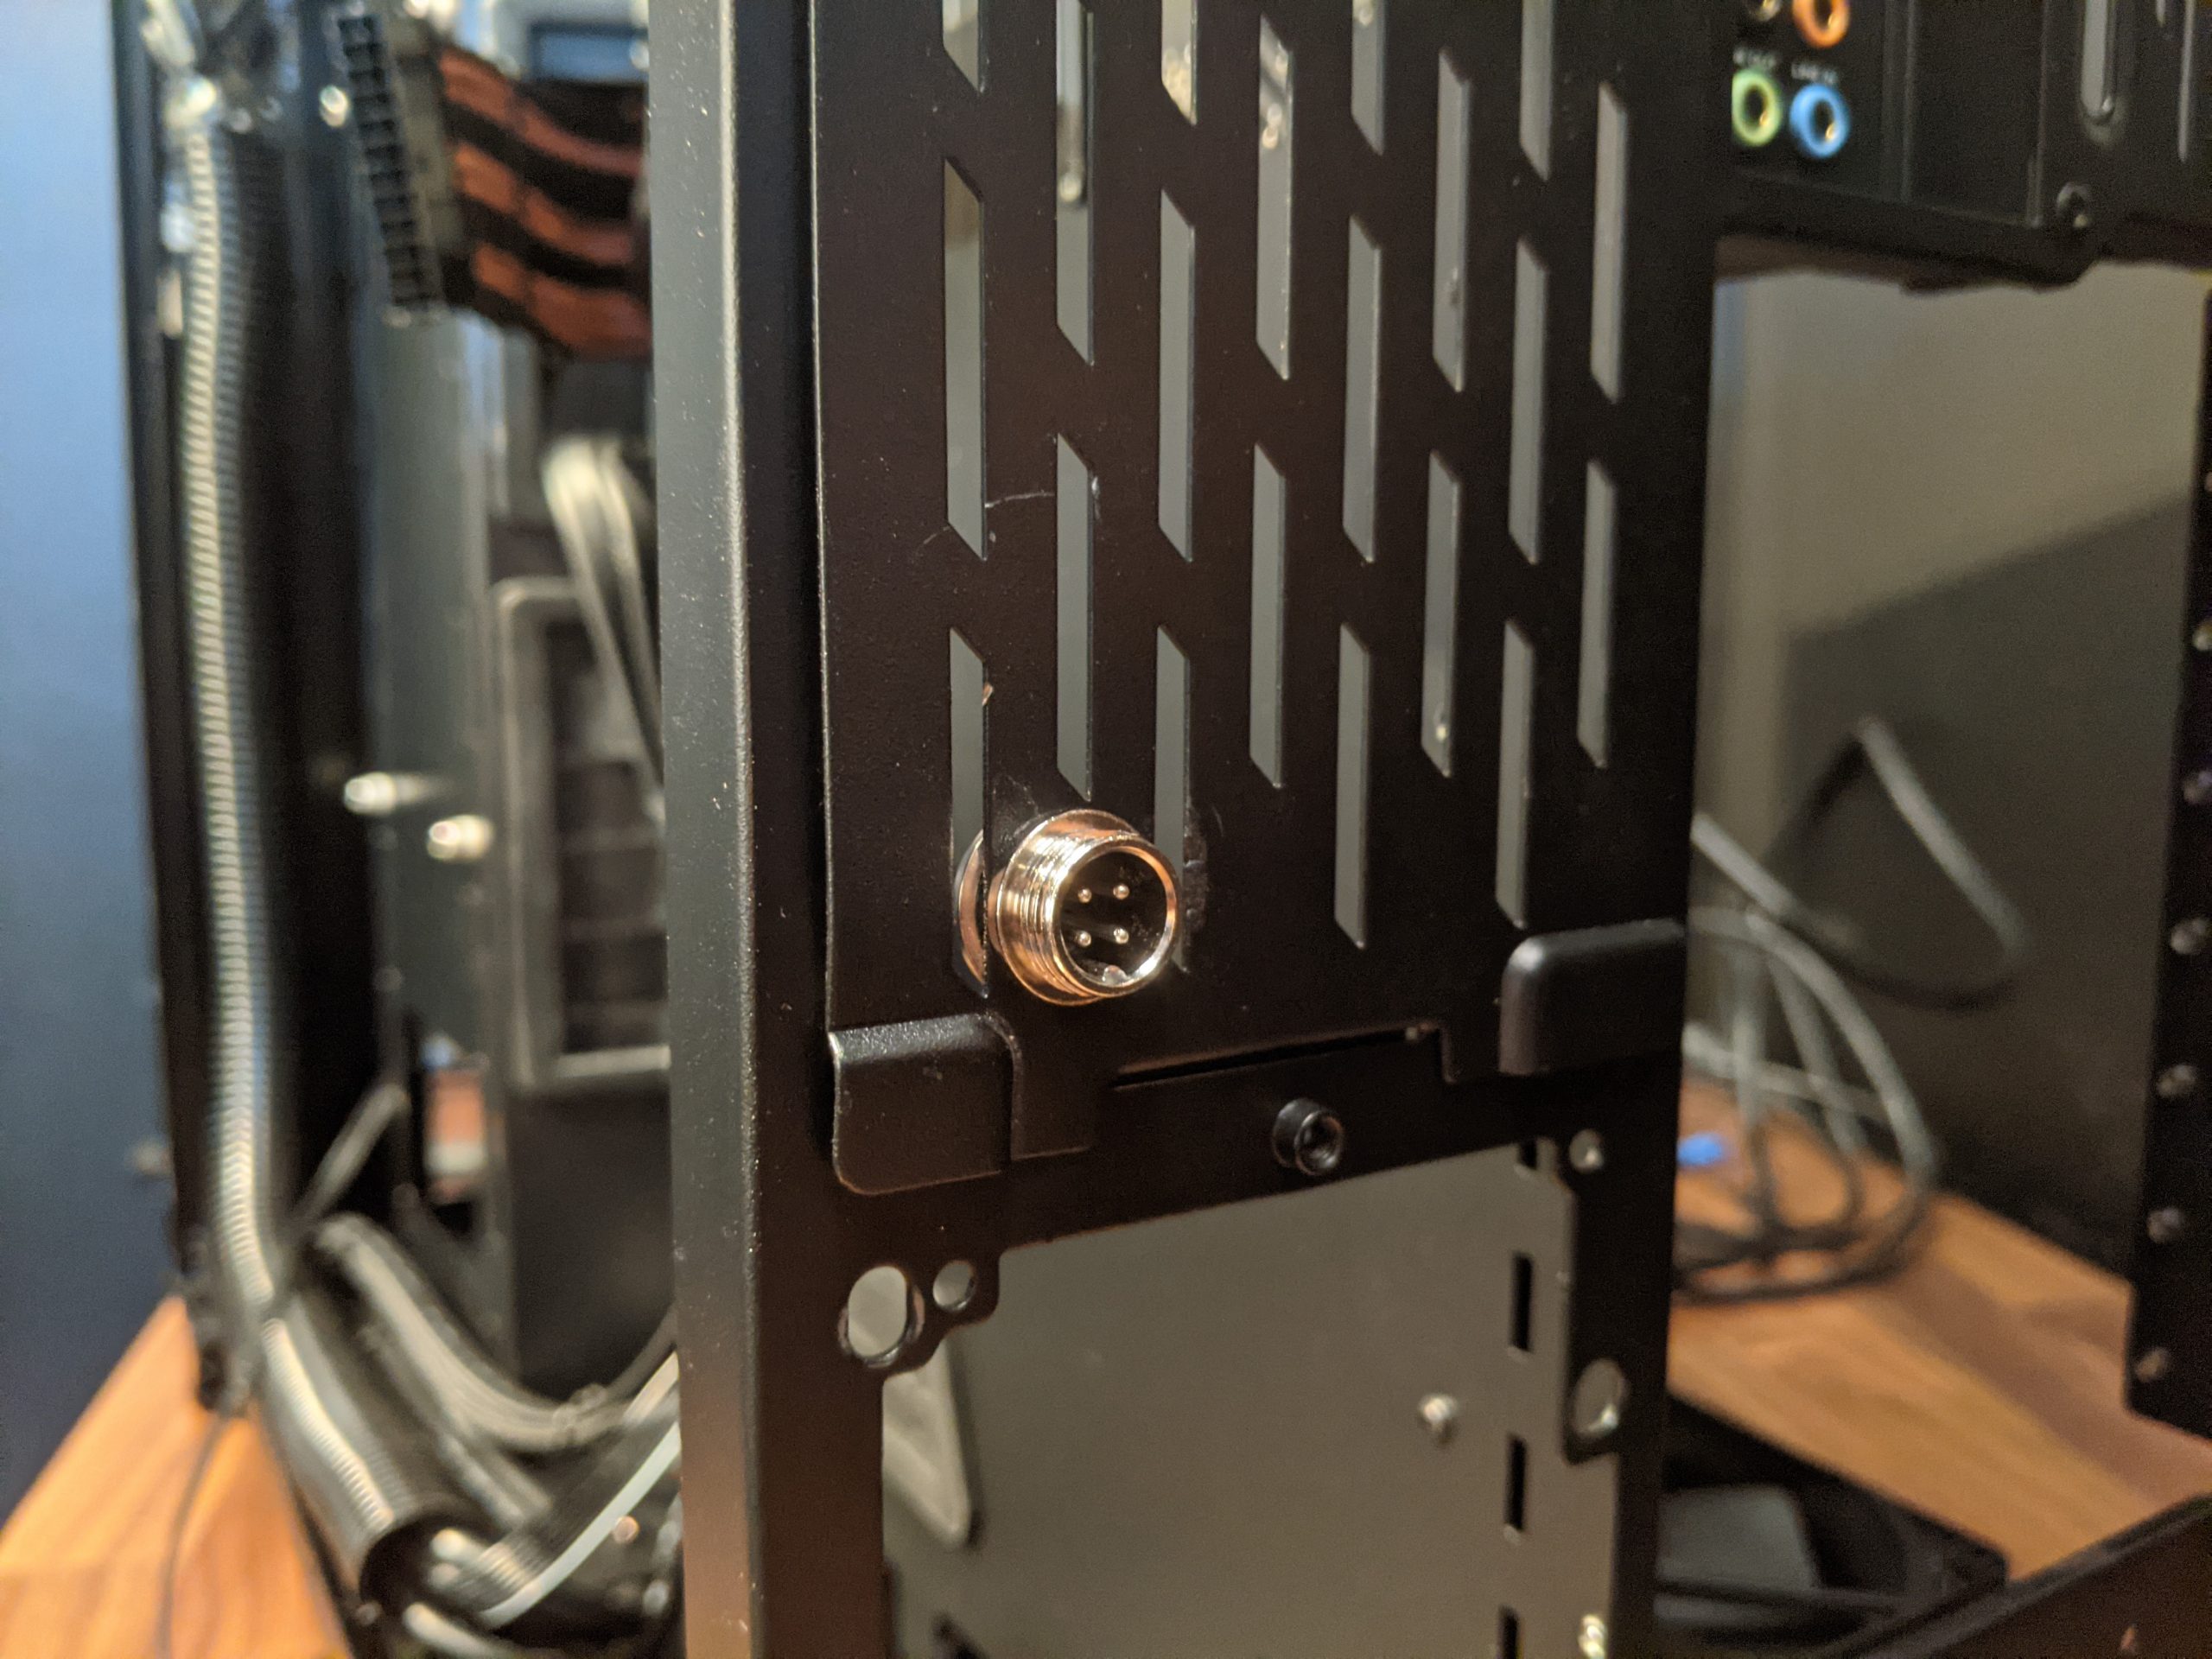
More heats shrink housing. It is so satisfying to work with
Here is the final product. Super secure and overbuilt to take a beating.
Copper Accents
EK Inertia D5 pump top comes with a translucent RGB top. I decided to color this in copper color and ditch the RGB altogether
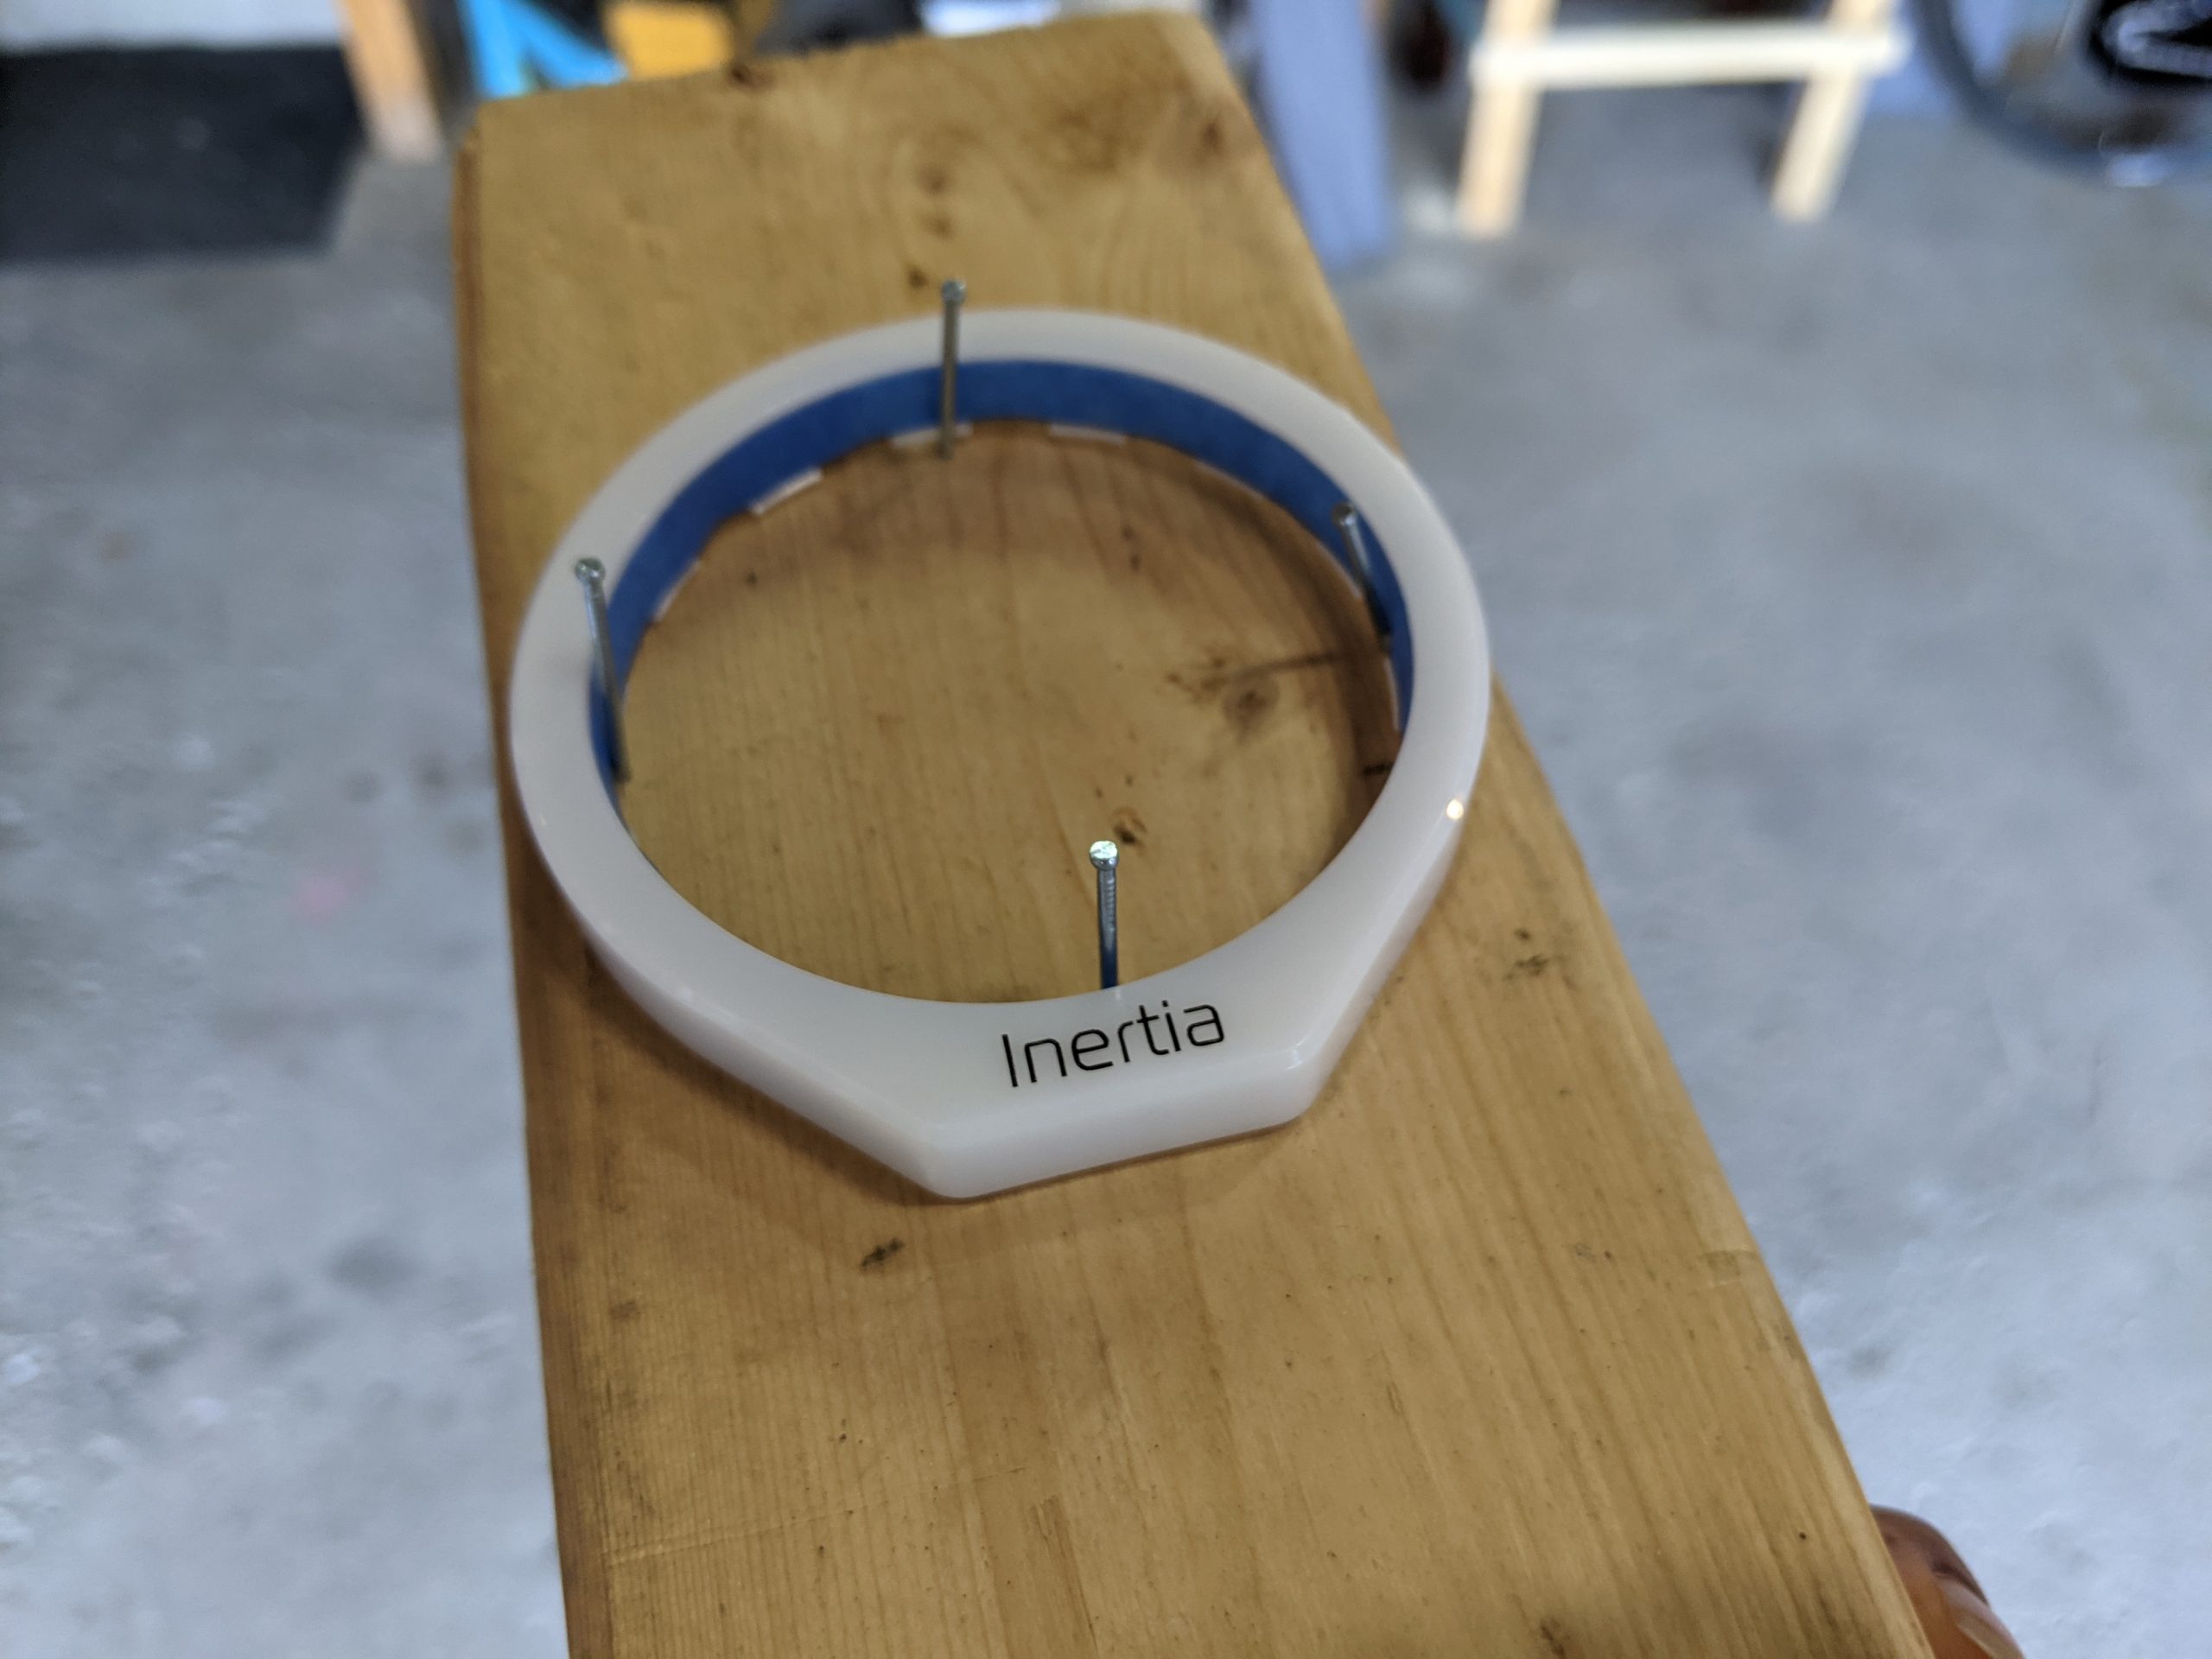
Painted using Rust-Oleum 1937830 Metallic Copper Spray. Rated the best to reproduce copper sheen.

RGB sacrificed for matching copper accents

EK Quantum Torque color rings in gold. These screw on to the EK Quantum Torque fittings to give an accent.
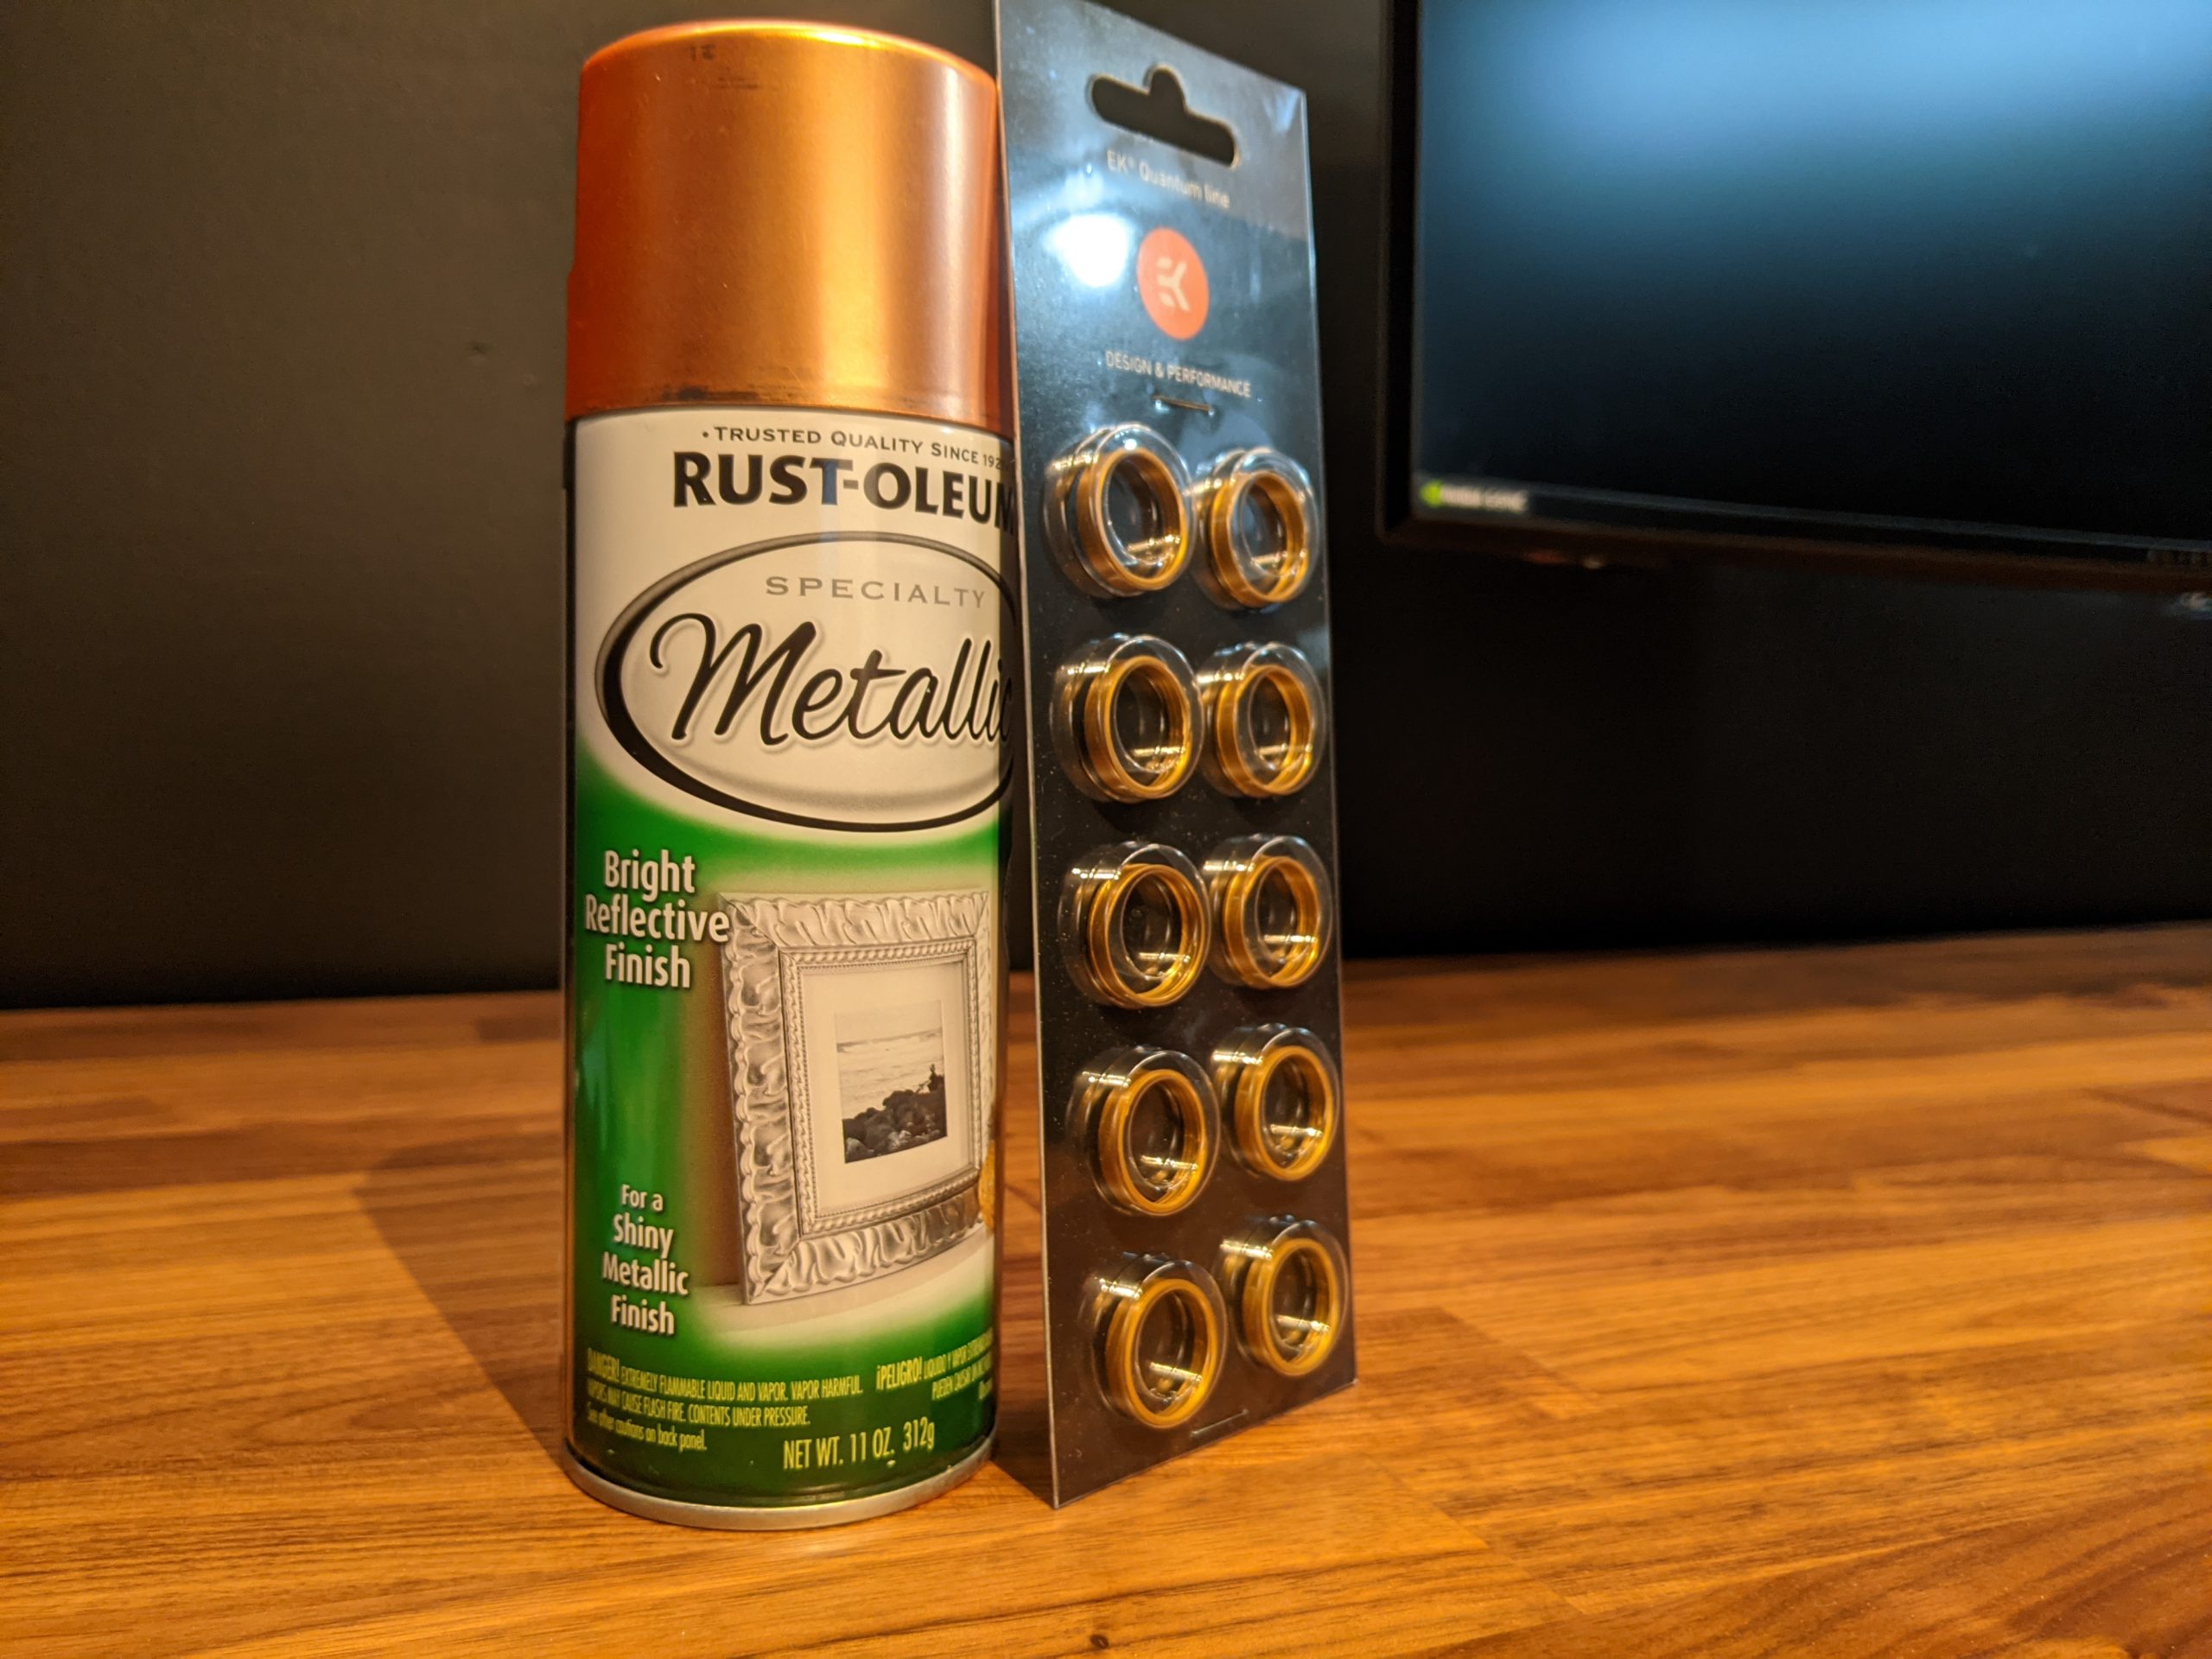
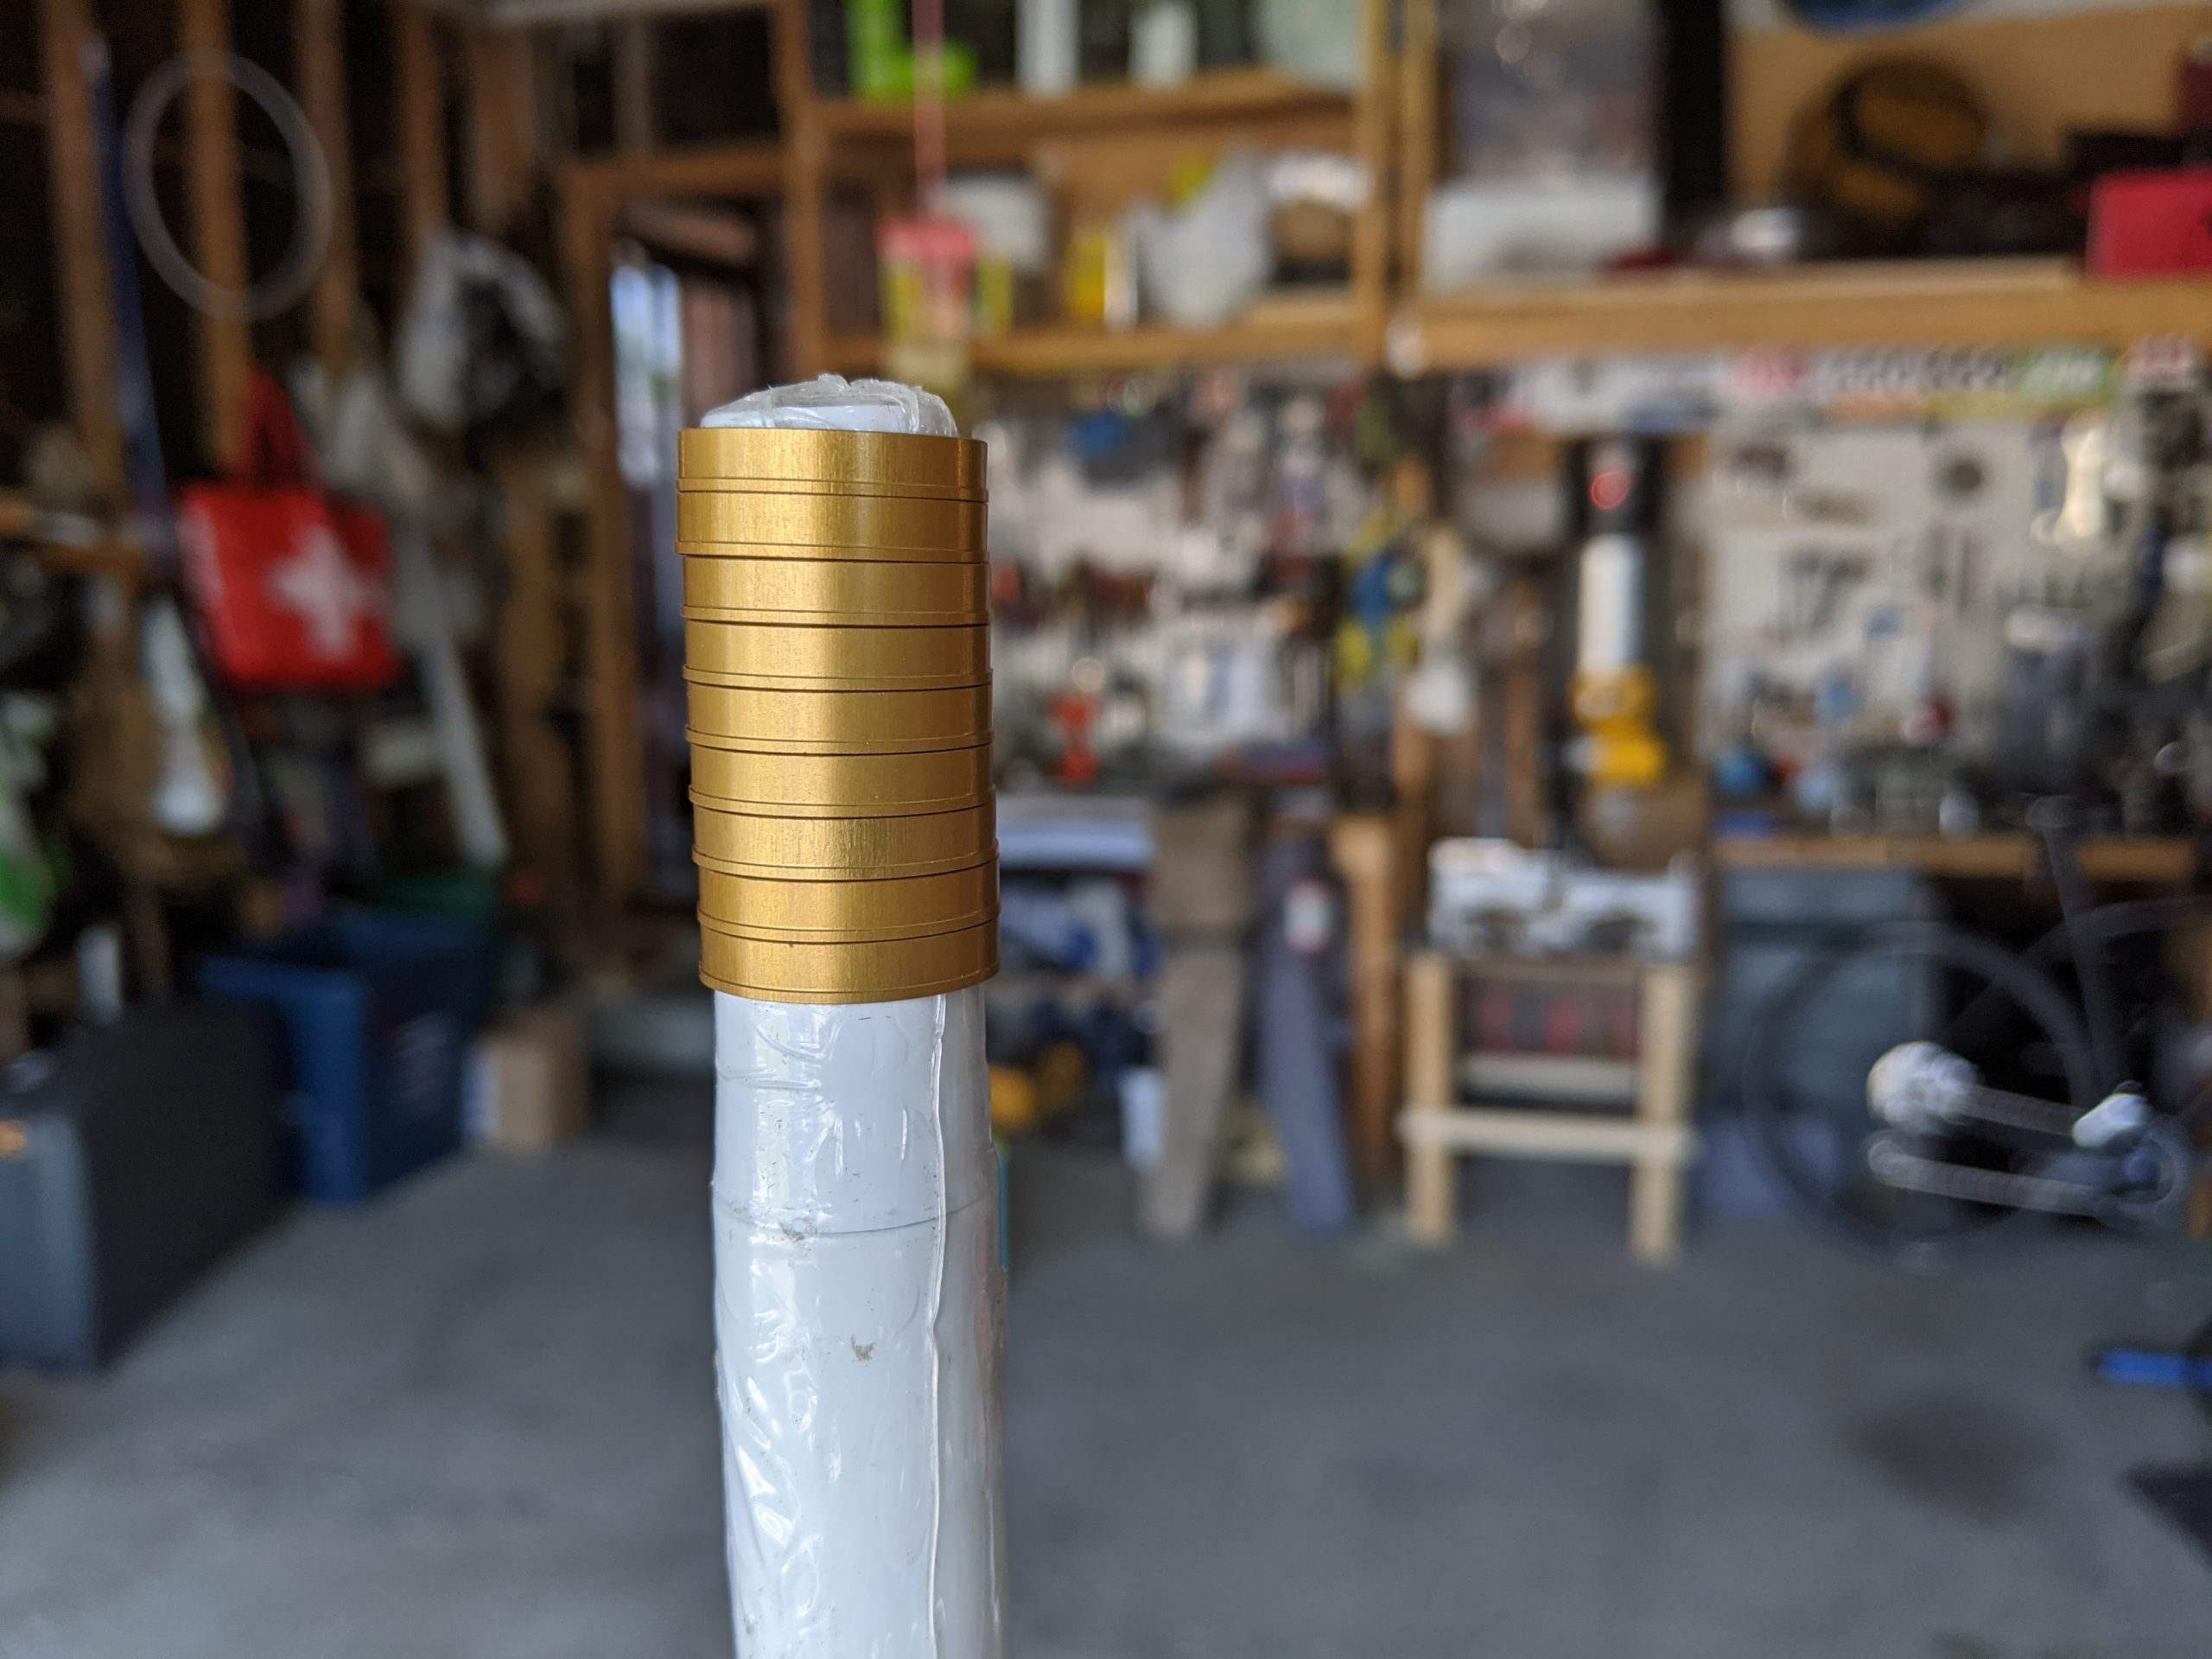
Painted
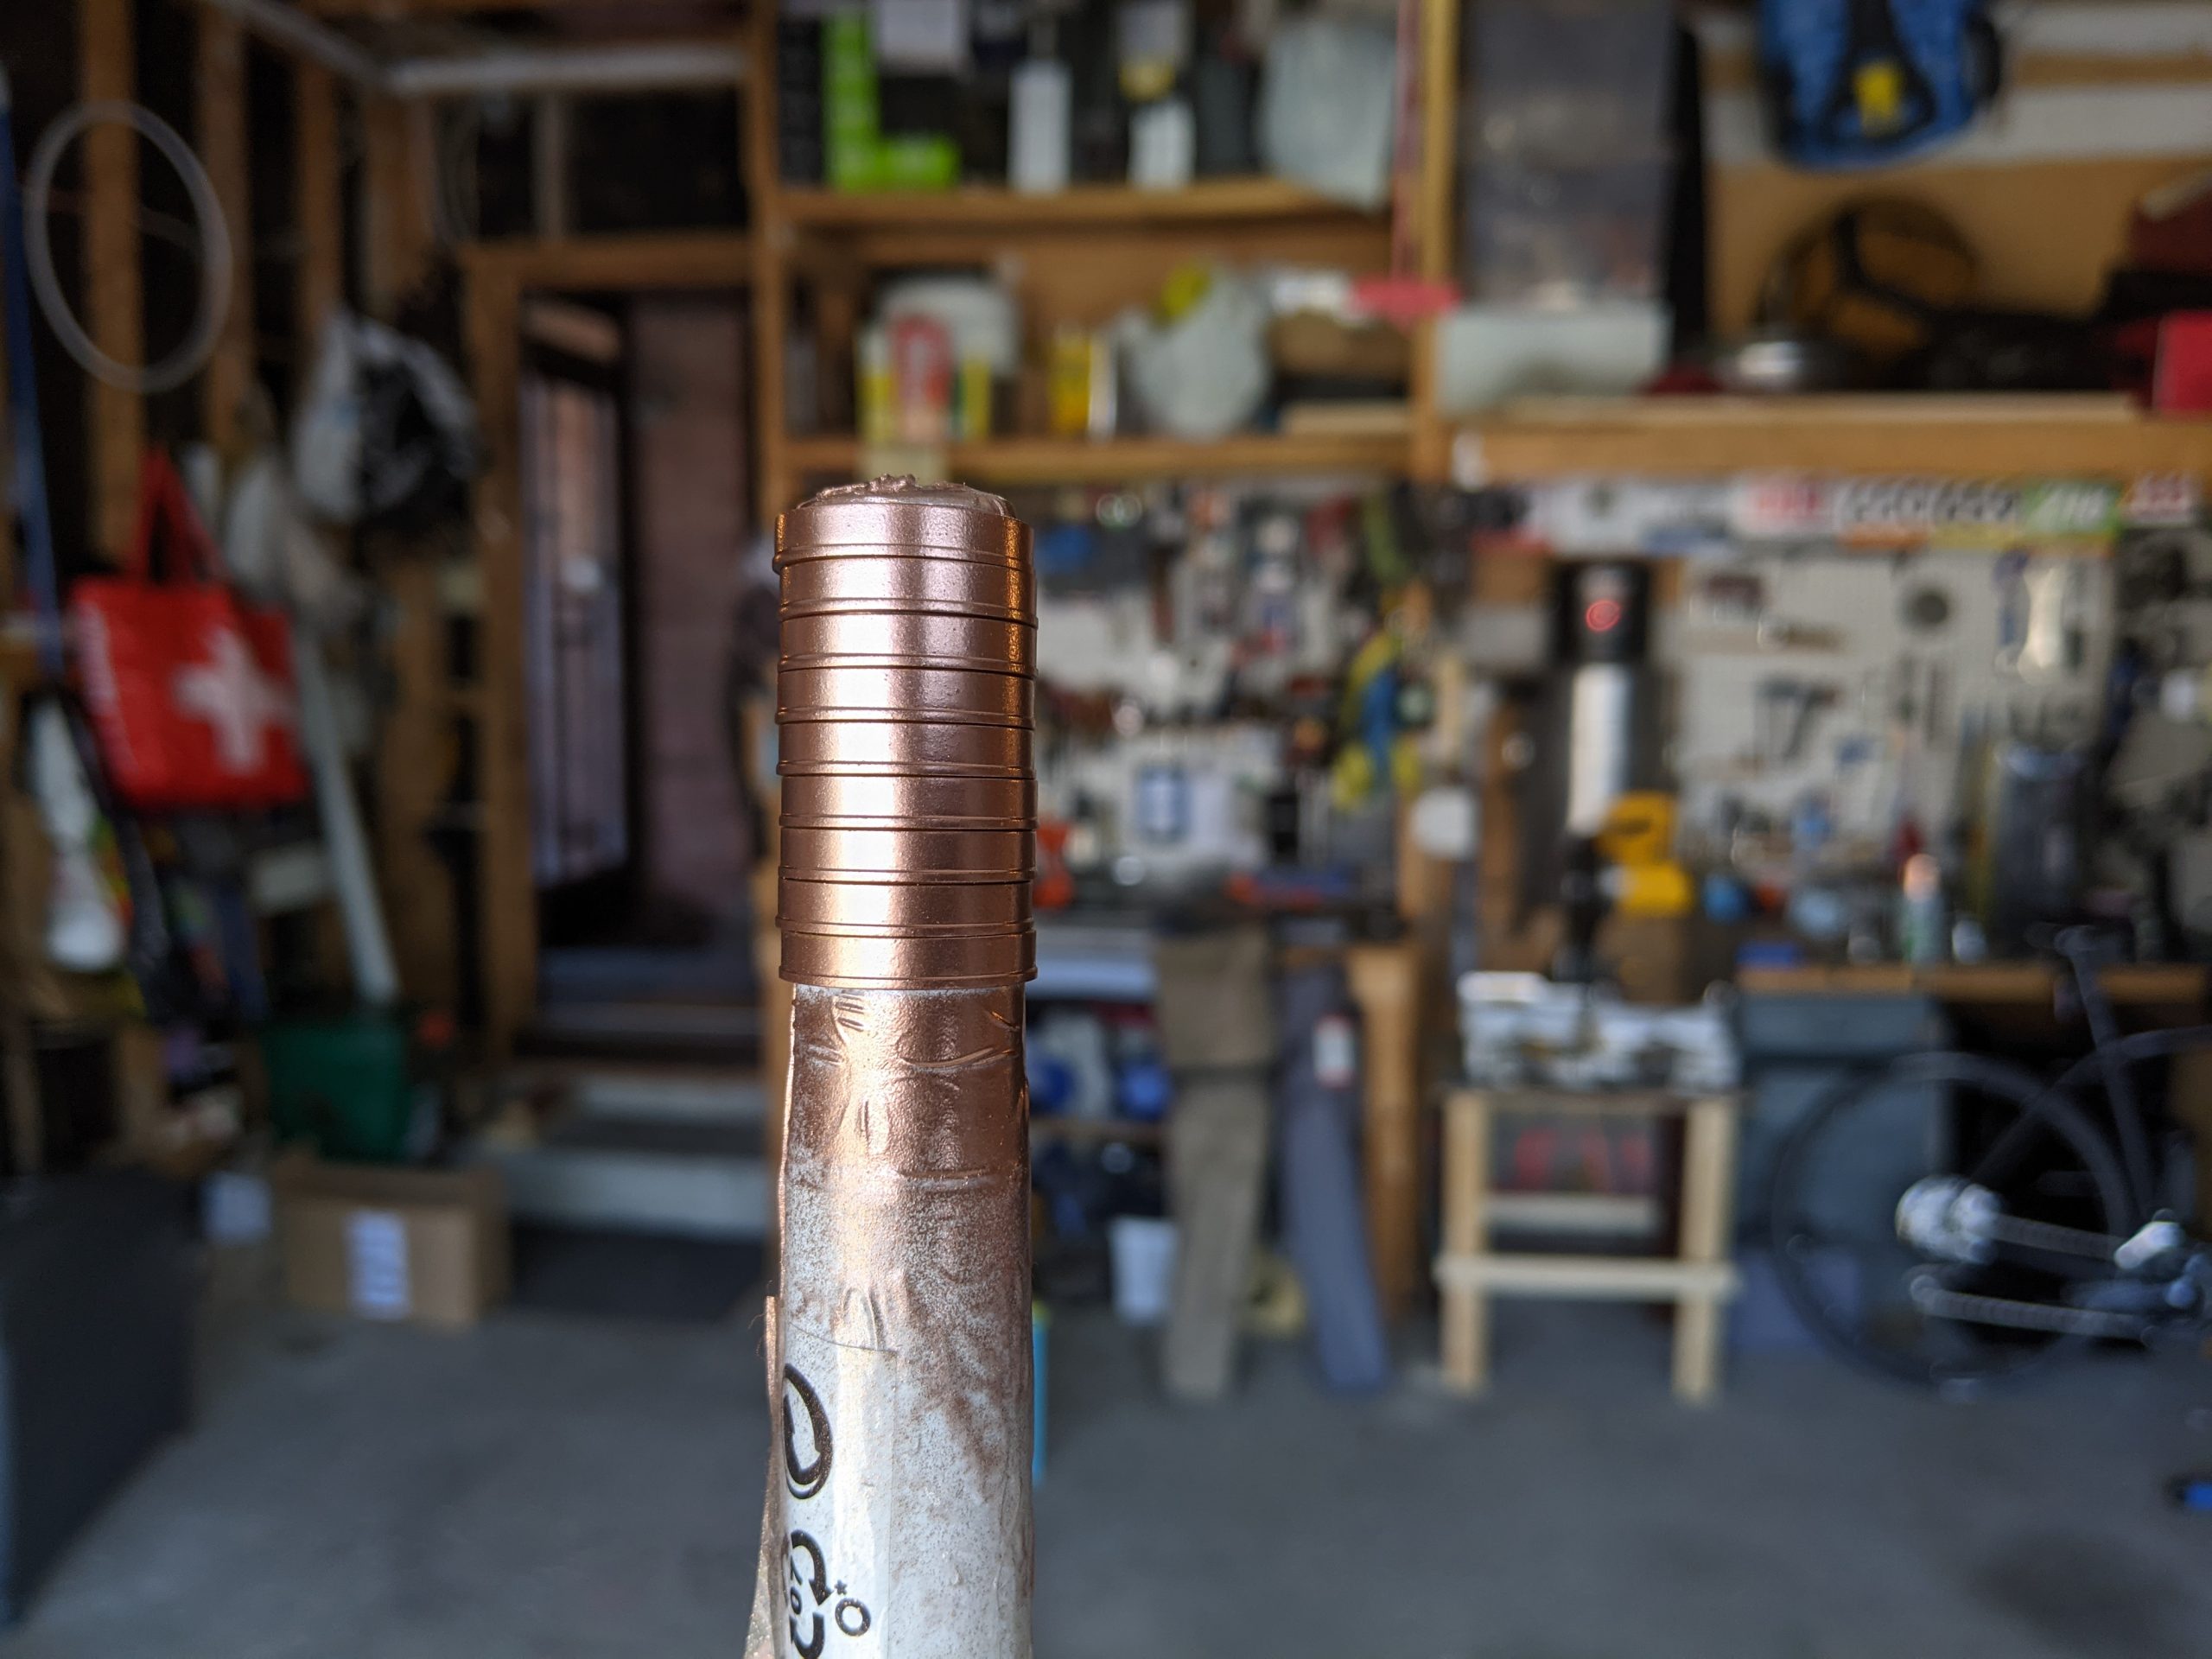
The EK Quantum Torque accent rings now match the copper tubes.
Flow Meter Face Plate
Barrow OLED flow meter is installed to keep an eye on coolant temp and flow rate. The face of this meter is plain and has a part number stamped on it. I decided to make a copper face plate because why not?
Of course they made the bezel non-symmetrical. It is not centered and offset vertically by 2 mm
Polishing

All done
Tubing Reinforcement
Long tubing runs can lead to sag and lack of stability for the fittings. To fix this I made some vice clamp style wooden pieces out of lumber.
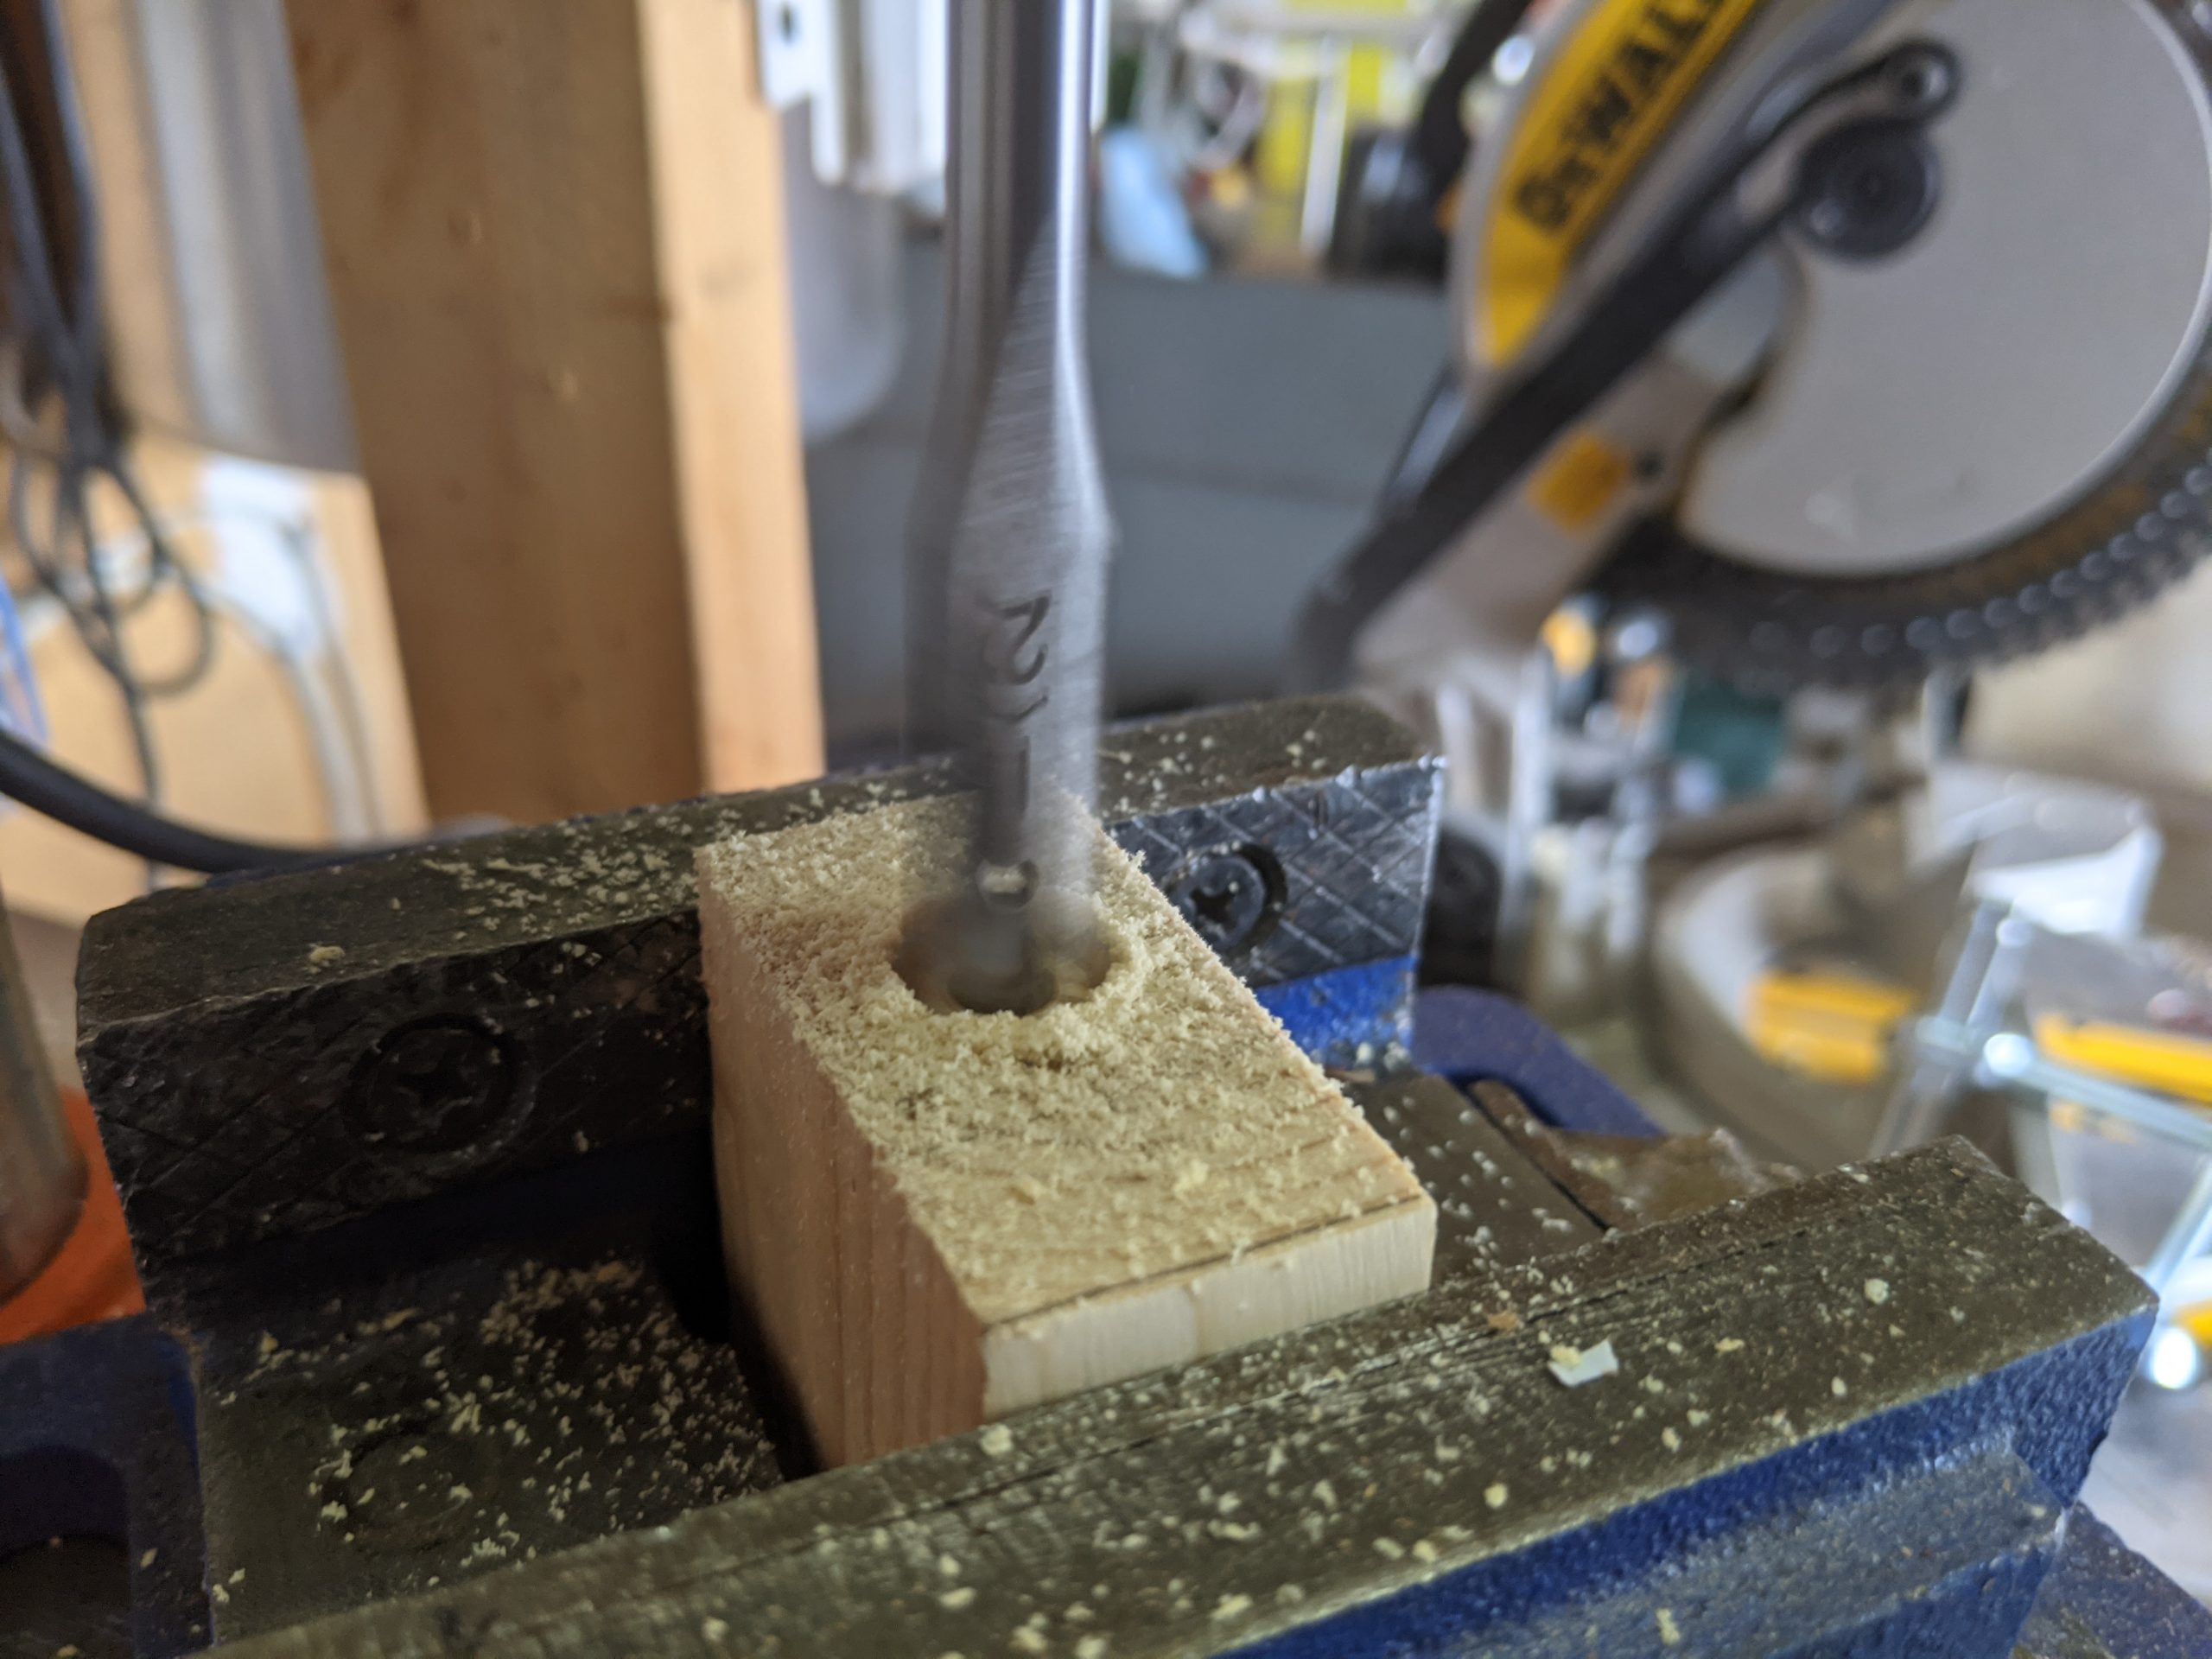
First a measured piece of lumber was milled out using 1/2″ spade bit.
Carefully cut in half to create a split design so the tubing can be held in place. This idea came from vice clamps I use to service mountain biking suspension components.

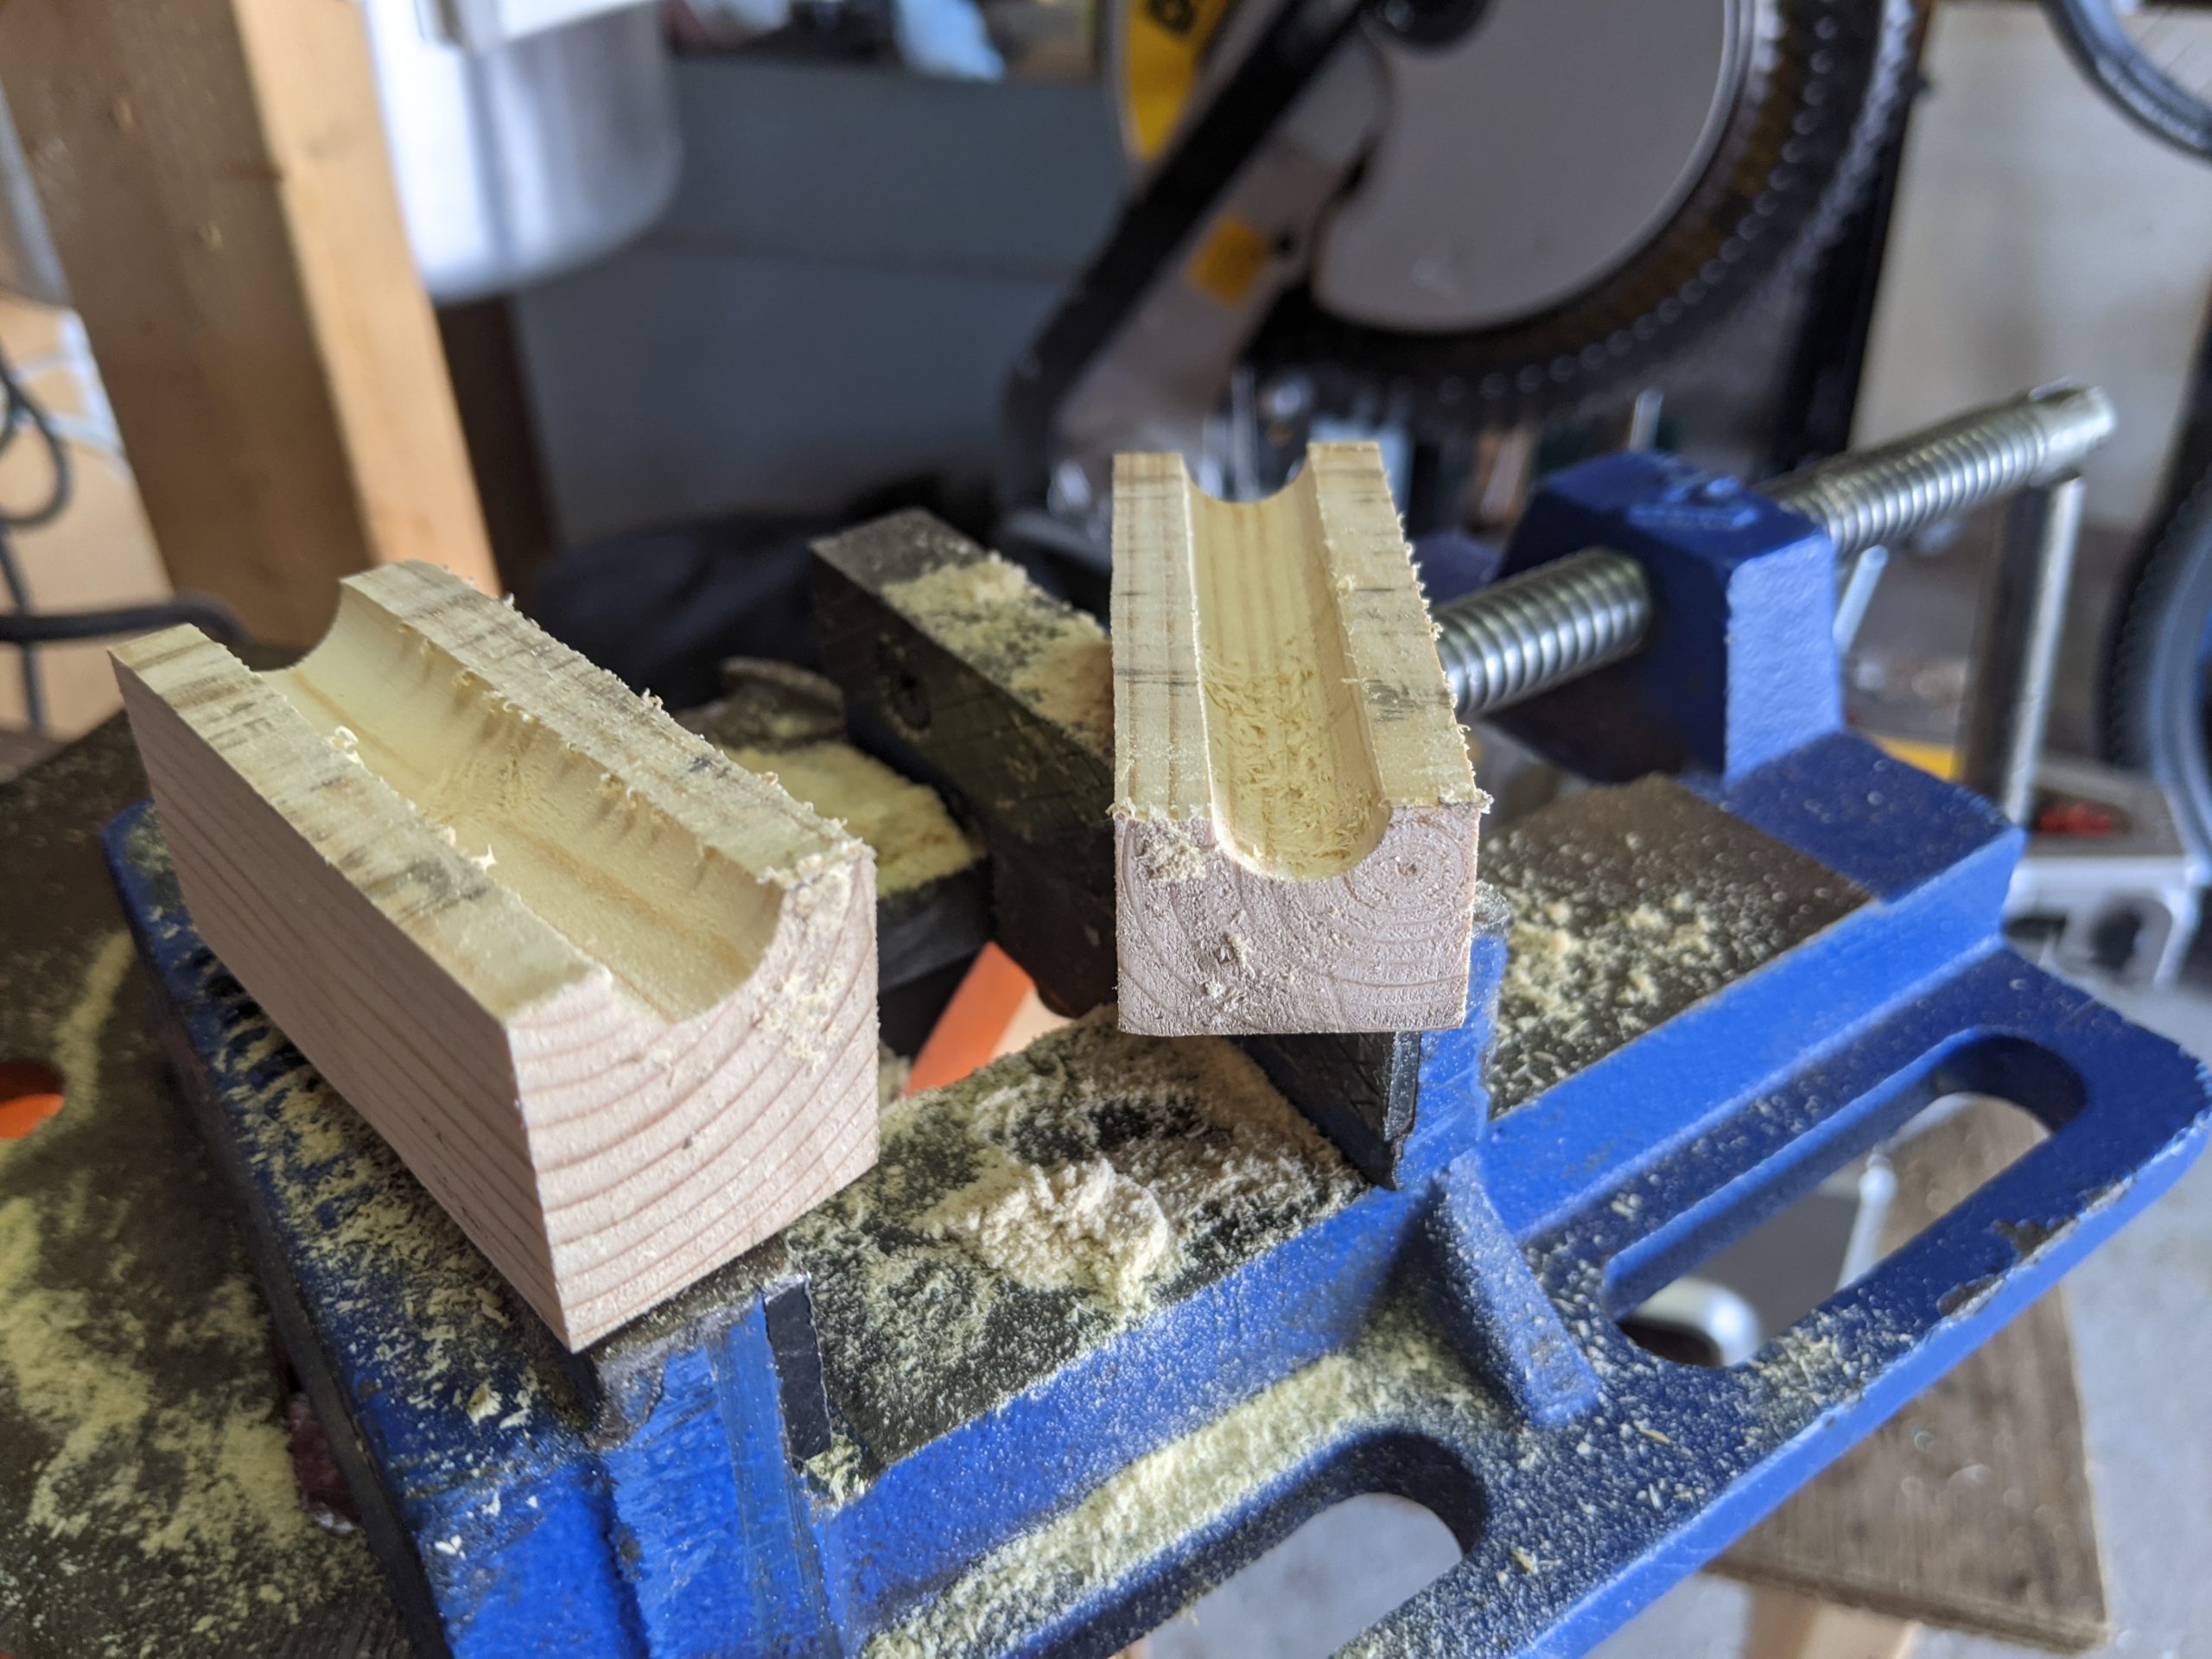
Using a drum sanding attachment, this channel was sanded to a smooth finish

Fits like a glove!
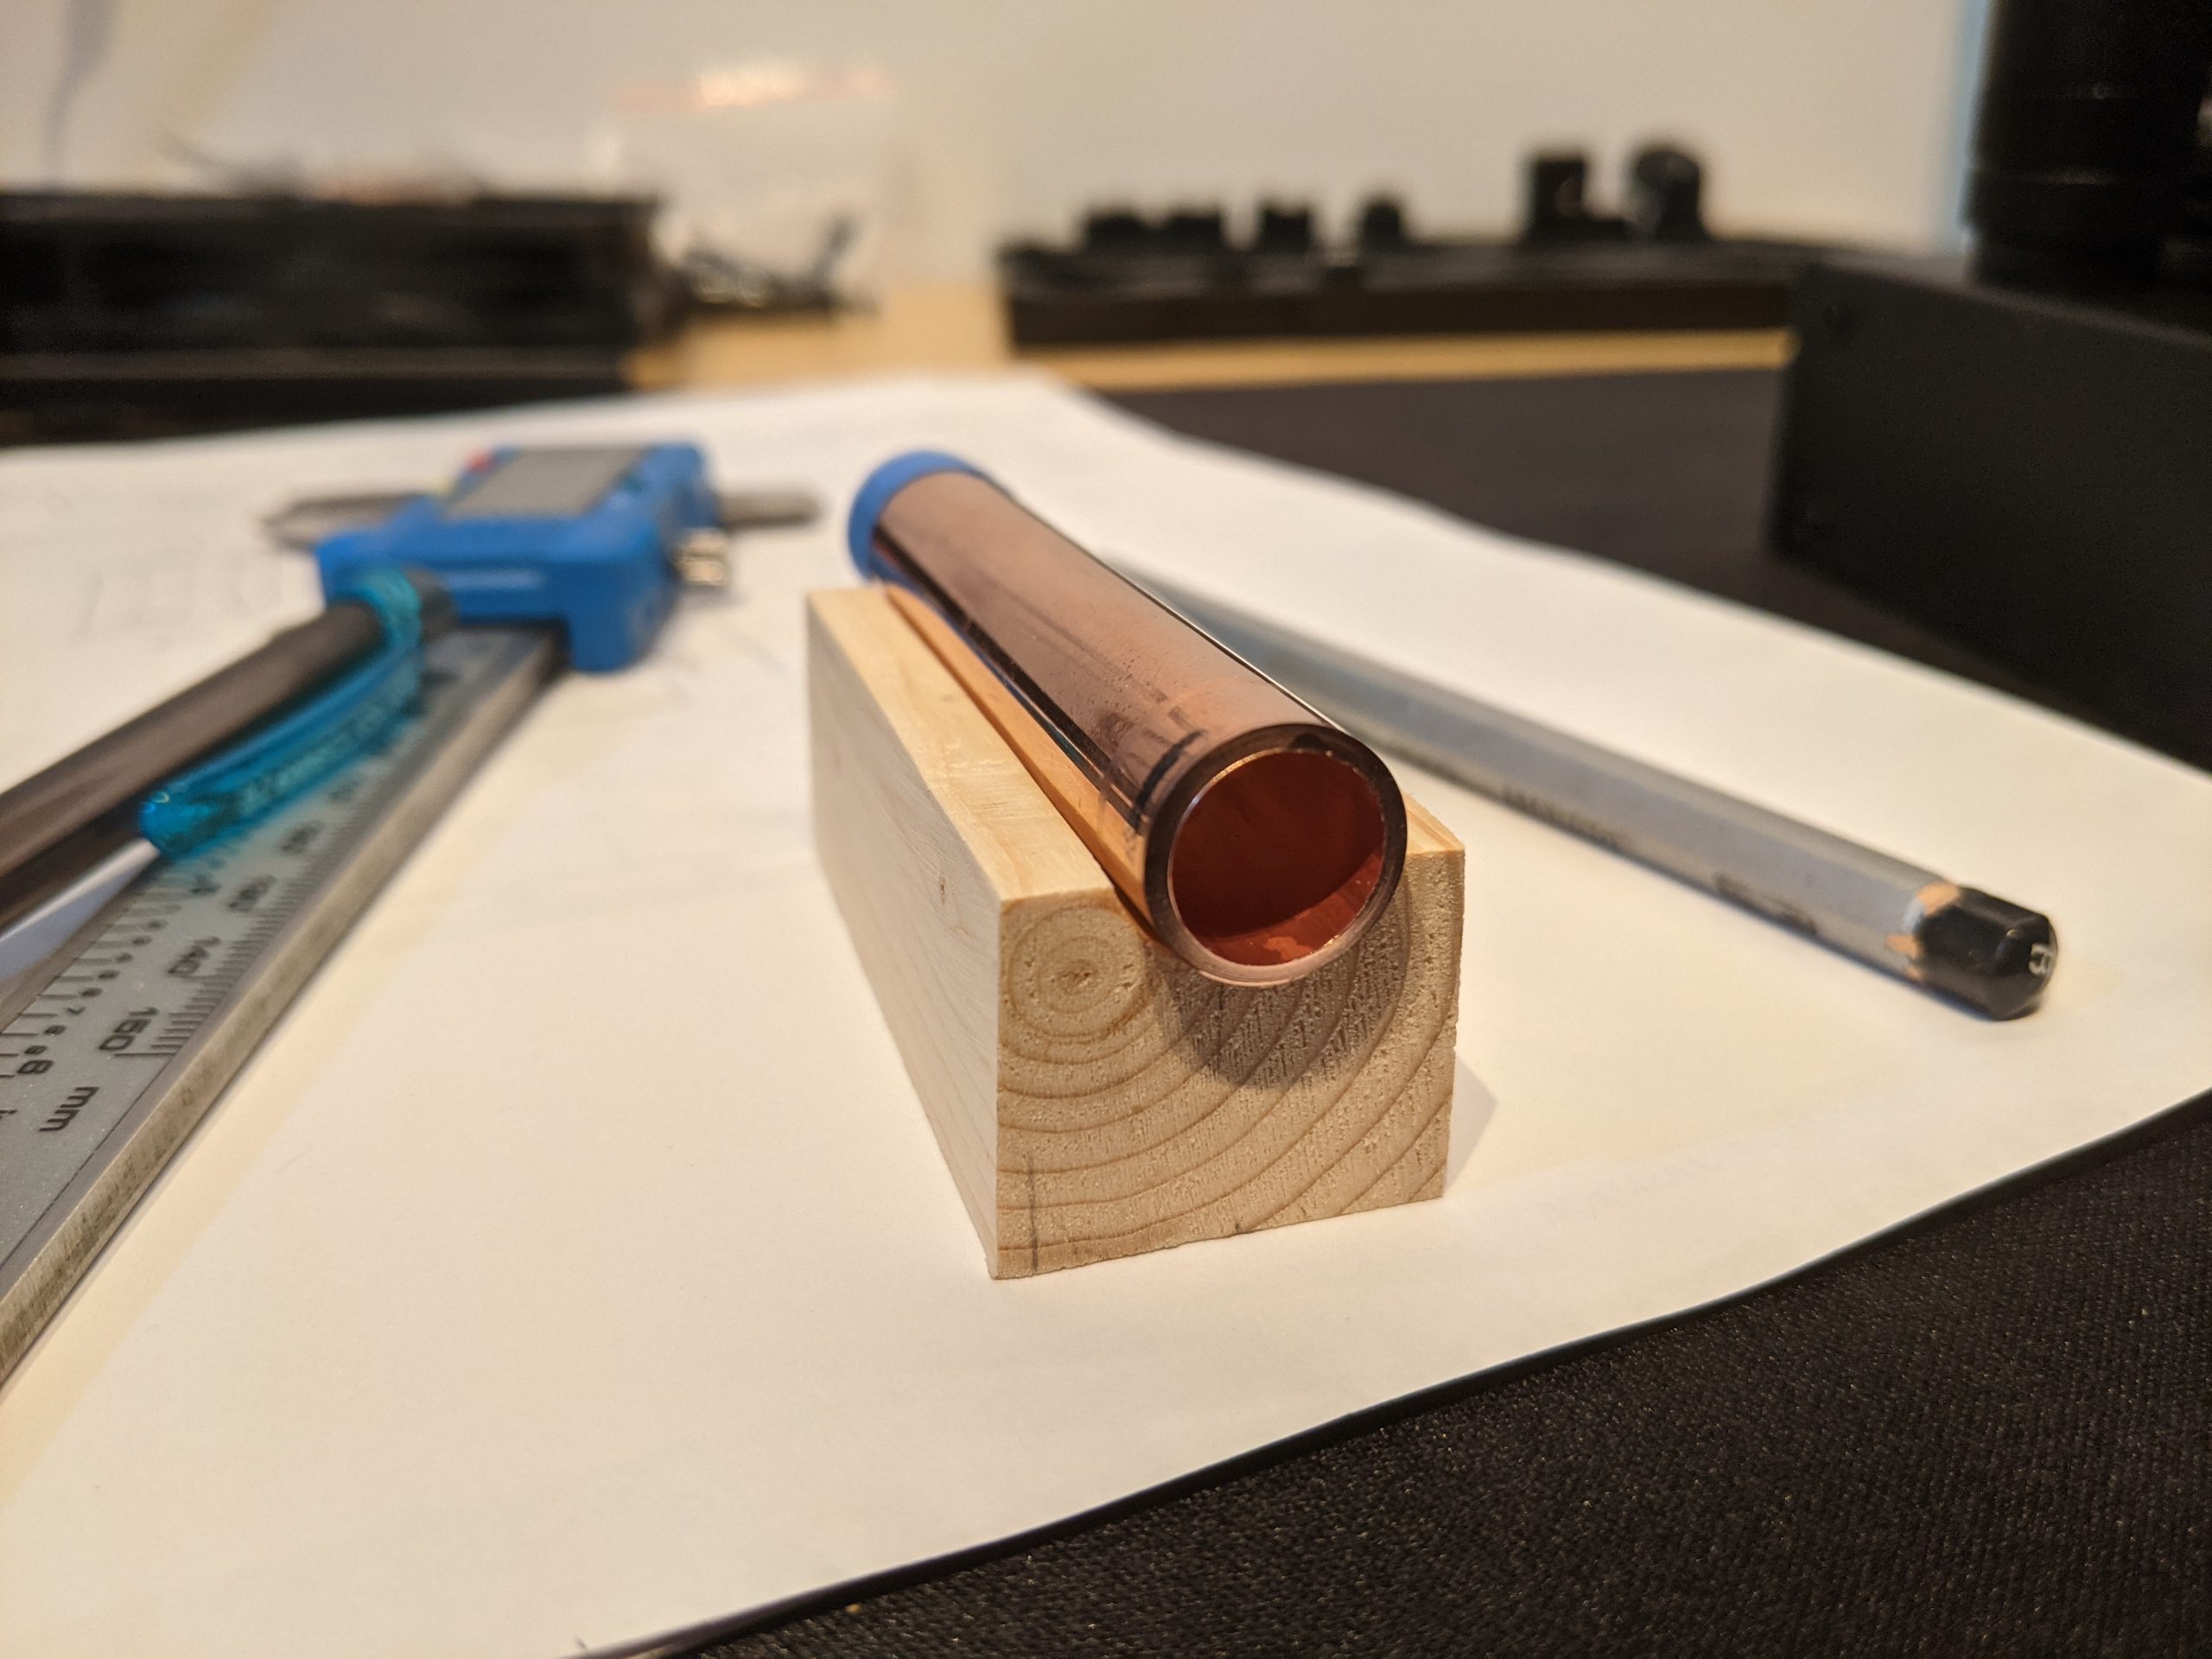
This piece will be used to secure the vertical tube run to the GPU

Second piece created to hold the bottom two tubes securely in place.
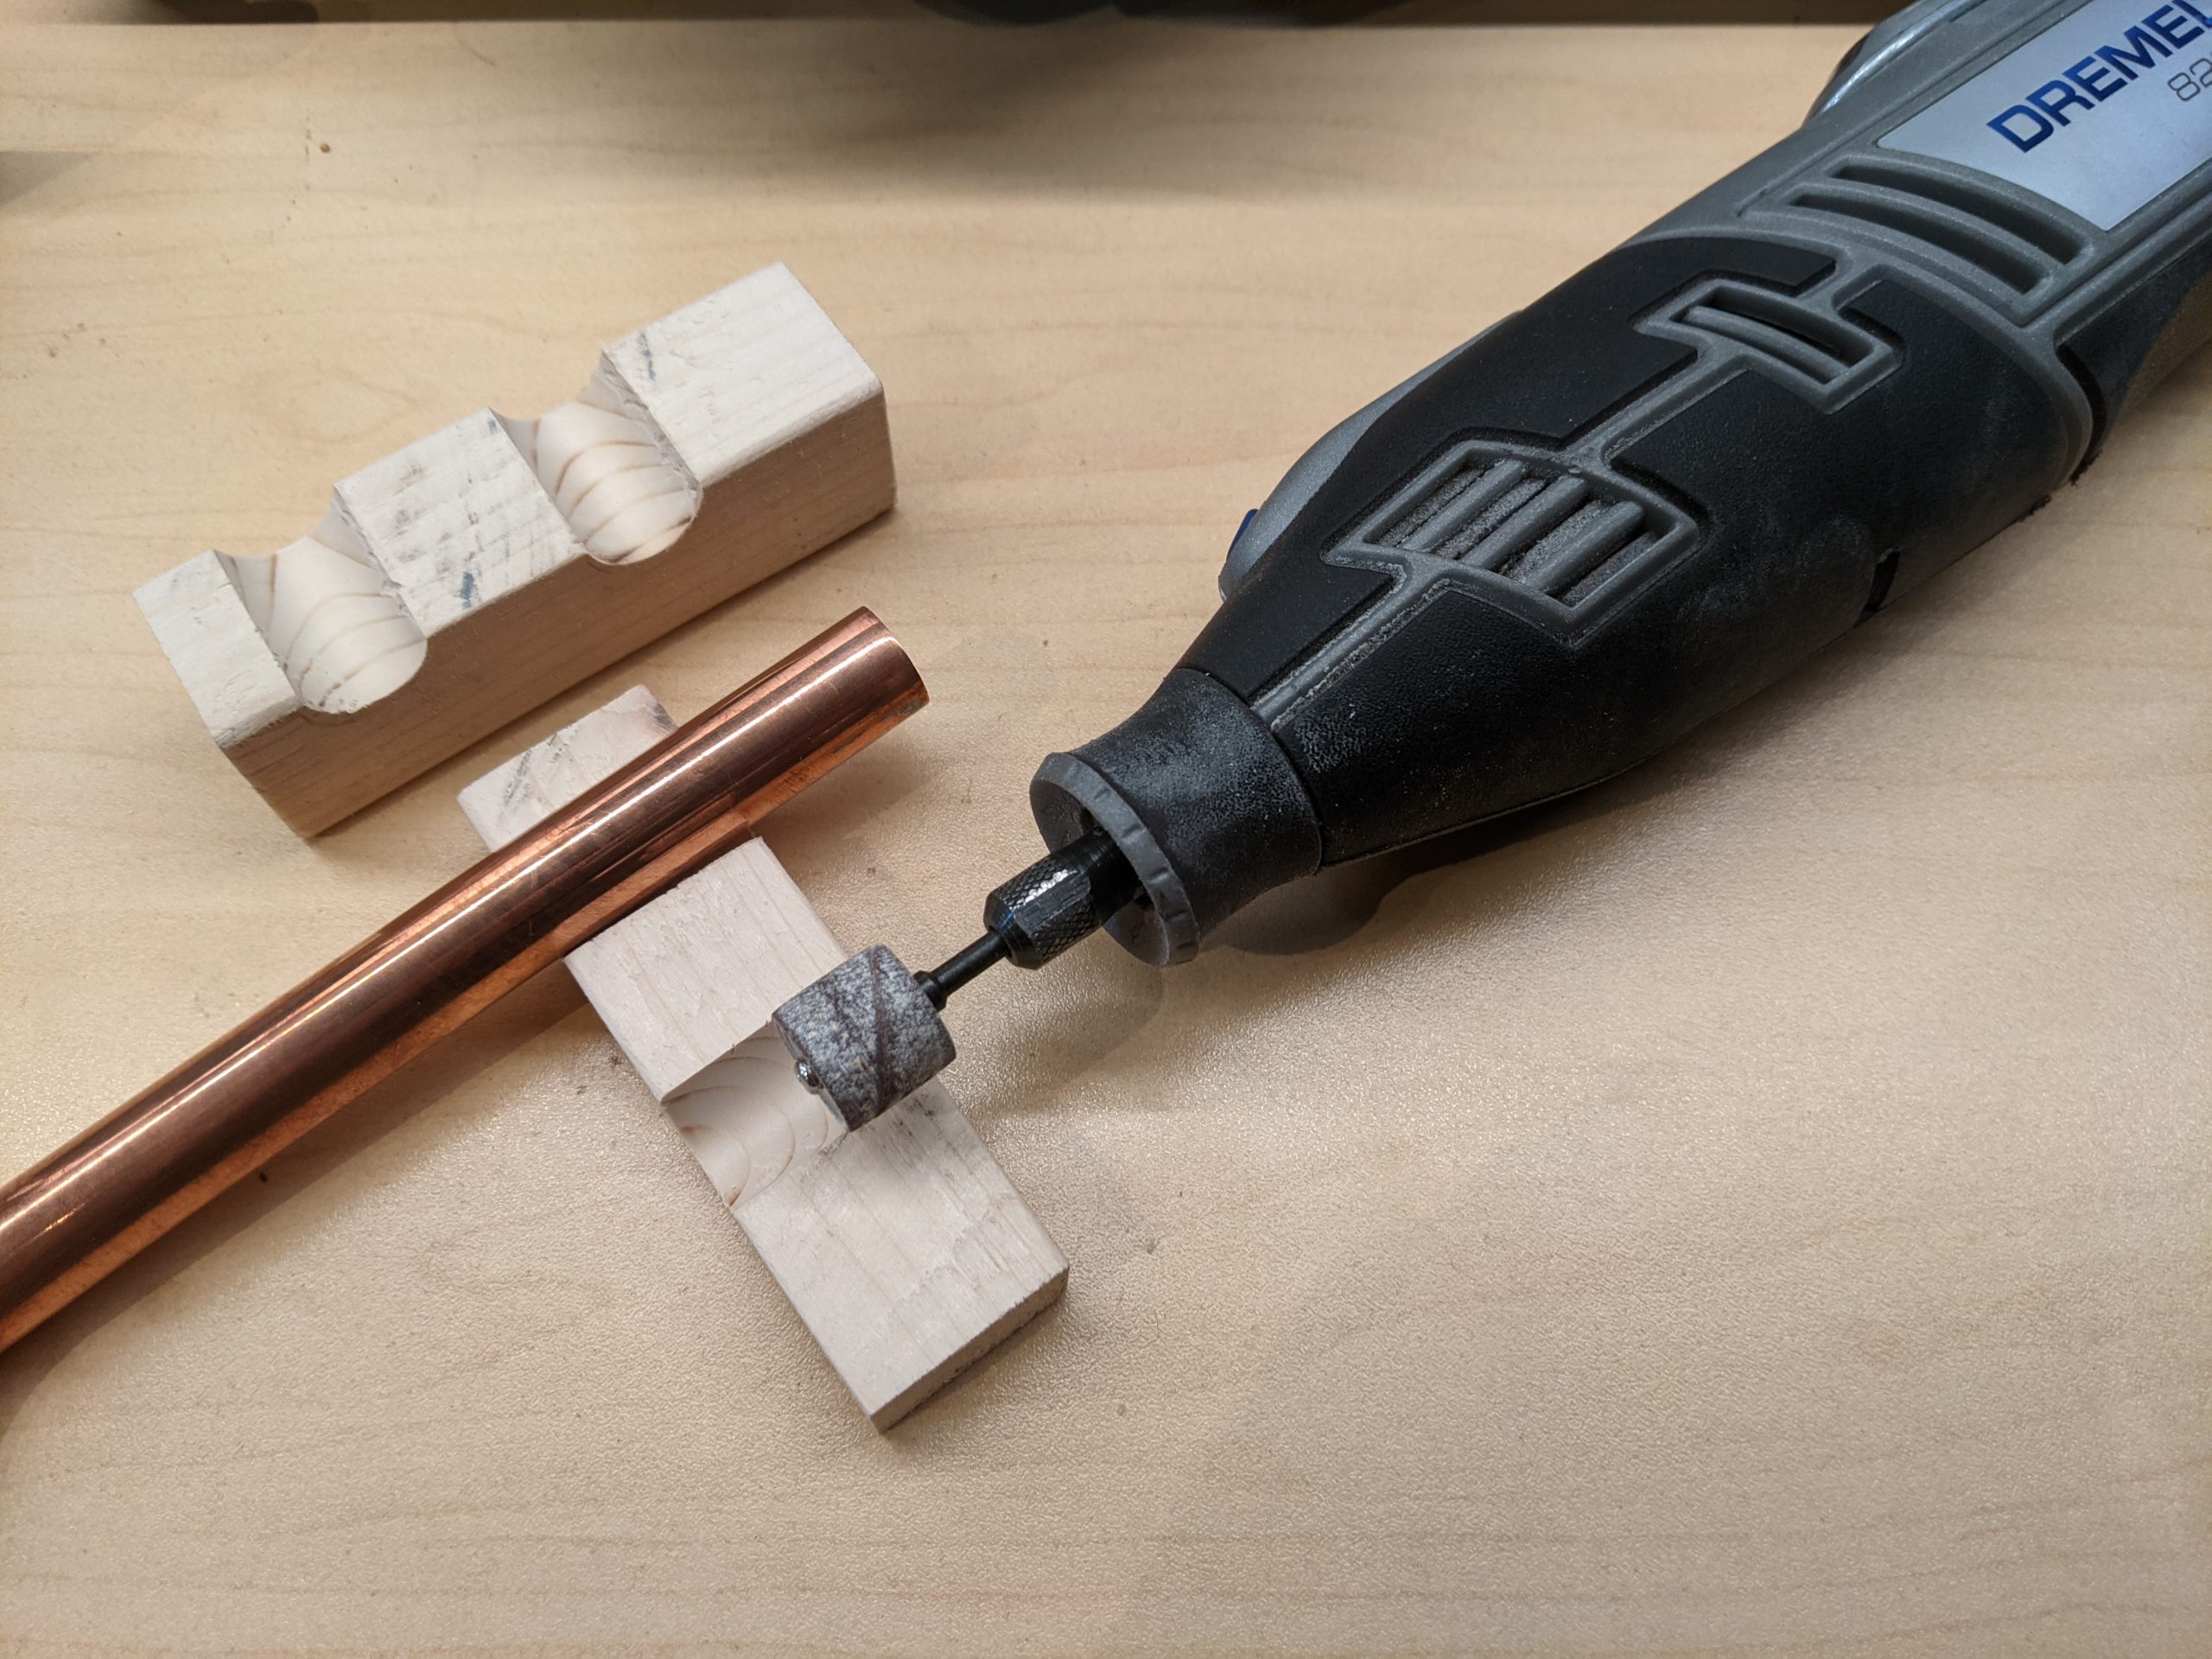
Not only does this piece hold the tubing in place, it also keeps them perfectly parallel for an aesthetically pleasing look
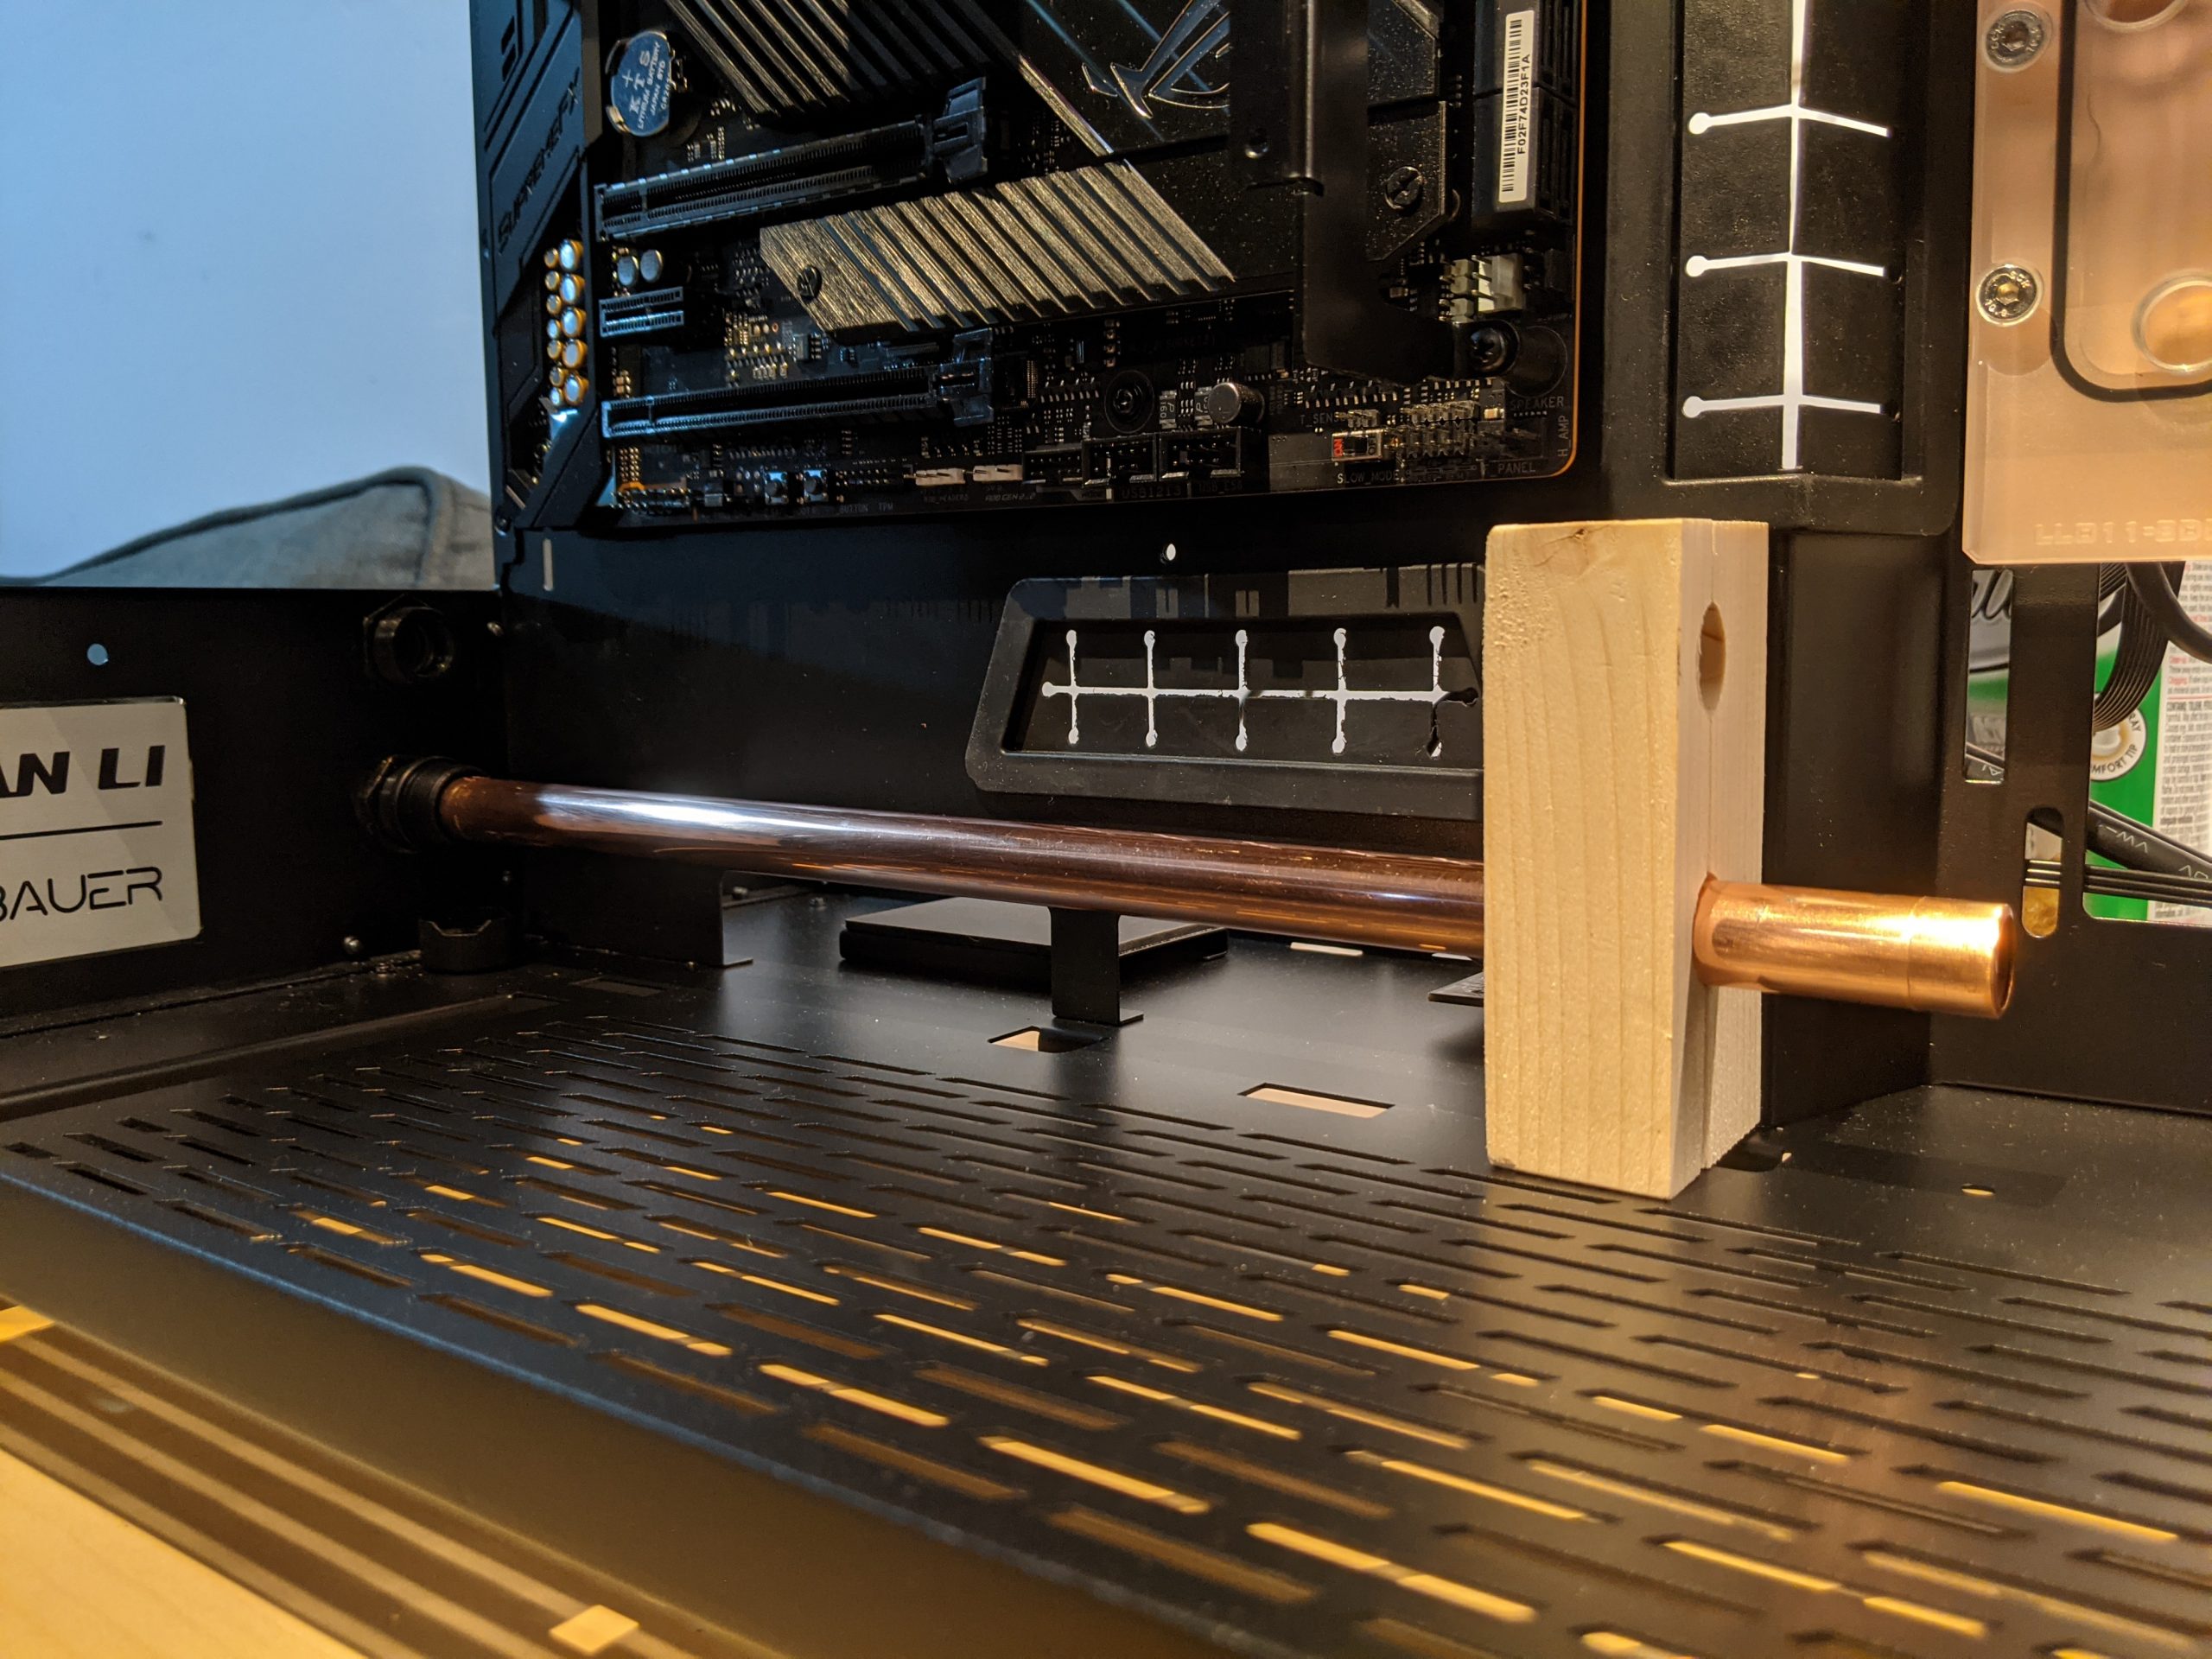
Final result. Support for the bottom two tubes and the vertical run.
Fan Label Covers
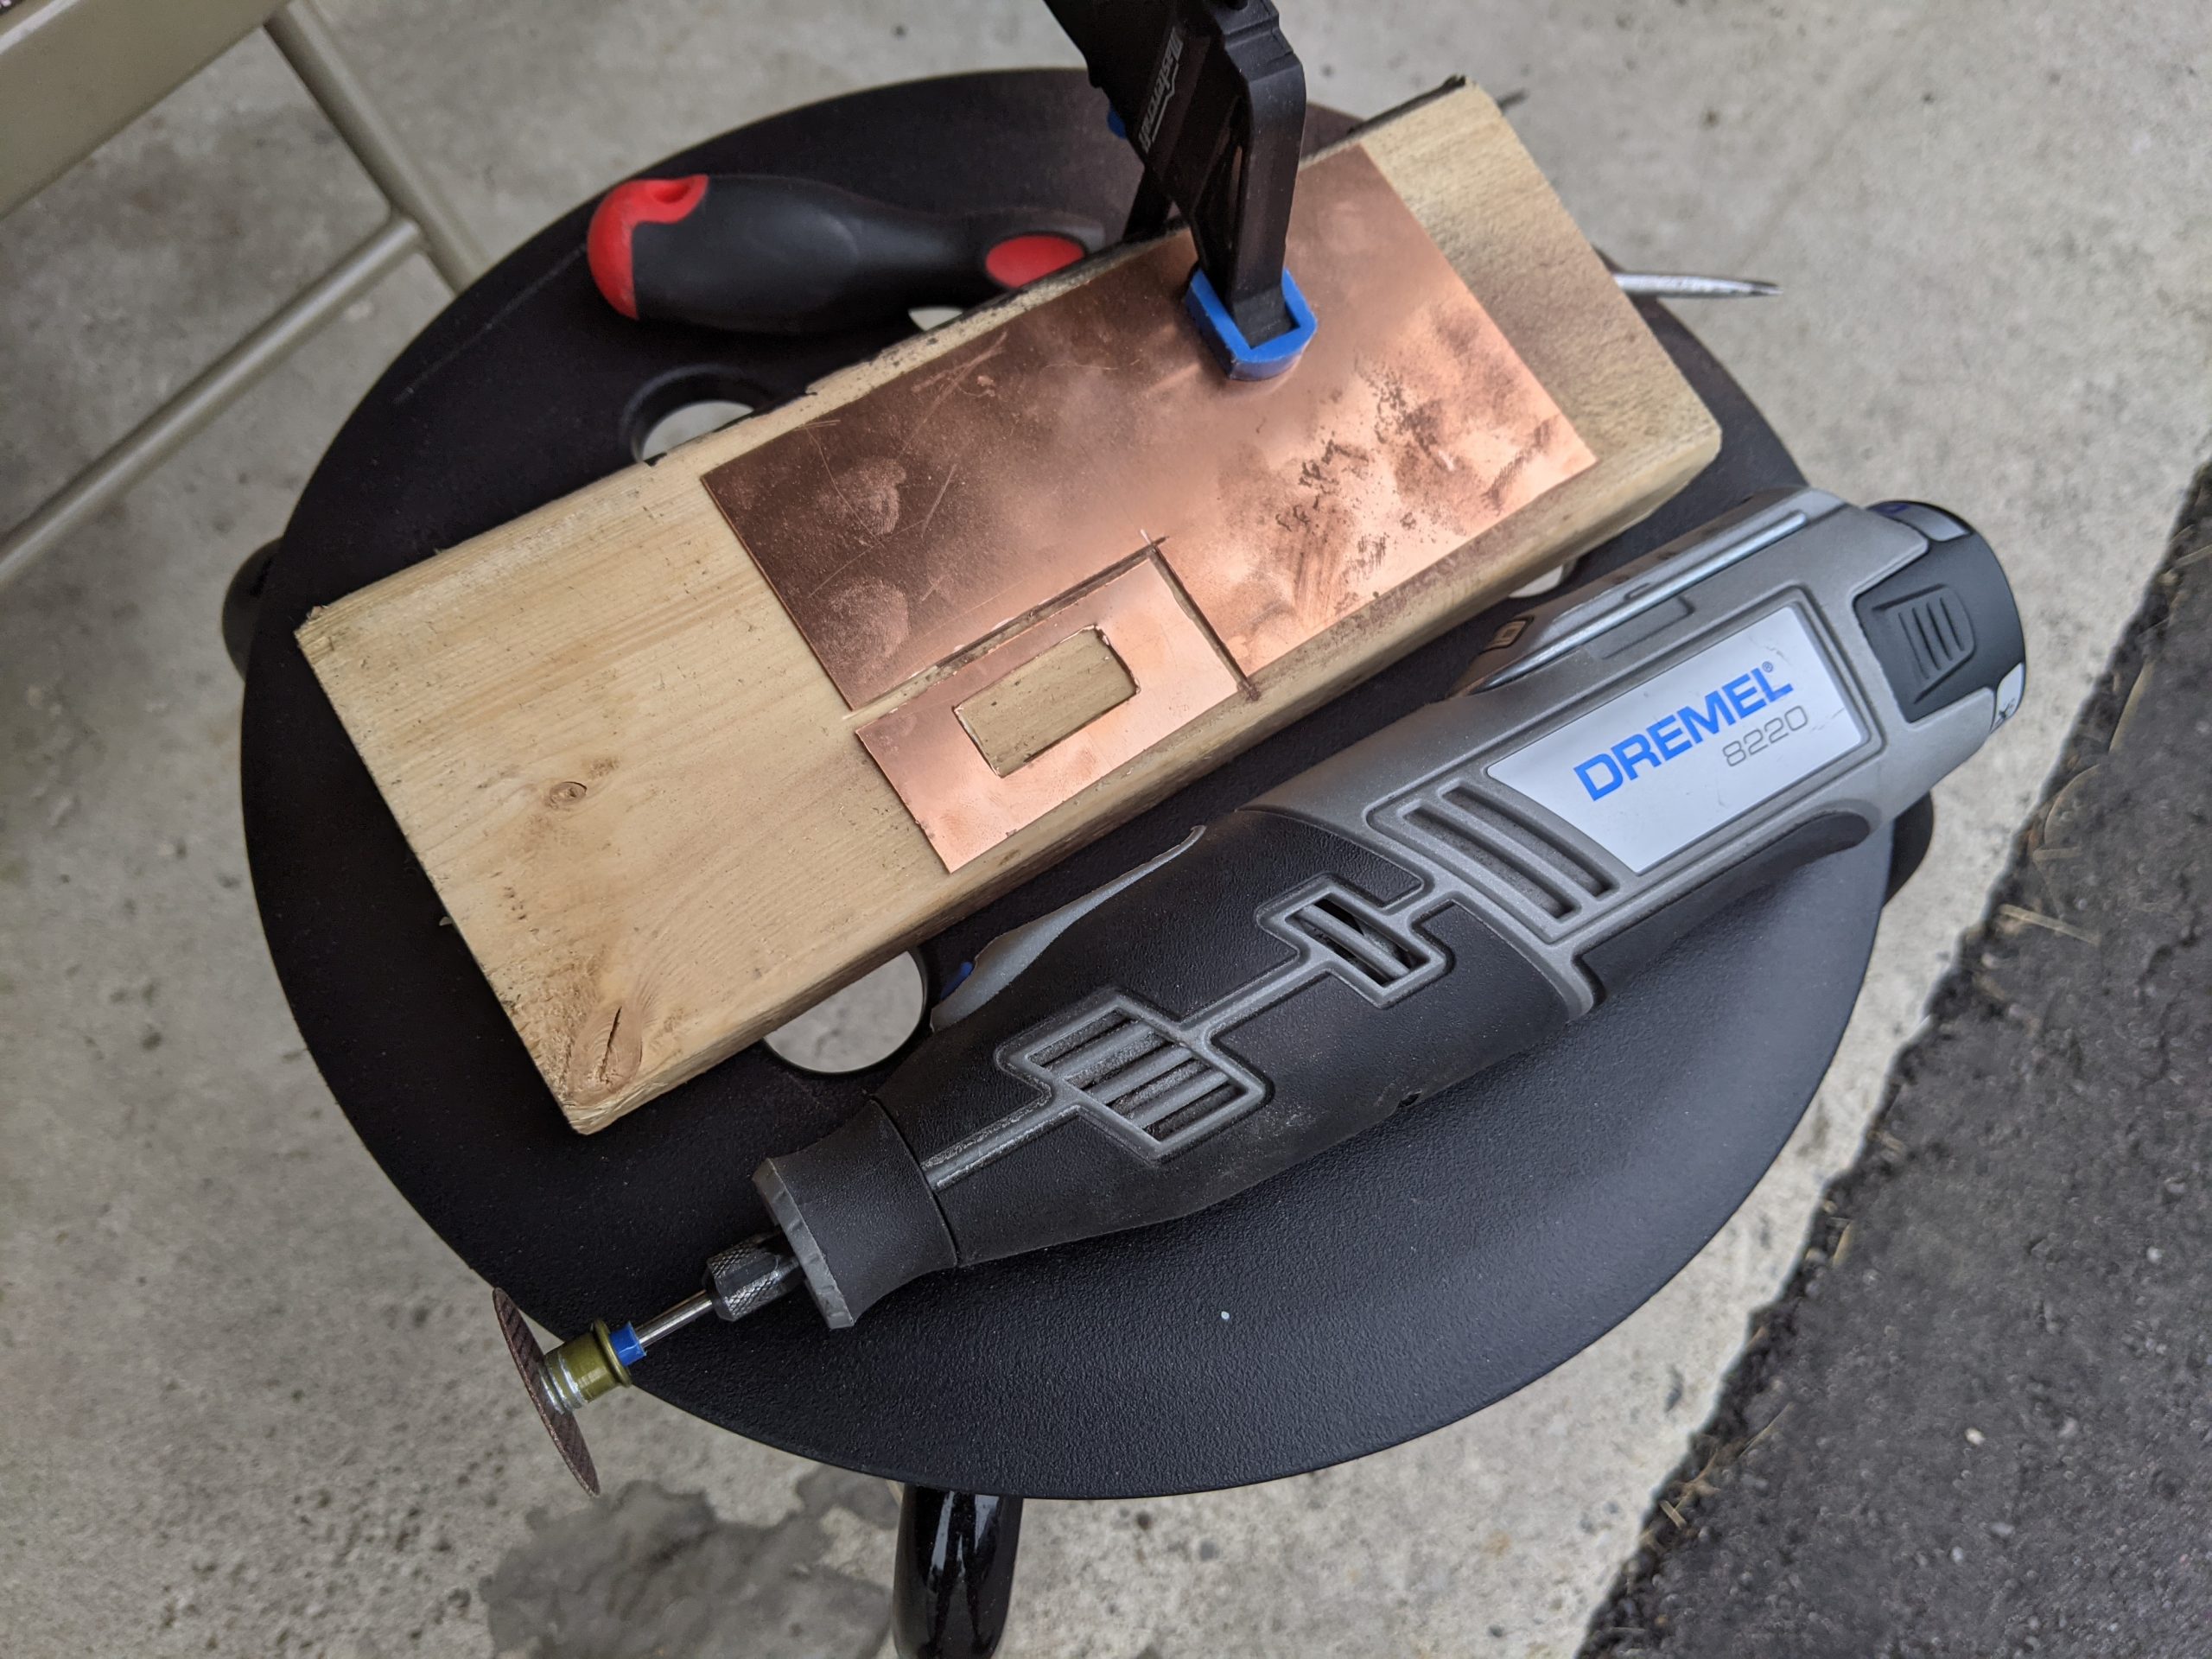
Intake fans are installed in an orientation where their rear sticker/label shows. I had some copper sheet lying around so decided to free hand some round copper covers for them.

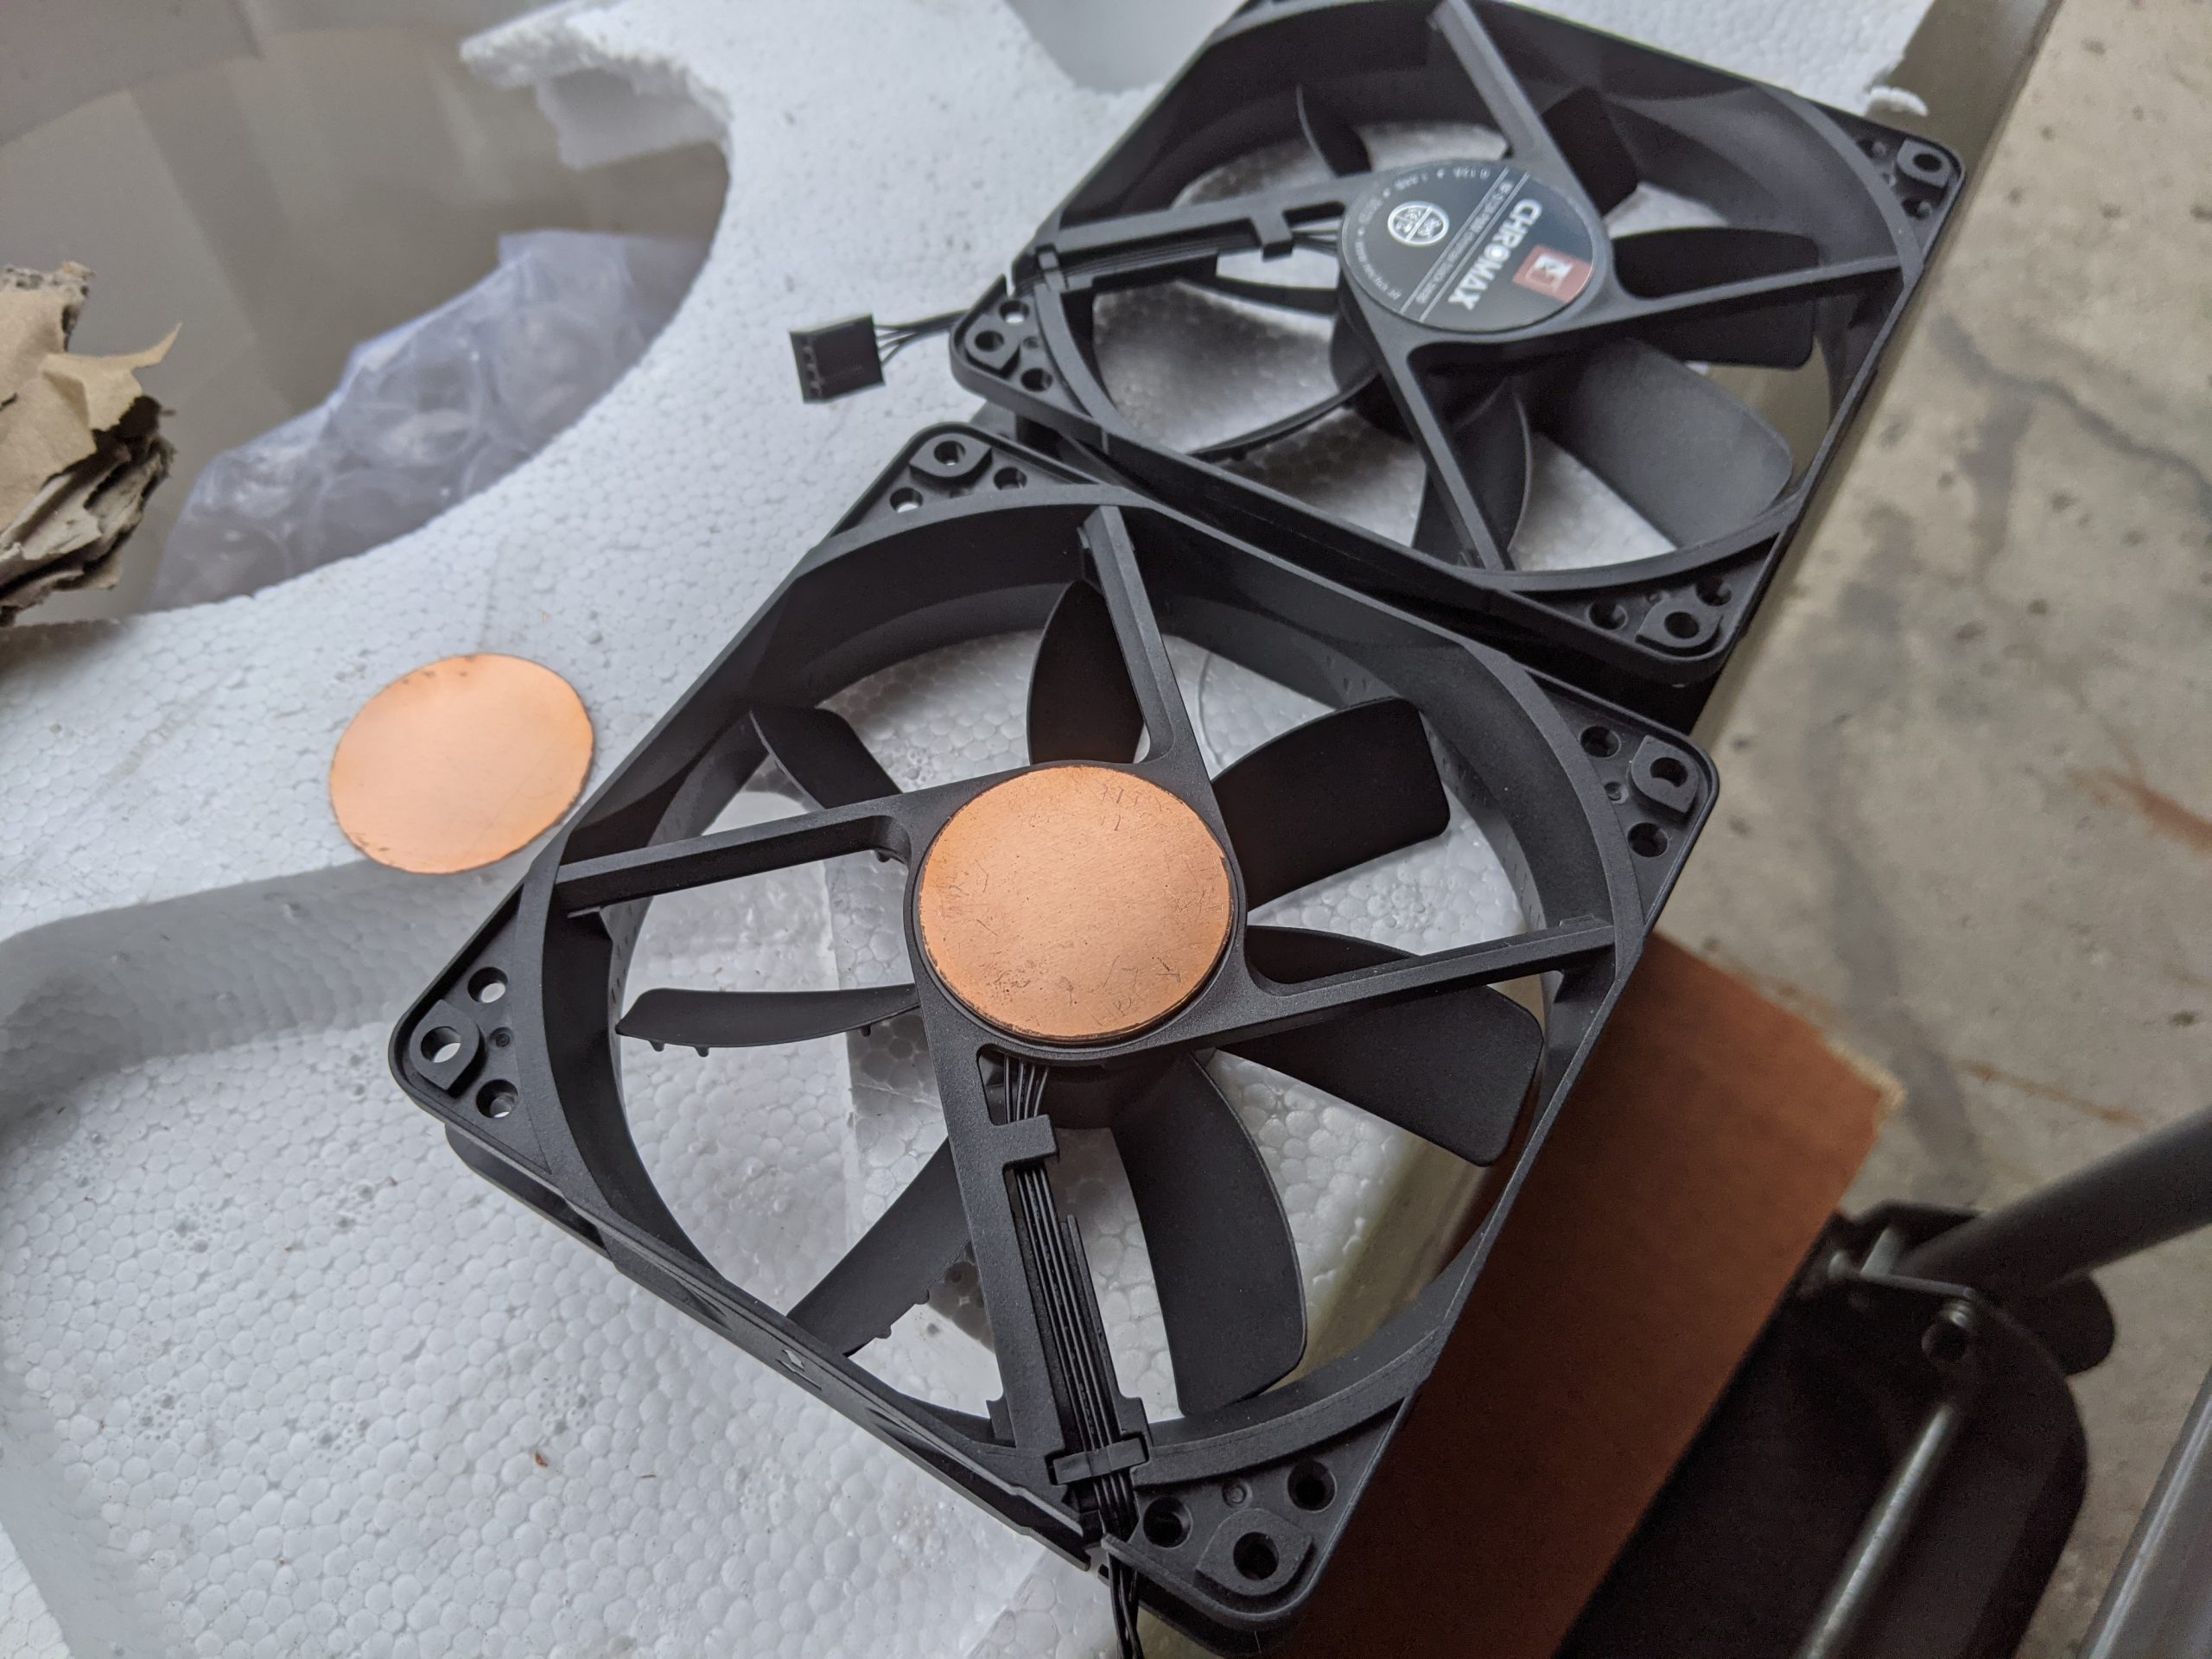
Installed! No more ugly stock stickers.

Distribution Block Mod
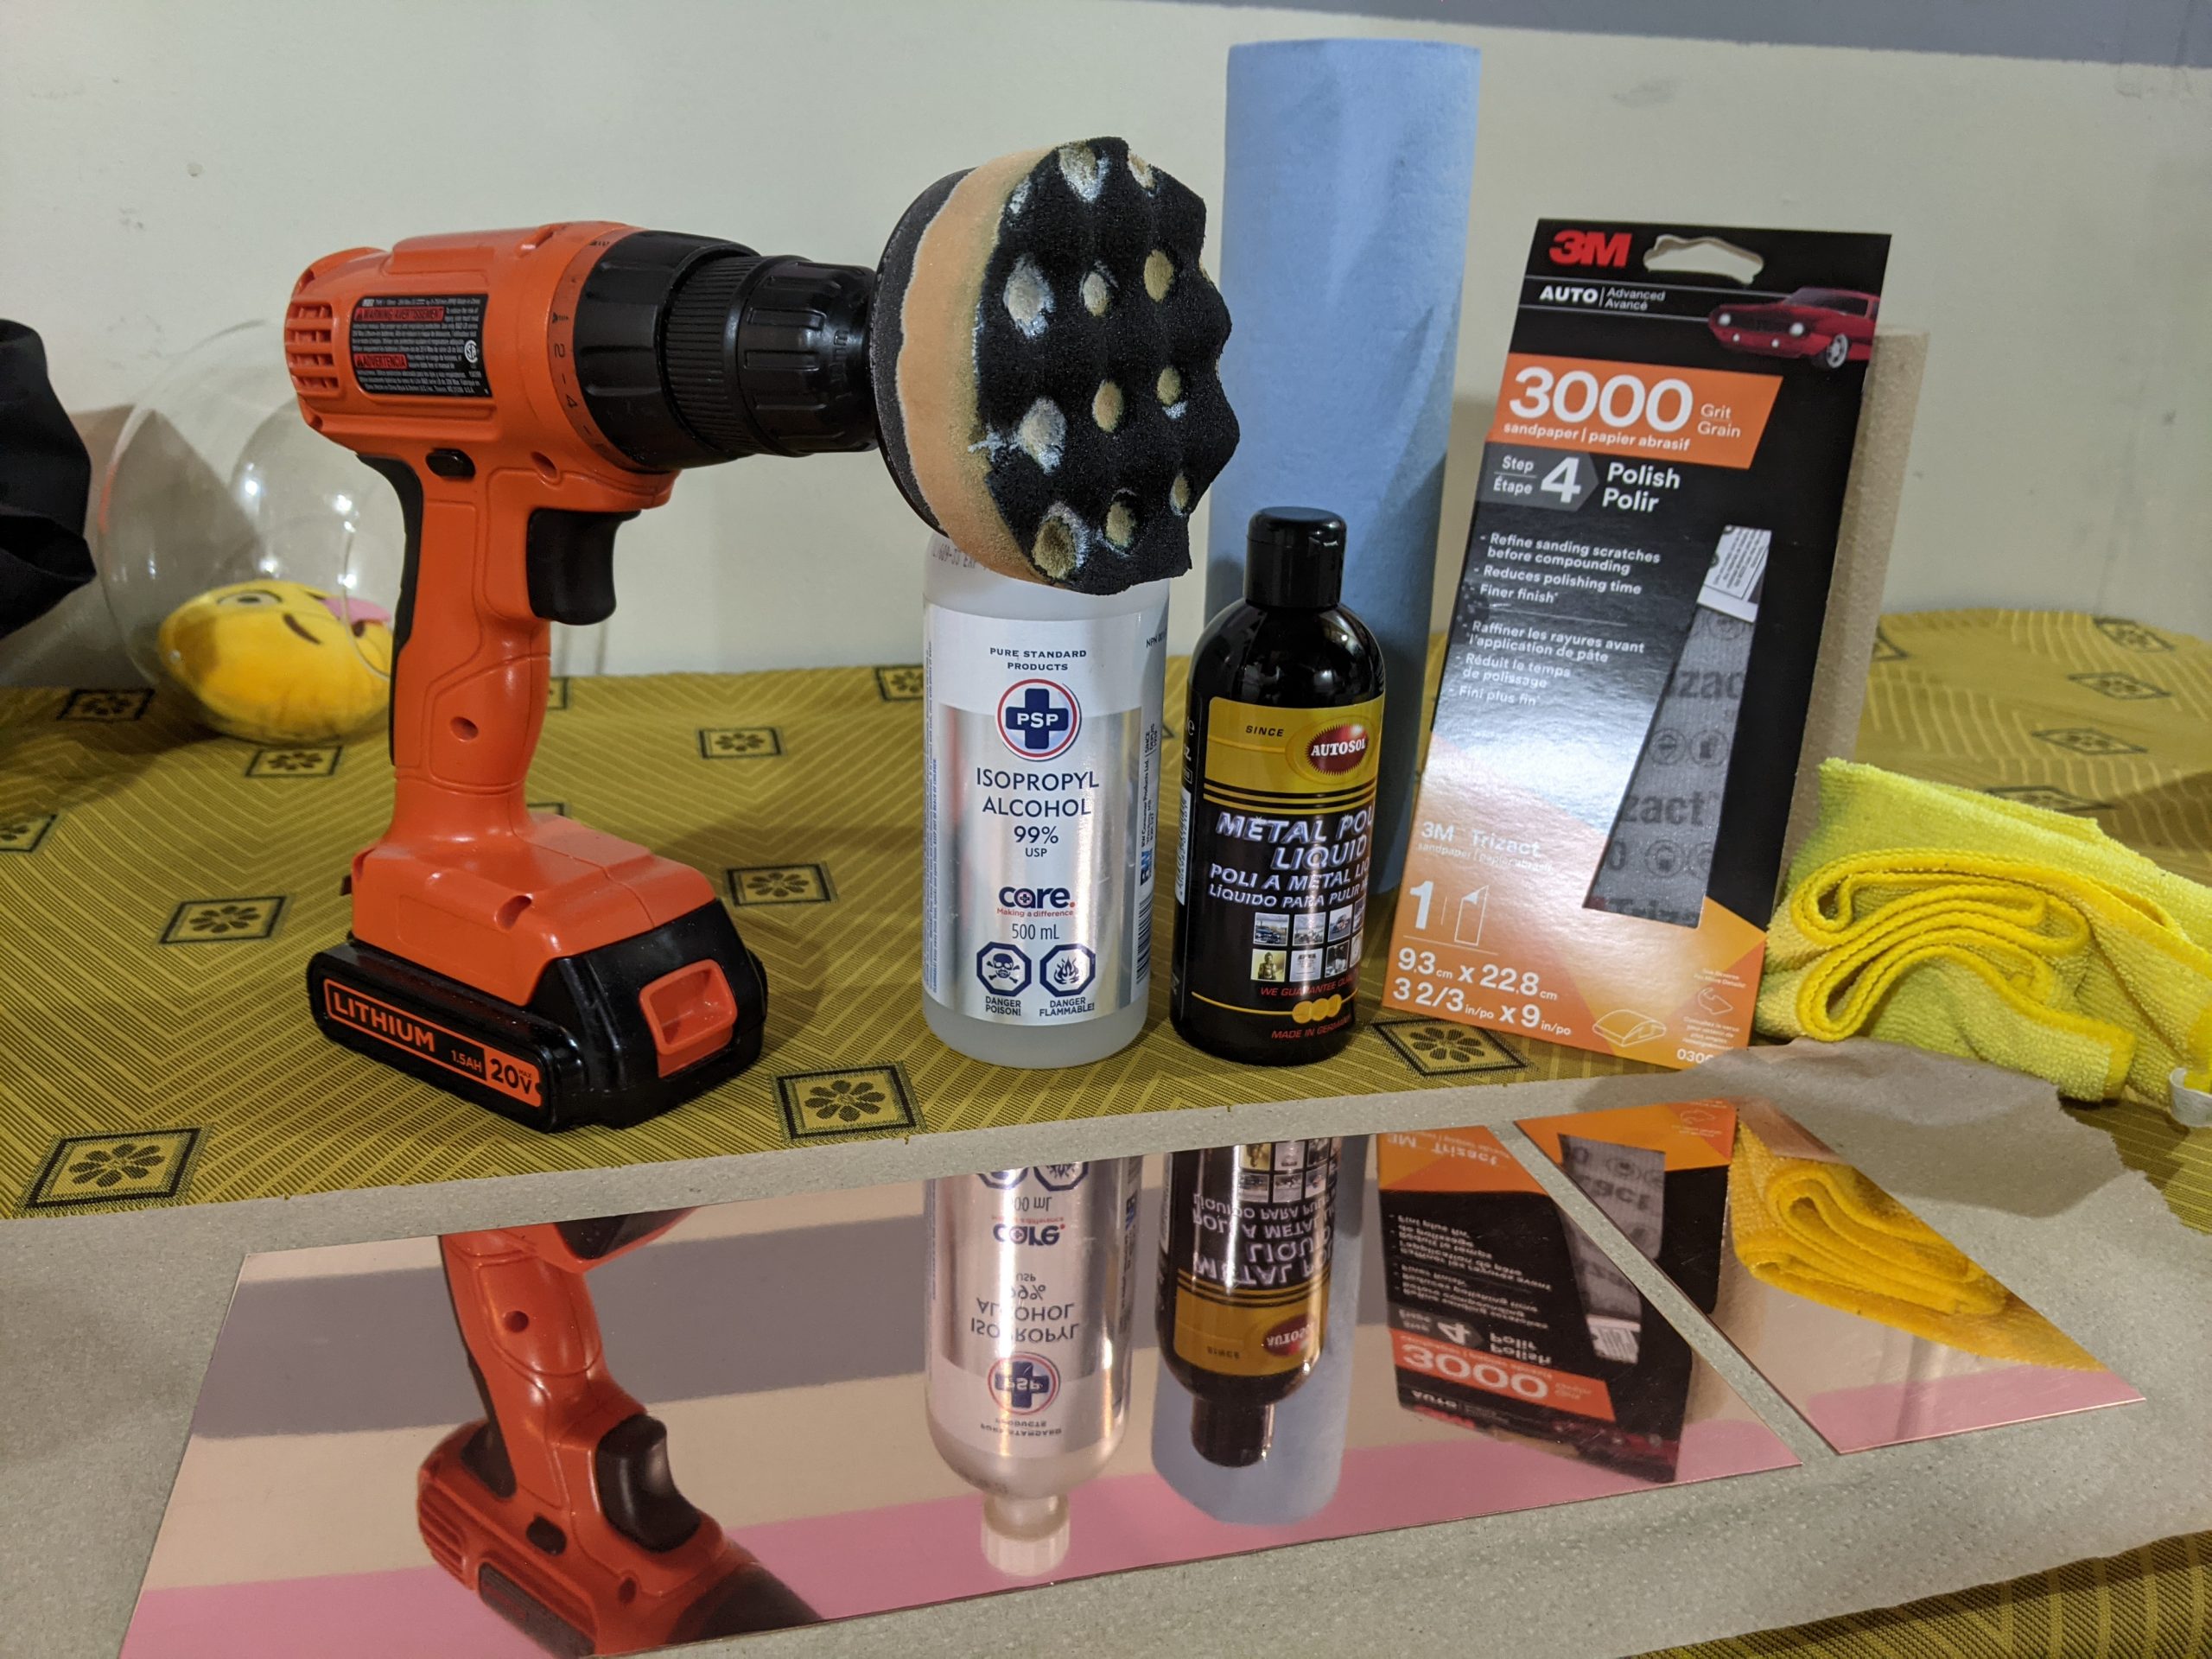
Distro used is Barrow LLO11-SDB-D5. This is the only distribution block that would fit my design and allow this build to expose as much copper tubing as possible. The block came in a frosted finish so 3M’s 3000 grit trizact pad was used to polish it.
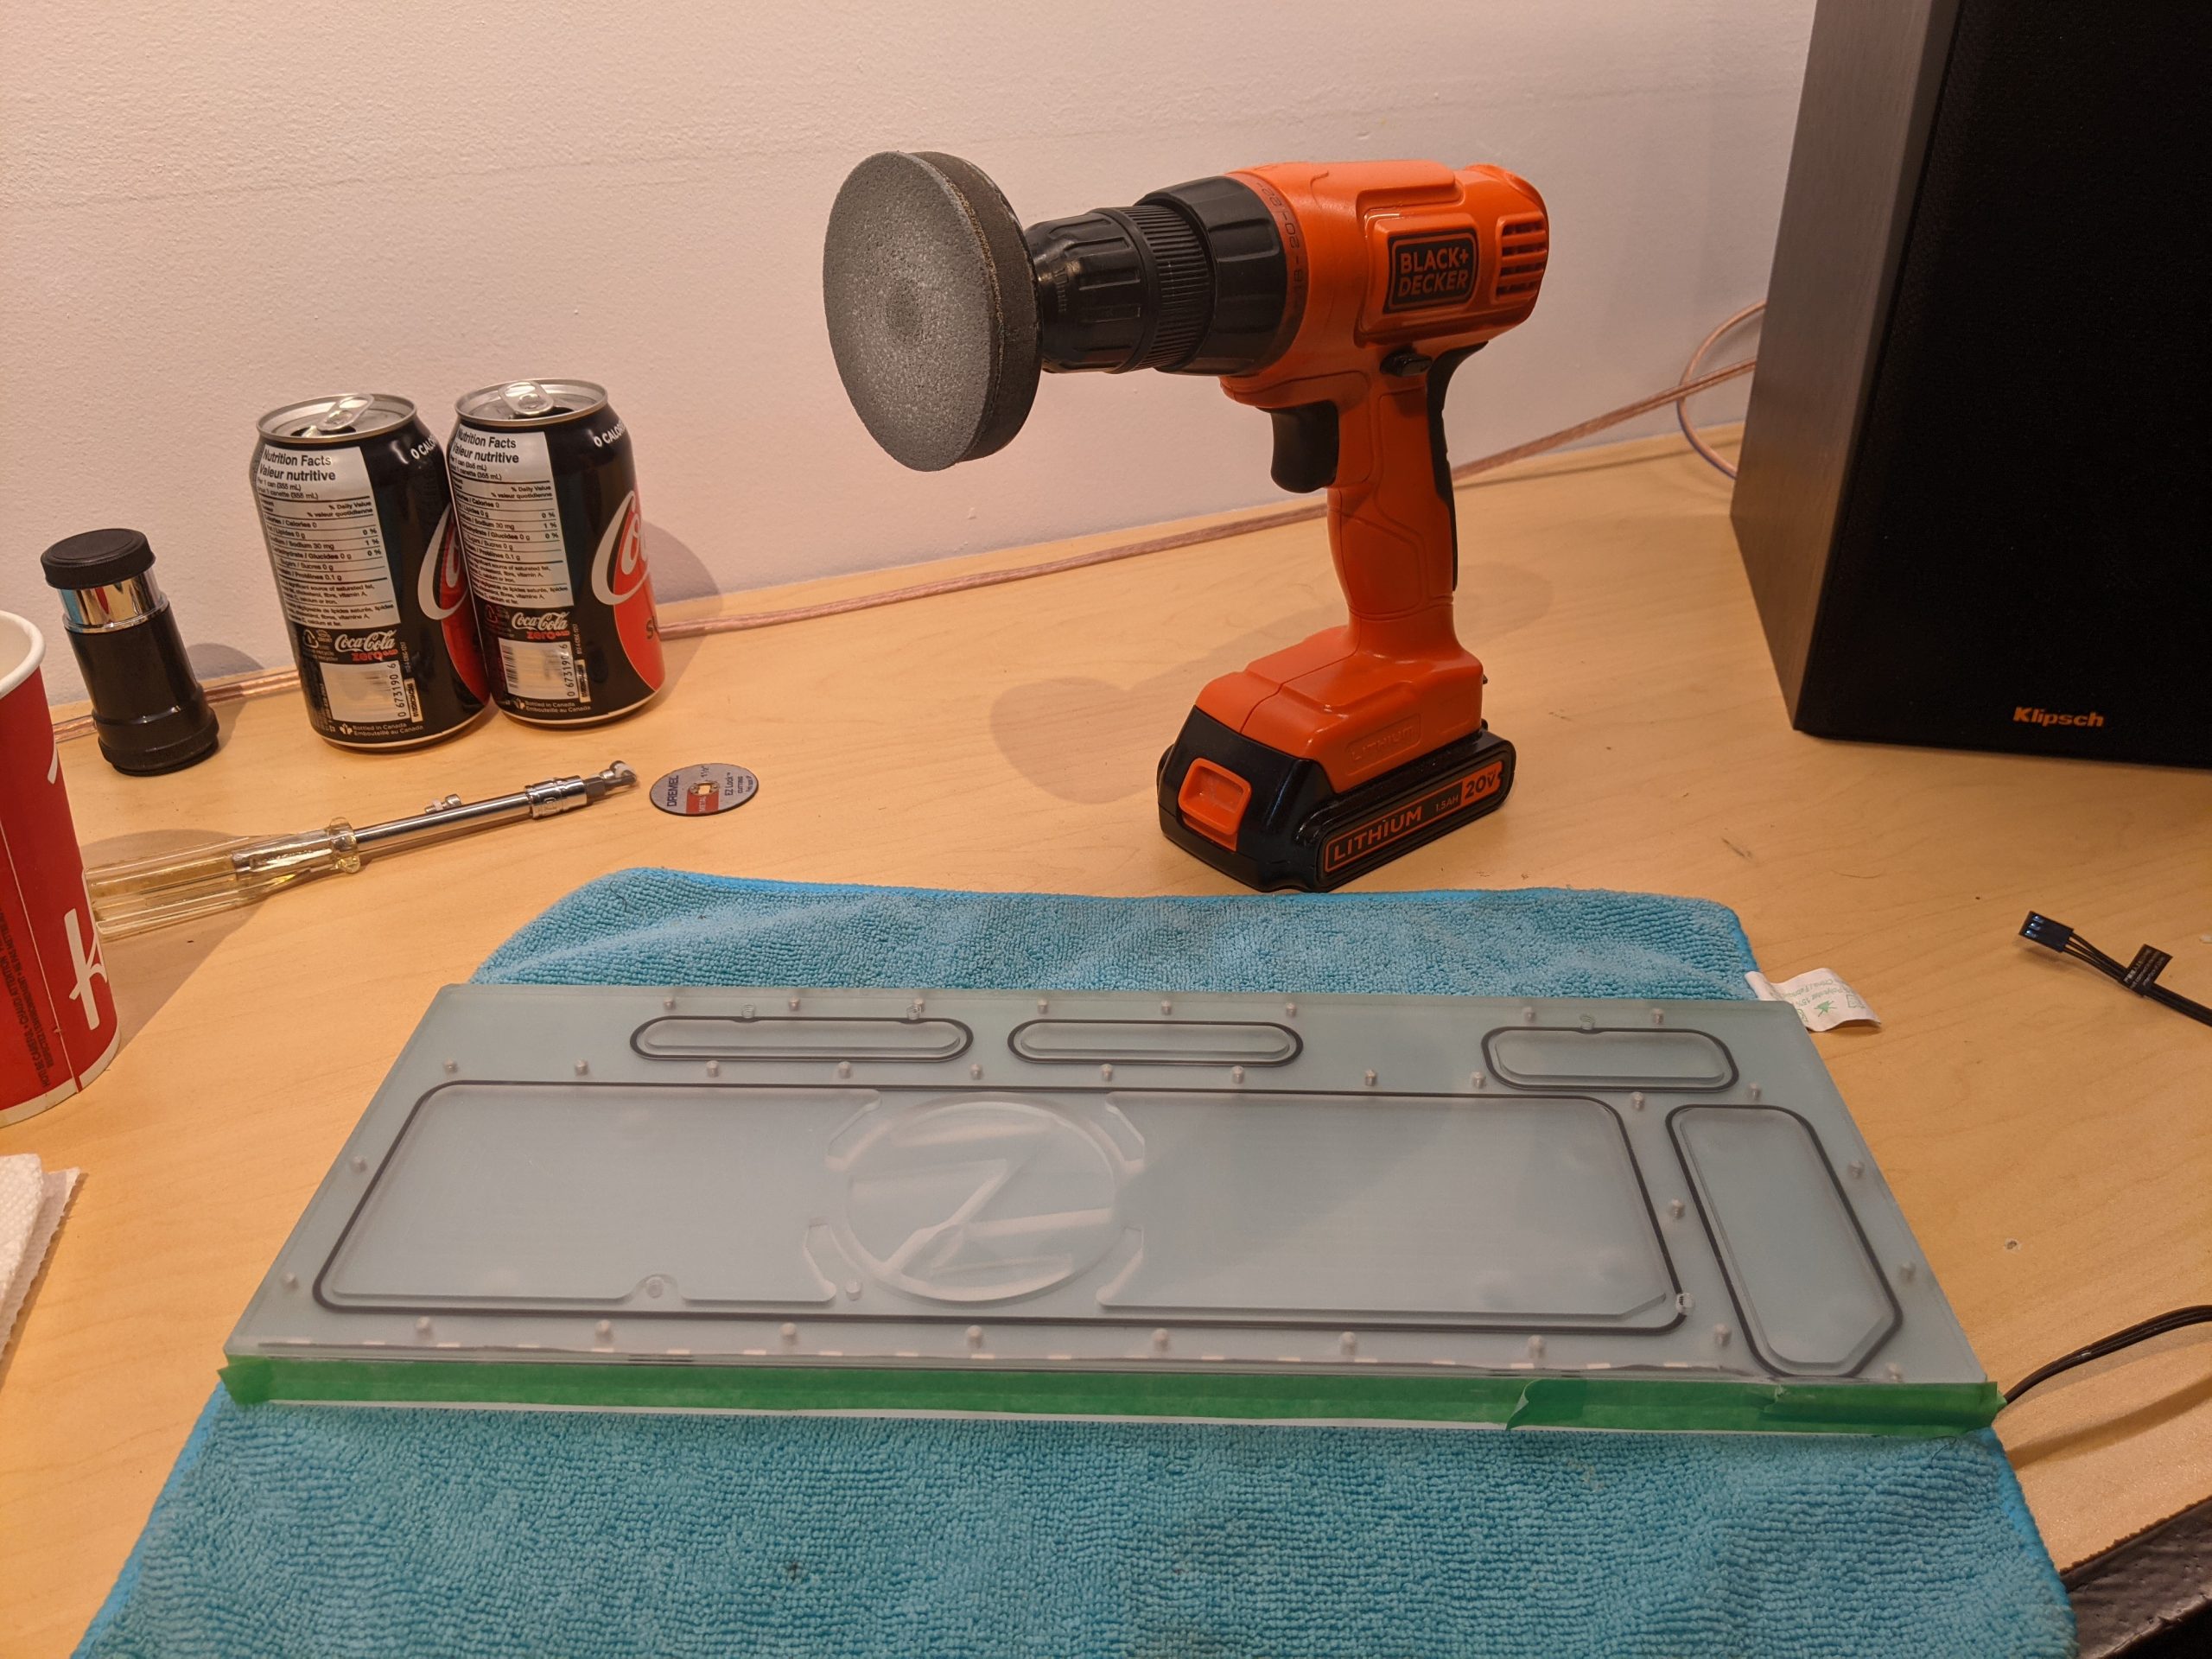
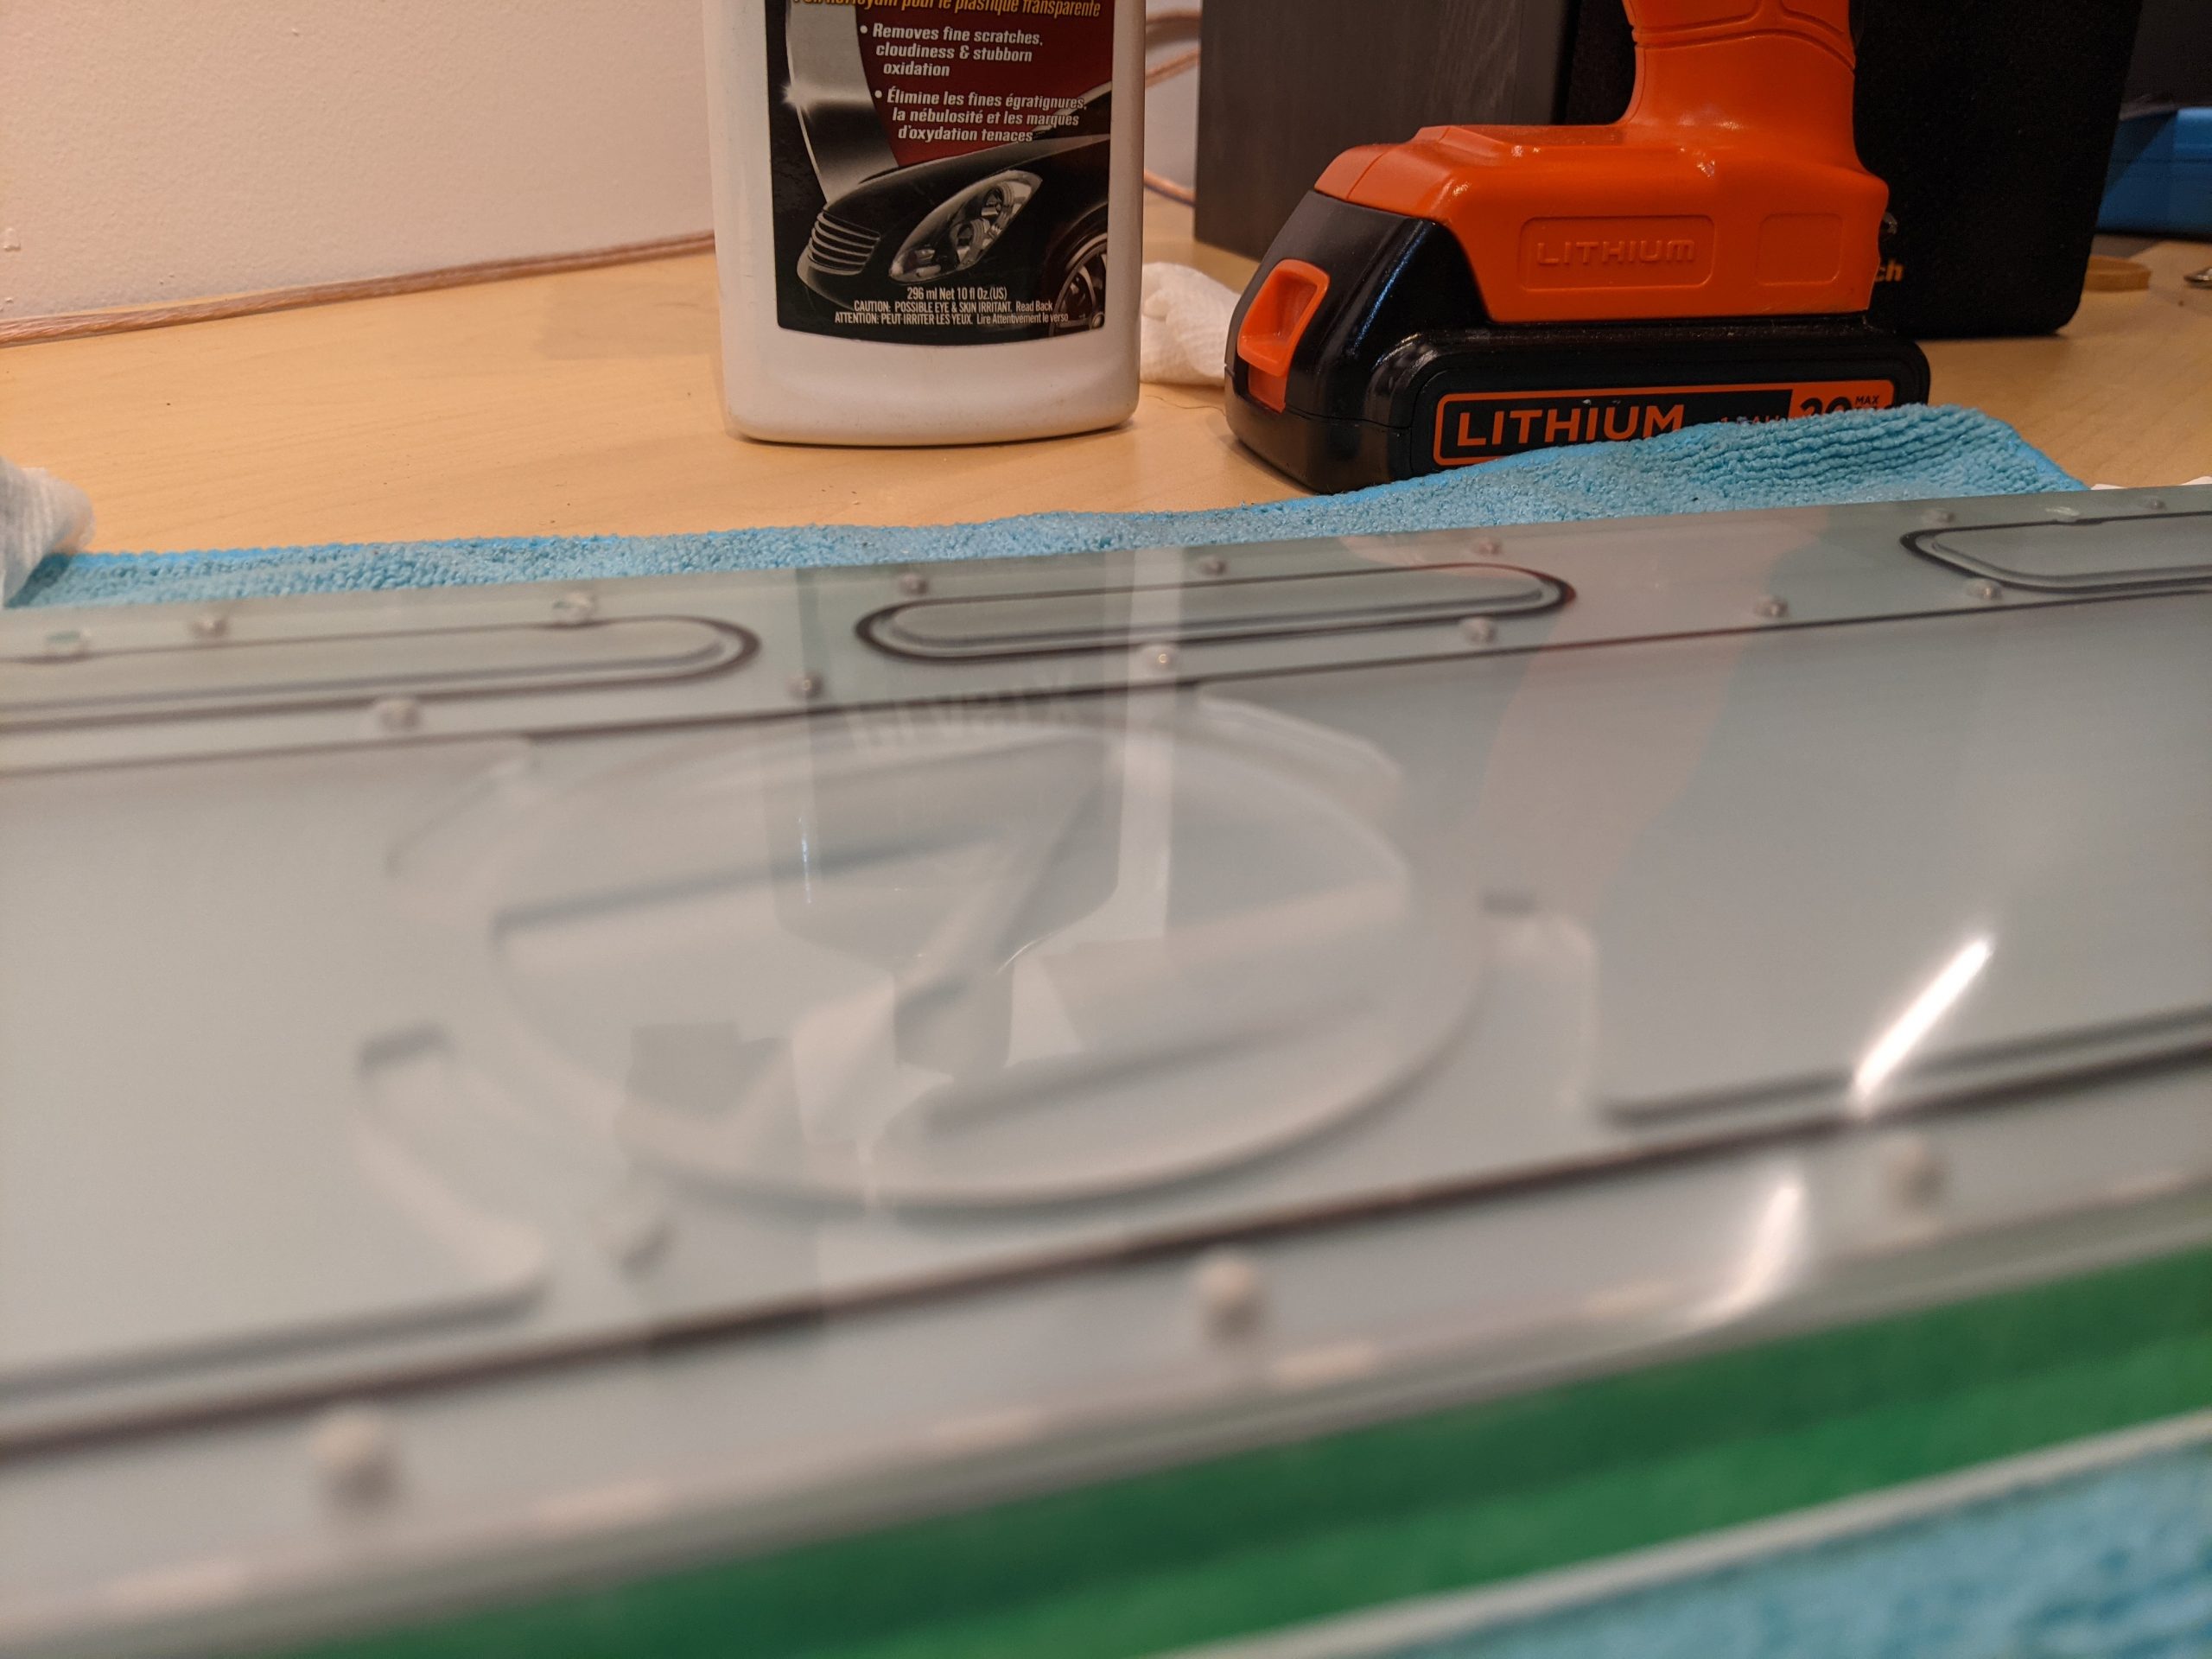
The reason for making it clear is to showcase pure copper sheets measured cut and polished to the distro’s size.
Mounted. It looks frosted but it becomes transparent when water flows inside.

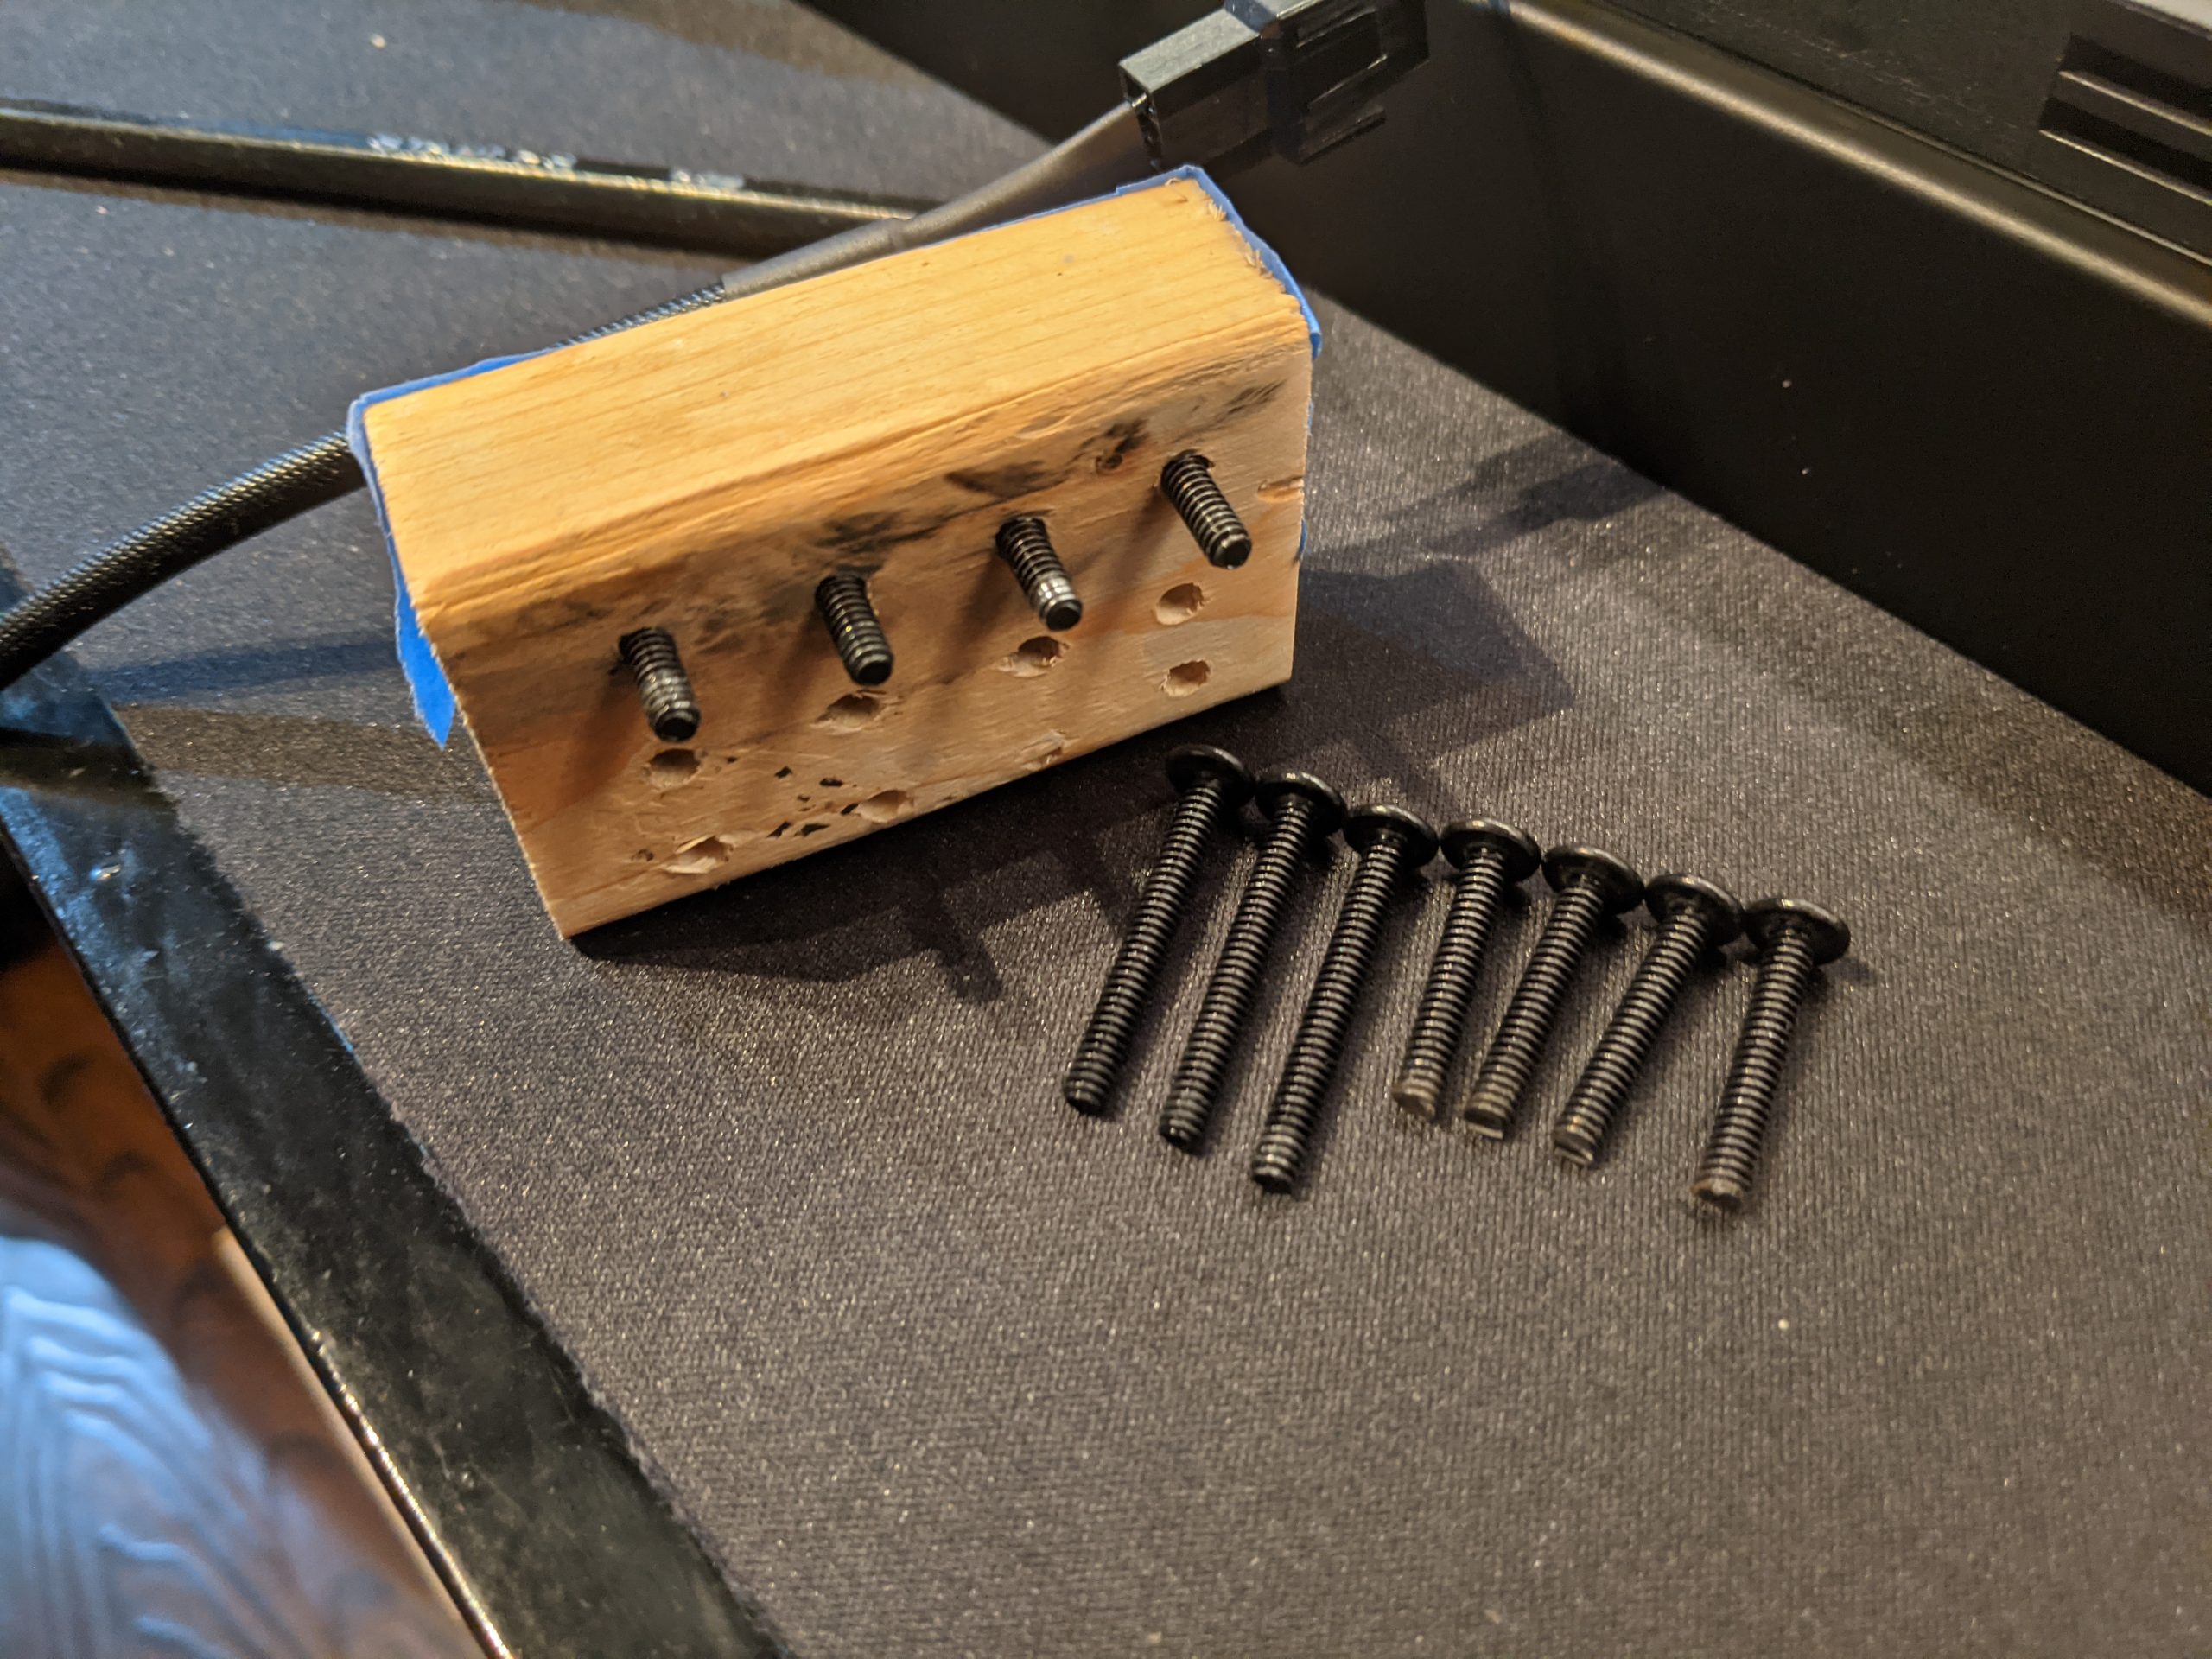
Wrong Radiator Screws
25mm screws were too long for the 15mm fans and radiator so they were shortened by this little jig. Make some holes slightly larger than the M3 screws. Use a mitre saw to cut the block to required length which in my case was 20mm

Blocking unwanted vents
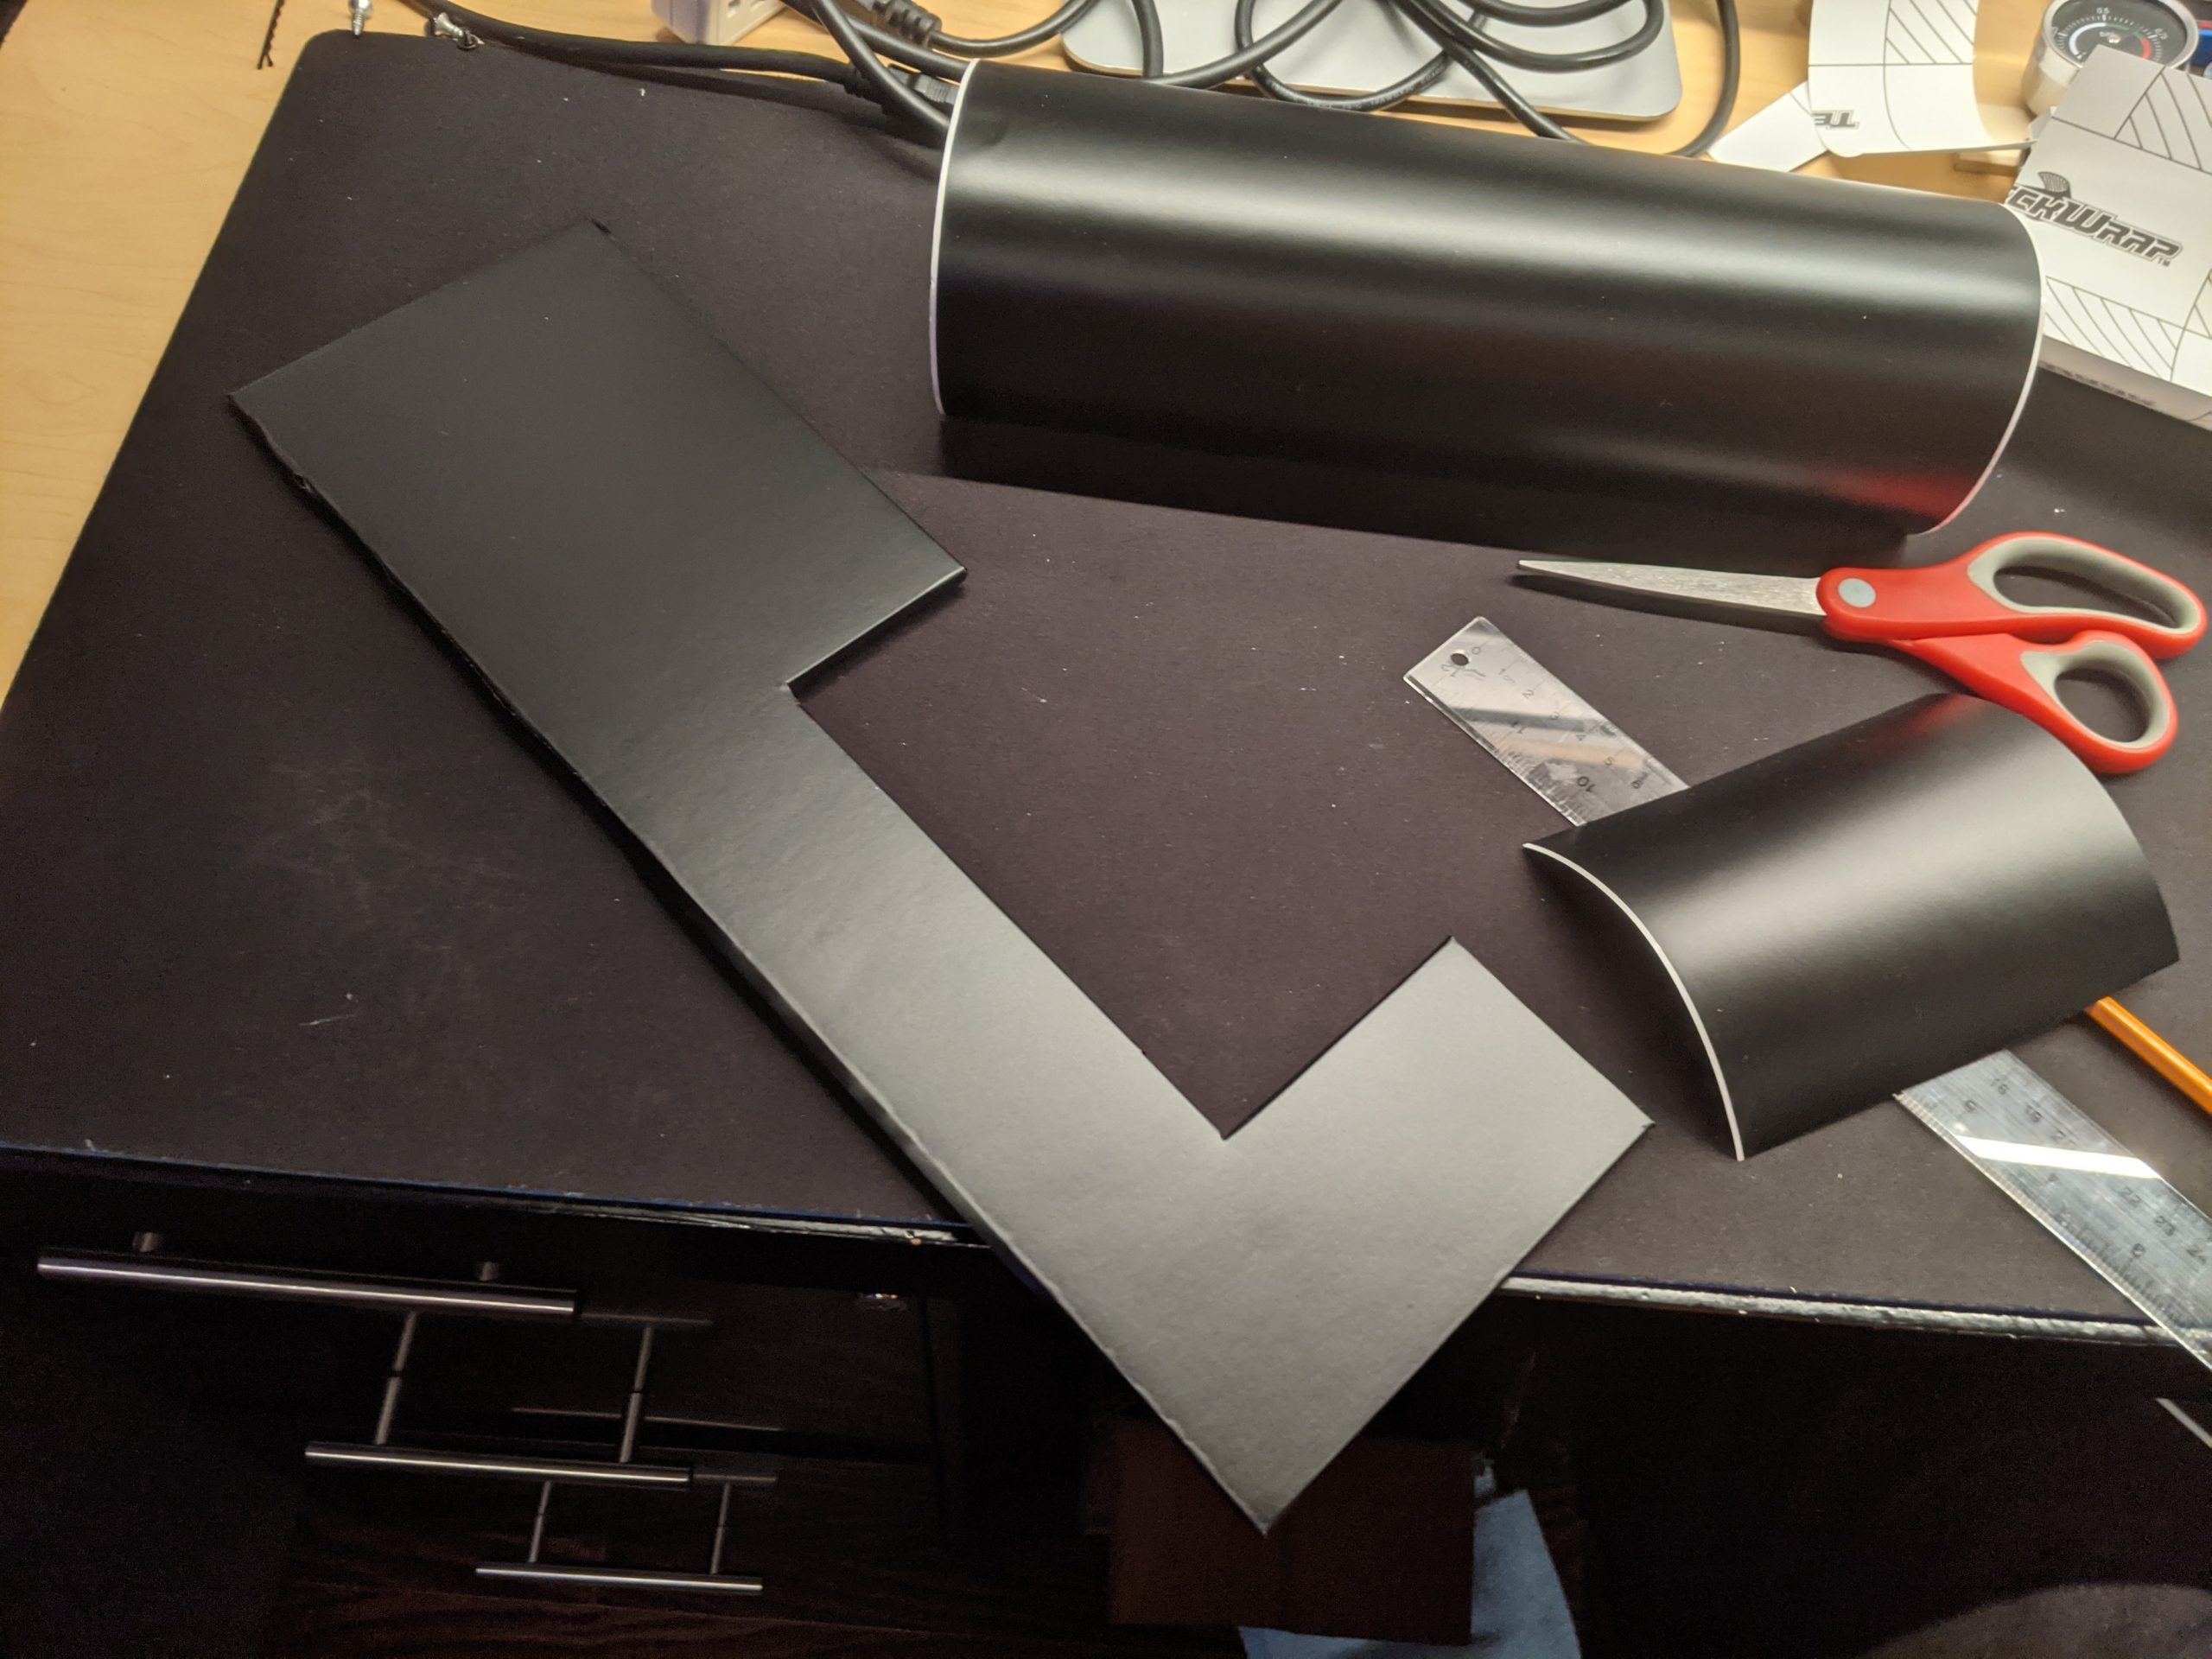
The O11D is being used in an unconventional setup where I don’t need much airflow. I decided to close off the vents on the I/O side of the case using foam board and matte black automotive vinyl that I had lying around.


Much better

Results
All this work for what? Proof is in the pudding. Have a look at the temps below
Computer Temperature
Ambient Temp 22°C
Idle Coolant Temp 24°C
Coolant Flow Rate 2 L/min (120 L/h)
Overclocked 3090 @ +100 MHz Core Clock, It stayed at 2115MHz solid during the gaming tests
Cyberpunk (1/2 hour session)
Coolant Temp Under Load 29°C
CPU Temp 43°C
GPU Temp 43°C
Memory Junction Temp 53°C
Warzone (1/2 hour session)
Coolant Temp Under Load 29°C
CPU Temp 42°C
GPU Temp 42°C
Memory Junction Temp 52°C
Mining 6 hours
+1500 on memory
GPU Avg 37°C
Memory Junction Temp 73°C
MEM1 43°C
MEM2 43°C
MEM3 46°C
As a test, the home thermostat was adjusted to bring ambient temp to 24°C. The coolant temperature rose to 26°C which means the Delta T for Coolant relative to ambient temperature is 2°C.
Ambient Temp 24°C
Idle Coolant Temp 26°C
Coolant Flow Rate 2 L/min (120 L/h)
+100 Core
Forza Horizon 4 (2 hour session)
Coolant Temp Under Load 31°C
CPU Temp Avg 45°C
GPU Temp Avg 45°C
Memory Junction Temp 56°C
Office Temperature and Acoustics
The most important question and why all this work was done; Is my office space still livable after lengthy compute heavy sessions? Answer is YES! The office no longer reaches 28°C like before. It stays to what the thermostat is set to (22°C). The best part is that there is no audible noise from the computer since the fans are set it 20% and all the heavy lifting happens in the other room by the external unit. This allows me to enjoy music in silence and not be bothered by white noise.
Conclusion
This project was a lot of fun from start to end. It was a great learning opportunity working with copper, working with rigid tubing and the parts associated with that ecosystem. It got a little tedious with the details at times but that was to be excepted. It took exactly 3 months from placing orders to getting the PC up and running. This is by far my most involved PC build I have done. The results were definitely worth the effort and this system will go on to serve many years of computing awesomeness. Thank you for taking your time to read through my build log.

Pingback: Case Mod Friday: Element 29 - ThinkComputers.org
Fantastic build mate! I’m currently building a black/copper themed build. Couple questions. How did you mount the copper sheet to the back of the distro plate? It’s a great Idea!
Thanks,
Joe
Hi Joe, Apologies for the late response. I drilled holes in the copper sheet so they are aligned with the distro’s mounting holes. That way the bolts hold both the distro and the copper plate.